


About
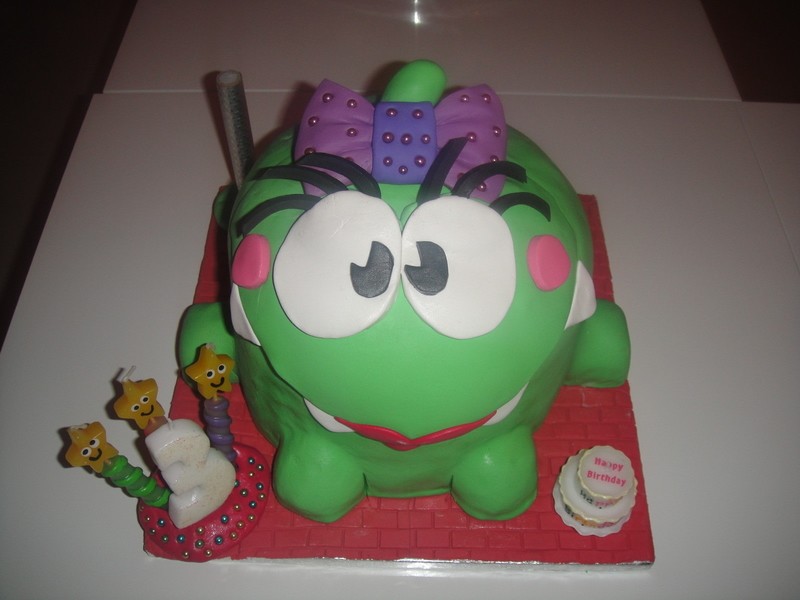
This is a female version of the very cute froglike creature from the "Cut the Rope" game
First, I'm dutch so, sorry if I made some mistakes in writing. Second the cartoon I used as a example isn't mine but I found it on Deviant Art: http://earnurm.deviantart.com/art/Miss-OmNom-192133975 ... And 3rd I am aware the real Om Nom isn't a girl, but our daughter is... And she chose the girly variant from the original cartoon artist on Deviant Art :D So that's why... And if you have any further questions about the cake, just ask! :) I made this cute cake last week for my daughter's 3rd birthday. She wanted a green cake again. Last year I made her a Tinkerbell cake and now she wanted a Om Nom cake, (that's the green froglike creature of the iPad game Cut the Rope) She always steals my iPhone or iPad and immediately turns on the game, and she actually knows how to play it very good LOL :) Anyway I filled the cakelayers with circles of Pink Mascarpone ganache & Dark Brown Chocolate Mascarpone ganache because my Princess wanted a green cake with pink and brown so she got just that :) Even though I didn't know exactly what direction I was going like always, I think the end result turned out just fine and ofcourse it just tasted delicious <3 And yes it's a lot of fondant that's why I only make a cake like this once a year :P
Tags
-
 mowi m. favorited Miss Om Nom Birthday Cake
19 Jan 12:32
mowi m. favorited Miss Om Nom Birthday Cake
19 Jan 12:32
-
 Zowii B. favorited Miss Om Nom Birthday Cake
28 Jul 05:48
Zowii B. favorited Miss Om Nom Birthday Cake
28 Jul 05:48
-
 Louise Quatorze entered her project Miss Om Nom Birthday Cake to Pop Bakery
17 Aug 14:30
Louise Quatorze entered her project Miss Om Nom Birthday Cake to Pop Bakery
17 Aug 14:30
-
 Step 1
Before baking the cakes I added some blue and yellow foodcoloring till I mixed the green color I wanted it to have. After that I cut 3 cakes in 2 layers so you get a good layering effect of the cake between the fillings. I baked 4 cakes in total of 25 cm diameter. And one of 20 cm diameter. 1 cake was not cut in half but I topped/sculpted the thickest part of the cake, just like the one on top of the all the layers of cake as you can see in picture number 3. And 1 cake I kept the 20 cm. cake separate to make the legs with :) But I will explain that later.
-
 Step 2
Making the mascarpone/ganache like I did is very easy. For either the pink or brown ganache it's the same recipe except the color of chocolate was different. For one color you need:
400 grams of white or dark chocolate (just depends on what color your making) and 200 gram of mascarpone cheese and 200 ml. of unwhipped single cream and 2 heaped tablespoons of buttercream mix (it's a mixpowder I bought in the bakeshop). Add some food coloring if you want the white chocolate to have a color instead of the creamy color it has naturally. First whip up the mascarpone cheese until it's soft and has no lumps in the mass with a mixer. After the cheese is soft and lumpless you can start melting the chocolate in the microwave. I used a pyrex oven dish and between every 30 seconds I swirled the chocolate around the dish till it was melted completely. After that I added the melted chocolate to the mascarpone cheese while mixing and also added the single cream and mixed this for a while. After it was one homogenous mass I added the buttercream mixpowder and mixed it again. -
 Step 3
After it was mixed and had the right color, I put both colors separate in a piping bag with a big starshaped tip in it. And after that I put it in the fridge for like 15 to 30 min. and checked if it hardened a bit... If it got to hard 'cause in the fridge the chocolate will set quick and it hardens the chocolate inside the mixture, but you can melt it easy by putting the piping bag in hot water. and massage it back to a soft mass that comes out of the tip of the piping bag. It can't be to soft though, or else it will drip to much. Then I repeated the pattern like the one you can see above at picture number 1 & 2.First the large pink circle then the smaller pink one in the middle and afther that I filled the rest up with the dark brown mascarpone ganache. Layer by layer I worked my way up all 6 layers.
-
 Step 4
After layering all the cakes I pressed them down a bit to make it a firm tower and with a cake smoother I scraped of all the squeezed out ganache so it was a smooth edged cake. After that it gets messy. I put on some rubber gloves and swirled all the left over darkbrown mascarpone ganache on top of the cake and around it. And started sculpting it with a cake smoother and with latex gloves till it got round just like on the picture. Because it's cold chocolate ganache it wasn't as smooth as on the picture yet. Because then you need to let it set in the fridge and when the ganache is hardened you can sculpt it with a small knife and use the cake smoother and with the latex gloves warmed in hot/luke warm water. When the gloves are hot, the outer layer of the ganache melts a bit an that makes it very easy to smoothen the outer layer. When you're done, put the cake back in the fridge. And after that I crumbled the 20 cm. cake and mixed it with some leftover pink ganache and made a sausage/roll with the cake crumblemixture just like you would make cakepops when you need them to be all the same size. Then I cut the rolled cake/ganache sausage in 4 equal pieces and shaped them like on picture nr.4. The 2 in the front with rounded edges and the 2 on the sides with a bit more squared edges.
-
 Step 5
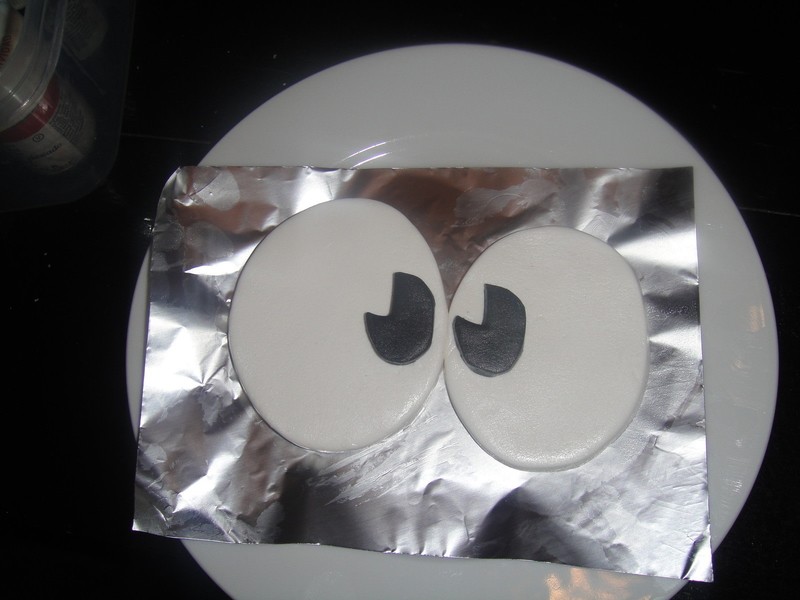
Then the most difficult part was topping the cake with a layer of fondant, because it can rip quite easily and it actually did the first time. The second time we managed to get it right without ripping. We placed a big sheet of about 60 cm. by 60 cm. on top of the cake. For that you need a green layer. I made about 1 kilo of bright green fondant with green, yellow and blue food coloring. It actually didn't turn out as I hoped but after mixing and kneading for 40 min. me and my husband said it was enough... Because we didn't see any change in color and we decided we should use it just like that. Me and my husband rolled it out on a rolling mat evenly spread out. And then we lifted it together and I pressed it down gently around the legs and cut it out. Because we we're both with our hands full sadly I couldn't make a picture of it... I bought some black marshmellow fondant 'cause I find it very hard to make black myself (and marshmellow dries out quicker by air) and used this for the eyes and brows of Miss Om Nom and cut them by using a oval shaped cookiecutter and the brows are just a square cut into strips and then I cut those strips diagonally. After that I put them on a round surface and let them airdry so they harden enough so they would stay up straight behind the eyes.
-
 Step 6
After that I found out the pupils were too big so I cut them smaller by hand. The white of the eyes was cut with a cookie cutter shaped like a easter egg. After cutting it they where the same size so I made the right eye smaller by hand using an exacto knife.
-
 Step 7
I used some terracotta colored fondant in which I pressed a brick pattern on the cakeplate. I also used a cookie cutter for the pink cheeks. For the cheeks I used a small oval shape and used the curves to make it a bit triangle shaped like on the picture. And for the teeth I used a angelshape and I have these in my collection and just cut of the rest of the angelshape I didn't need. I made a bow with 2 colors of purple fondant and the upper lip with the leftover green fondant, I cut a bit thicker large oval shape and cut it in half and placed it on top of the already green layer of fondant to shape the mouth . After that I pressed the white teeth, lips and cheeks on it. Then I rolled some green balls and pressed them on the place the bow and eyes, and green snorkellike thingy will sit on her cute head. And this makes the upstanding effect of the bow and eyes stay up better. I pressed the brows behind the white of the eyes. And after that I shaped the red lips by hand. And then we we're almost finished. Put it in the fridge and keep it stored there and take it out 3 hours prior to cutting the cake else it will be stone cold and that's not as tasty as when it becomes room temperature. It was truely delicious! And my daughther was exited when she could finally blow out the candles & take a bite of Miss Om Nom's Pink cheeks :)


Comments

