
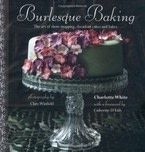
Miss Catherine D’Lish Cake
Extract from Burlesque Baking • By Charlotte White • Published by Ryland Peters & Small

About
Burlesque Baking
This timeless and elegant design is simply stunning in lace, dedicated to a virtuoso and true Burlesque star.
Tags
© 2024 Charlotte White / Ryland Peters & Small · Reproduced with permission. · Burlesque Baking by Charlotte White (photography by Clare Winfield is published by Ryland Peters & Small and is available from rylandpeters.com
-
 Key West Witch added Miss Catherine D’Lish Cake to Recipes: Cakes, cupcakes, frosting
20 Mar 21:57
Key West Witch added Miss Catherine D’Lish Cake to Recipes: Cakes, cupcakes, frosting
20 Mar 21:57
-
 Sierra H. favorited Miss Catherine D’Lish Cake
18 Mar 02:44
Sierra H. favorited Miss Catherine D’Lish Cake
18 Mar 02:44
-
 Sabrina M. added Miss Catherine D’Lish Cake to Baking
04 Nov 17:51
Sabrina M. added Miss Catherine D’Lish Cake to Baking
04 Nov 17:51
-
 Ella Light added Miss Catherine D’Lish Cake to Baking
10 Aug 22:54
Ella Light added Miss Catherine D’Lish Cake to Baking
10 Aug 22:54
-
 Sarah W. favorited Miss Catherine D’Lish Cake
15 Apr 13:33
Sarah W. favorited Miss Catherine D’Lish Cake
15 Apr 13:33
-
 shehawk12woman favorited Miss Catherine D’Lish Cake
03 Apr 01:20
shehawk12woman favorited Miss Catherine D’Lish Cake
03 Apr 01:20
-
 jade.owen.338 added Miss Catherine D’Lish Cake to Cakes
30 Mar 10:31
jade.owen.338 added Miss Catherine D’Lish Cake to Cakes
30 Mar 10:31
-
Suzi T. favorited Miss Catherine D’Lish Cake
28 Mar 17:26
- Emma S. commented on Miss Catherine D’Lish Cake 27 Mar 17:53
-
 Joyce Z. favorited Miss Catherine D’Lish Cake
25 Mar 09:40
Joyce Z. favorited Miss Catherine D’Lish Cake
25 Mar 09:40
You Will Need
-
Step 1
Begin by dyeing your sugarpaste a pale nude colour, using the creamy peach food colouring paste. Cover your cake in buttercream and then the sugarpaste, using the same technique as we used in The Art of Covering Up (see below), finishing with a black lace ribbon.
-
Step 2
Prepare your royal icing according to the packet instructions, then tint it black with the liquorice black food colouring paste. To get your icing really dark, you will need to be bold and add a good 1⁄2 teaspoon of the paste, then continue to mix until you are happy with the consistency. Fill the piping bag
one-quarter full with the black icing. -
Step 3
To create the lace effect on this cake, begin by piping a large flower shape, approximately 4-cm diameter on the top of your cake. As soon as you have piped this shape, take a slighty dampened paintbrush and use it to drag the line that you have piped into the centre of the shape. You are aiming to turn your smooth, solid line into a line that is smooth on its outside edges and rough on its inside edges.
-
Step 4
Once you have completed this large flower, take your piping bag and pipe another smaller flower shape inside the large one. Take your paintbrush and brush the lines of this flower in the same way as before. Repeat this process with one last tiny flower in the very centre and finish with a small black pearl piped into the middle.
-
Step 5
The true impact of this lace effect will only become apparent once you have repeated this entire process with large flower shapes covering the cake. Any bald areas can be filled with tiny dots of black royal icing.
-
Step 6
The Art of Covering Up
Equipment:
a large serrated knife
a large palette knife
a side scraper
a large non-stick rolling pin
a straight-edge smoother
marzipan spacers
a pizza wheel
ribbon (refer to the relevant recipe for colour)1 Begin by running a sharp knife across the top edge of the cake pan, using this as a guide to remove any risen tops while the cakes are still in the pan. When you pop your mini cakes out, the cut edges should become your bottom edge so that the top edge is perfectly flat.
2 Use your buttercream to cover the top and sides of your cakes. This is best done with a large palette knife. Start by spreading buttercream on the top and then the sides of the cakes.
3 To tidy the edges, hold the side scraper tool flush against your work surface and then press the flat panel lightly into the buttercream on the side of your cakes. Then pull the scraper slowly around each cake to create an even surface. Finish off by scraping the top edges of each cake in towards the centre to achieve a clean top edge. This buttercream is used to keep the cake moist and to create an adhesive for the sugarpaste – so do not be too generous! Set your prepared cakes aside and clean your work surface.
4 Rub a small amount of cornflour onto your hands and knead your sugarpaste for 3–5 minutes on a clean work surface. Kneading causes the sugarpaste to warm up, which results in a much smoother finish.
5 Once you are happy that your sugarpaste feels sufficiently smooth and pliable under your hands and there are no streaks of colour, dust a small amount of cornflour onto your work surface and place your ball of sugarpaste on top. Press the sugarpaste down into a chunky flat disc.
6 Lay your marzipan spacers either side of your sugarpaste and begin rolling it out in long fluid strokes. If you roll once forwards and once back, before lifting and turning the sugarpaste by a quarter turn and repeating this process, you should end up with a nice even roll and something resembling a circle of sugarpaste. You will know that you have finished rolling out when your rolling pin rests on the top of the guiding marzipan spacers.
7 Slide your hands underneath the sugarpaste, keeping your fingers together so that they do not poke through, until they are in the centre of the circle. Gently lift the sugarpaste and hold it above the cake. Line up your hands with the centre of the cake and carefully lower the sugarpaste onto it.
8 Using the flat of your hand, gently press onto the top edges of each cake to secure the sugarpaste. Use a gentle stroking motion to secure the sugarpaste to the sides of the cake, always smoothing upwards to prevent pulling on the sugarpaste and causing any breakage.
9 Once you have smoothed the sides of the cake all the way down to the work surface, trim away any excess sugarpaste with a pizza wheel.
10 Use your straight-edge smoother to create a really polished finish on your cakes. With the straight-edge flush against the work surface, and the flat panel pressed lightly on the sides of your cake, run the smoother around the sides to iron out any rough surfaces. Go around each cake 3–4 times and then give the top a final polish with your smoother. If you find any air bubbles, these can be popped with a cocktail stick and smoothed out.
11 Finish the bottom edge of each cake with a ribbon, secured with a dab of royal icing or a little sticky tape (the tape should only touch the ribbon itself and not the cake).


CO + K User