


About
How to make an origami turtle
I was given the paper by my sister a long long time ago. I haven't used up much of the box though.
This is my first how-to, so if something is unclear, feel free to ask for clarification.
Tags
-
 LilMissSTFU favorited Miniature Origami Turtles
15 Jan 17:33
LilMissSTFU favorited Miniature Origami Turtles
15 Jan 17:33
-
 Marie R. added Miniature Origami Turtles to ART
12 Feb 15:22
Marie R. added Miniature Origami Turtles to ART
12 Feb 15:22
-
Lee B. favorited Miniature Origami Turtles
18 Aug 05:06
-
 kimberly.hodges.5059 favorited Miniature Origami Turtles
22 Oct 12:11
kimberly.hodges.5059 favorited Miniature Origami Turtles
22 Oct 12:11
-
 Mathias E. favorited Miniature Origami Turtles
24 Aug 18:38
Mathias E. favorited Miniature Origami Turtles
24 Aug 18:38
-
 WhereTheWildThingsAre favorited Miniature Origami Turtles
03 Mar 18:22
WhereTheWildThingsAre favorited Miniature Origami Turtles
03 Mar 18:22
-
 ursulasela favorited Miniature Origami Turtles
22 Jan 15:06
ursulasela favorited Miniature Origami Turtles
22 Jan 15:06
-
 wendy t. favorited Miniature Origami Turtles
21 Jan 01:07
wendy t. favorited Miniature Origami Turtles
21 Jan 01:07
-
 Risa.Hanae (JapZilla) favorited Miniature Origami Turtles
16 Jan 23:57
Risa.Hanae (JapZilla) favorited Miniature Origami Turtles
16 Jan 23:57
-
Alex L. favorited Miniature Origami Turtles
15 Jan 00:22
You Will Need
-
 Step 1
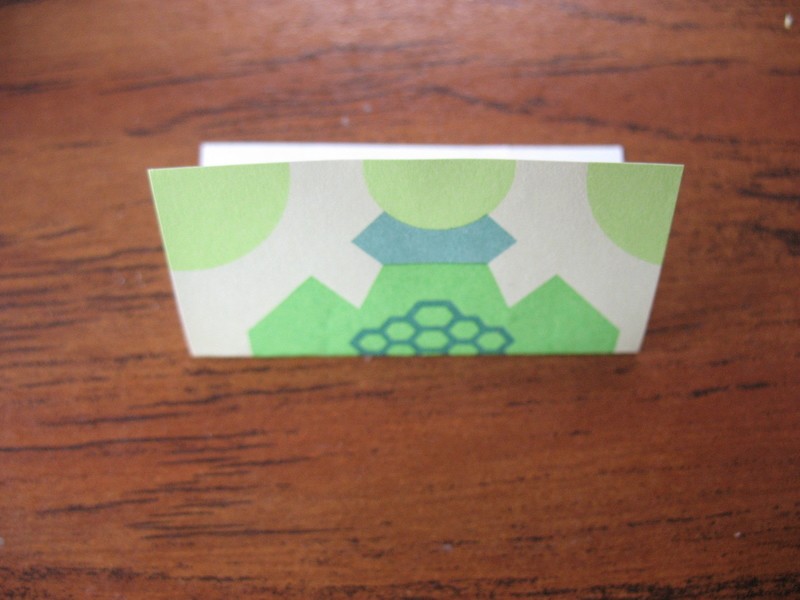
Start with a square. It should be white on one side and colored on the other.
-
 Step 2
Flip over so the white side is facing up. Fold in half.
-
 Step 3
Fold into quarters. You can do this by folding the bottom edge up to the center fold you made in step 2.
-
 Step 4
Fold the top edge down to meet the center fold as well. Unfold.
-
 Step 5
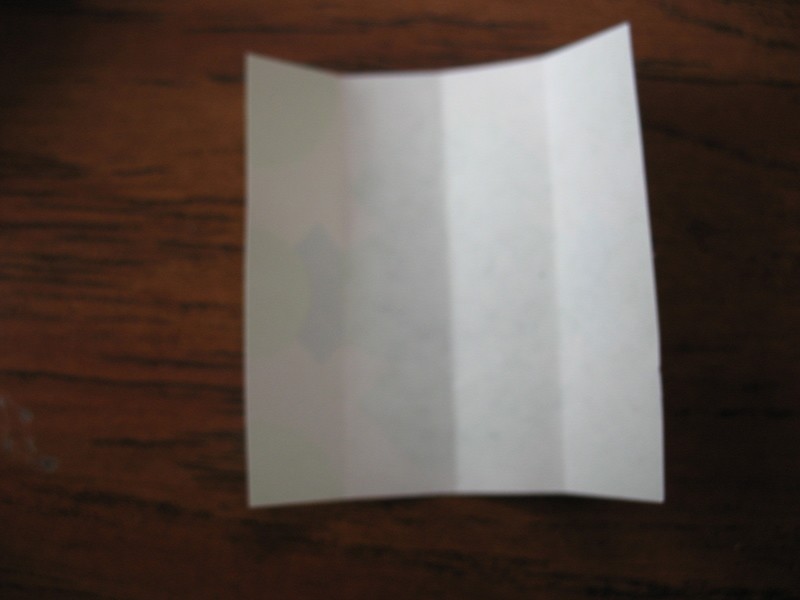
Turn the paper 90 degrees. Repeat Step 2-4. You should end up a grid.
-
 Step 6
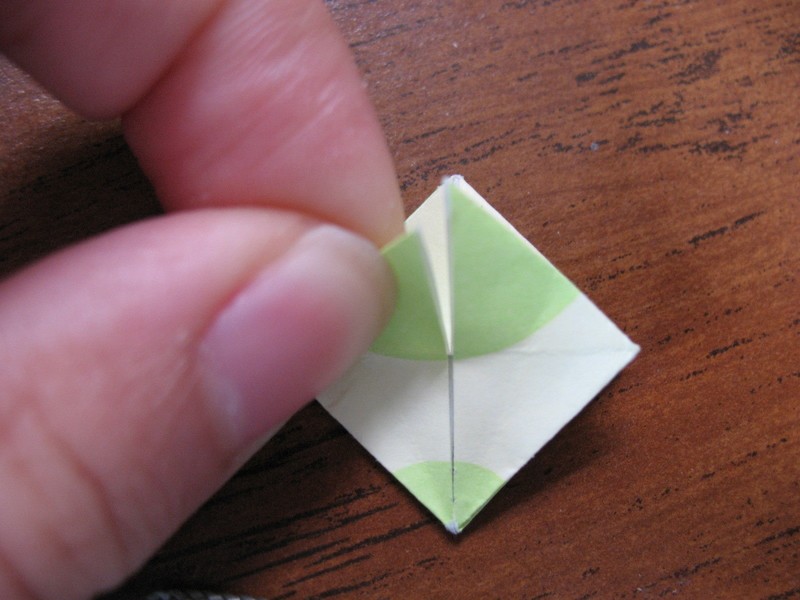
Fold the paper diagonally. Unfold.
Turn the paper 90 degrees and fold the other diagonal. Unfold.
Flip the paper over so the green side is facing up.
-
 Step 7
A tricky bit.
Pinch the corners so the diagonal folds appear. The paper will not lie flat.
-
 Step 8
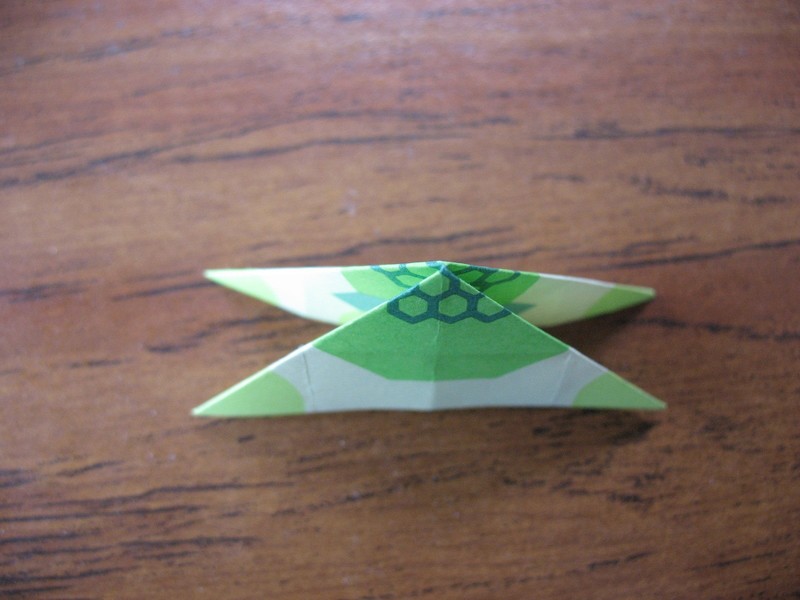
Put your thumb at the bottom edge of the paper, and your pointer finger at the top edge of the paper. Squish the paper so it lies flat. It should settle onto folds you made in steps 1-5.
Flatten completely.
-
 Step 9
Notice that there are now 4 layers of paper.
The side view should look something like this:
-- layer one
>< layer two and three
-- layer fourPut your finger between layer one and layer two. There should be a fold halfway up the triangle. Bring the bottom edge of the paper up and fold along that fold.
-
 Step 10
What it should look like (in progress)
-
 Step 11
Use one finger to hold down the layers of paper at the top. Following the folds that were already made, grab the bottom right corner of the first layer and pull it down so it meets the bottom edge of the paper.
-
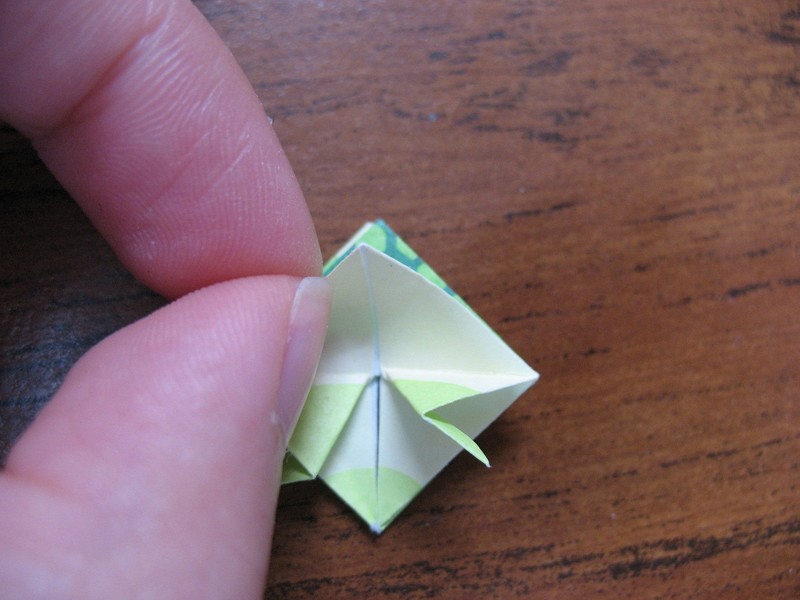
 Step 12
Repeat on the left side.
-
 Step 13
Flip over. Repeat Step 9-12 with the one layer on the other side.
You should still have 4 layers that look like
-- layer one
>< layer two and three
-- layer four -
 Step 14
Slide your thumb between layer two and layer three. Push gently up and flatten. There should be pre-existing folds that you can follow.
(In progress)
-
 Step 15
You should end up with a triangle shape. Repeat on the right side.
-
 Step 16
This is what it should look like.
Turn over and repeat.
-
 Step 17
The top half should have 6 layers.
-- layer 1
-- layer 2
>< layer 3 and 4
-- layer 5
-- layer 6Grab the two triangles of layer 1. Make a diagonal fold on each. triangle.
-
 Step 18
This is what it should look like.
-
 Step 19
Fold down layer 1.
-
 Step 20
Grab layer 2. Fold the point down halfway.
(In progress)
-
 Step 21
This is what it should look like.
-
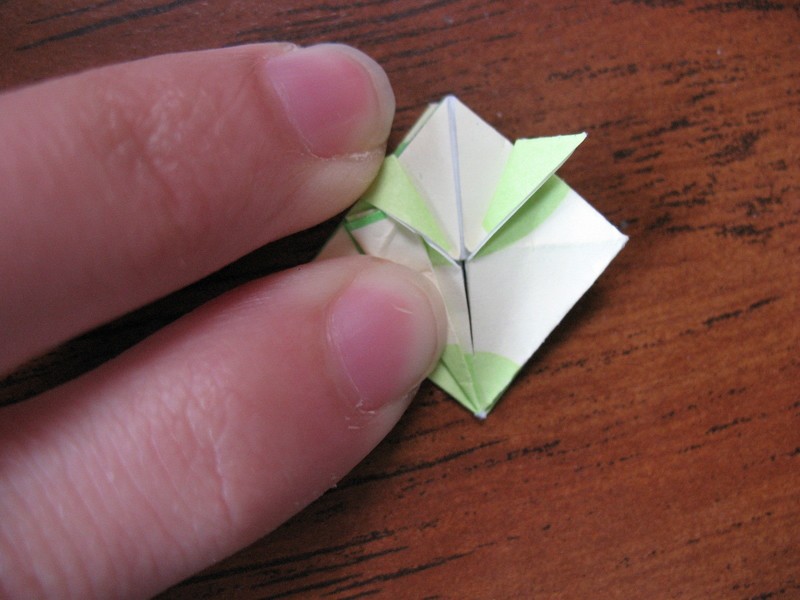
 Step 22
Fold layer 1 up again.
Repeat Step 17-22 on the other side.
-
 Step 23
Partially unfold one of the little triangles.
Fold layer 3 (ONE layer only) up until it reaches where the little triangle is. Look at the photo for clarification.
-
 Step 24
Fold down the little triangle again.
-
 Step 25
Repeat Step 23-24 on the right side.
Then turn over and repeat on the other side.
You should have something like this.
-
 Step 26
Push up the head and the tail. This is an inside reverse fold.
You can do this by putting your fingers in the gap between the two bottom triangles.
In progress.
-
 Step 27
Completed fold.
Repeat on the left side.
-
 Step 28
Almost done!
The next step is to open up the shell.
-
 Step 29
Top view of the turtle.
I opened up the layers a bit so it was easier to see.
-
 Step 30
The four little flaps on the outside are the turtle's feet. There is a little pocket beside them. Slide your fingers into the pockets (probably easiest to do this with two hands) and slowly and gently push down. The paper will tear if you are not gentle.
You can help the shell open up by gently pressing down on the shell.
-
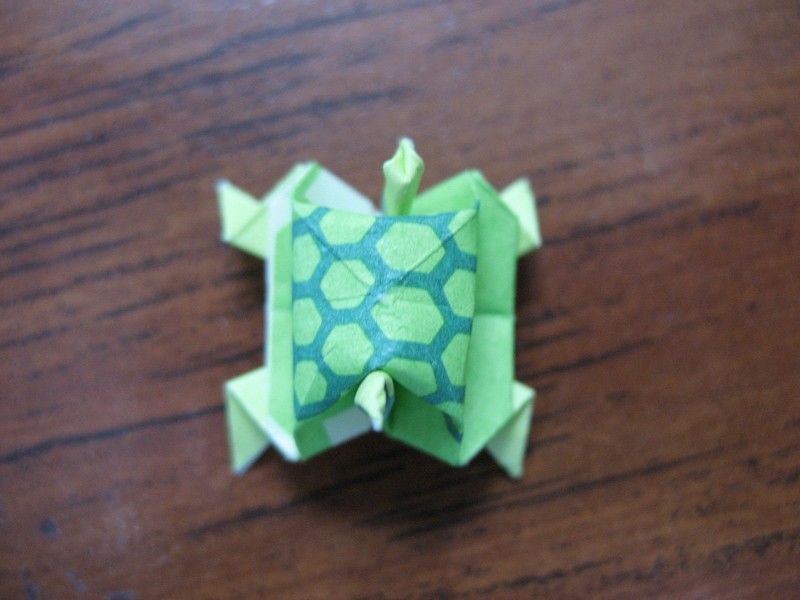
 Step 31
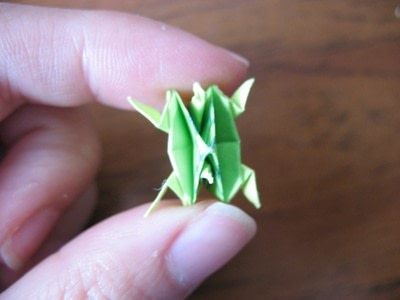
Done!


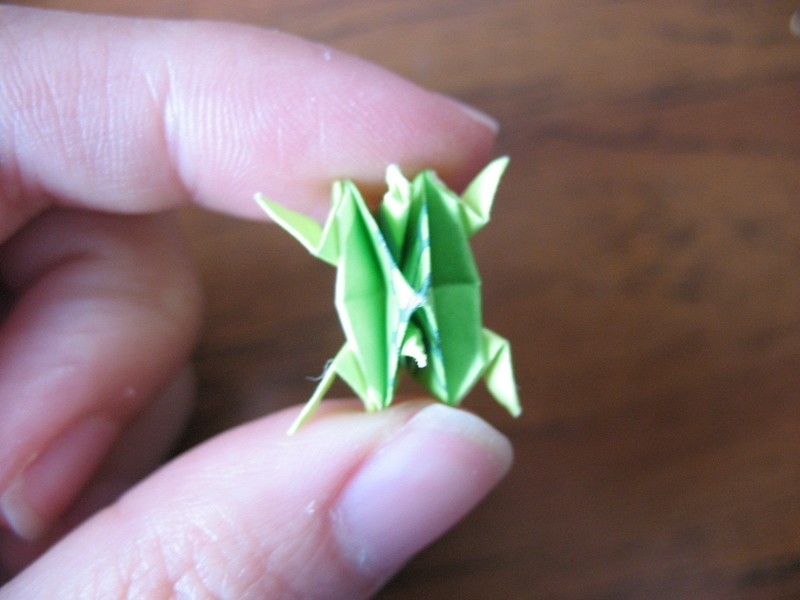


I'd like have a pdf of your paper to print it =)