


About
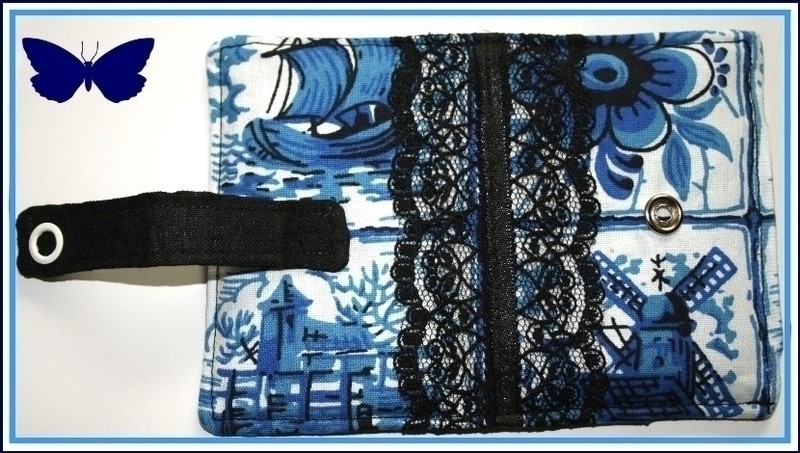
Mini Wallet
Cute little wallet with coin pocket tutorial (sorry if my english is bad, i'm from holland )
Tags
-
 VillainousNinja added Mini Wallet to Make this
18 Aug 01:40
VillainousNinja added Mini Wallet to Make this
18 Aug 01:40
-
 Miss_Fit favorited Mini Wallet
08 Jul 02:13
Miss_Fit favorited Mini Wallet
08 Jul 02:13
-
 Kay T. favorited Mini Wallet
11 Nov 08:14
Kay T. favorited Mini Wallet
11 Nov 08:14
-
 Aishwarya Purohit favorited Mini Wallet
22 Nov 05:09
Aishwarya Purohit favorited Mini Wallet
22 Nov 05:09
-
 mel M. favorited Mini Wallet
14 Aug 02:32
mel M. favorited Mini Wallet
14 Aug 02:32
-
 02jhseaby added Mini Wallet to Try
08 Jun 20:12
02jhseaby added Mini Wallet to Try
08 Jun 20:12
-
02jhseaby favorited Mini Wallet
08 Jun 20:12
-
 Dee D. added Mini Wallet to bags
04 Jun 21:00
Dee D. added Mini Wallet to bags
04 Jun 21:00
-
 vermilia c. favorited Mini Wallet
17 May 19:52
vermilia c. favorited Mini Wallet
17 May 19:52
-
 SilverLupe favorited Mini Wallet
16 May 10:04
SilverLupe favorited Mini Wallet
16 May 10:04
-
 Step 1
First cut of all the pieces out of paper use a credit card for the size. Pay attention on the fact that there must be any space for a couple of seams. then cut the peaces out the fabric
-
 Step 2
Iron on the inside of your front some interfacing.
then the flap, i colored it yellow. Fold it double right side in. and sew it around. Attend, you will keep an opening to turn it inside out.
Turn it inside out. push with an pencil the corners out. Fold the opening inside and iron it flatten.
Then sew it around and your flap will be ready to stitch on -
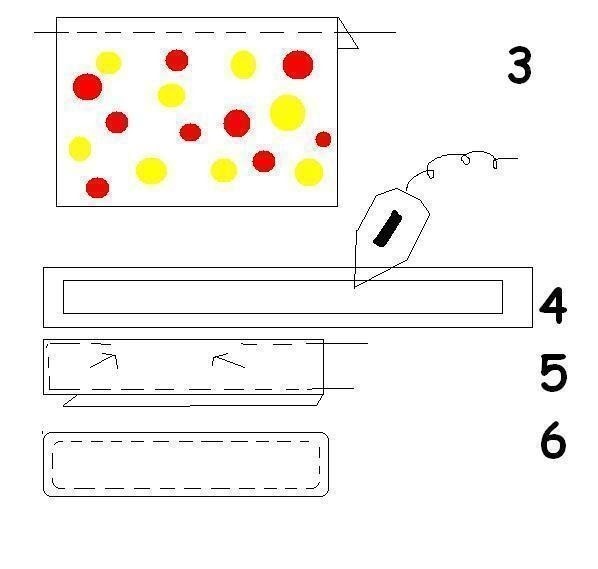
 Step 3
Sew anything you want one the front site of your wallet. Like lace, or this cute ladybird
-
 Step 4
Iron the top of each pocket and then sew it
Then the locker (i called so, its the thing where you'll close the wallet with)
Iron some interfacing on it, fold it double ( outside in) and stitch it around, Attend on the opening so you can fold it inside out. Put in the opening and iron the opening so it will flatten and sew it around and your locker is ready to stitch on -
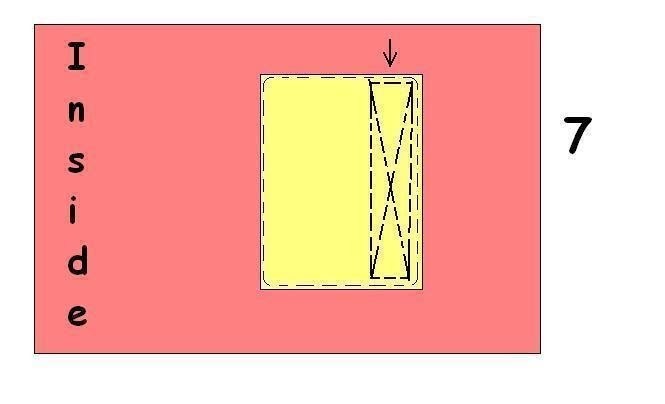
 Step 5
Sew your flap on the inside of your wallet. Attend on the height, your pocket must fit under it
Sew it on wit a oblong and an cross -
 Step 6
Lay every pocket on the place where you want to. Sew it firmly on the side. Now all your pockets stuck on the inside of your wallet
-
 Step 7
The locker, sew it on with an square and an cross. Attend of the right length it must be fit on the front side
-
 Step 8
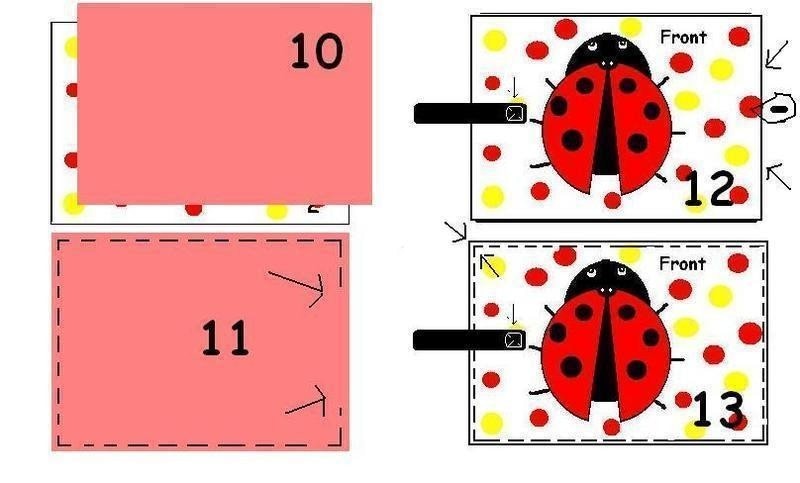
10, 11 Now your front and inside are ready to sew to eachother. Lay them on eachother with the right side in. Then sew it. Attend for an opening to turn your wallet inside out.
12 Turn it inside out and pull with a pencil the corners out. Iron your wallet and opening so it will flatten
13 Sew it around so your opening will be gone
-
 Step 9
Congratulations, your wallet has almost done. Only the buttons yet. Make sure that you place them on the right place


Versions


Comments


