


About
Tiny Backpack to carry your odds and ends
So one day i decided i needed something to carry my stuff.
I'm not really a purse girl so i decided on a tiny backpack.
It has some tricky sewing parts but it's worth it
-
 Key West Witch favorited Mini Backpack
07 May 06:42
Key West Witch favorited Mini Backpack
07 May 06:42
-
Krystal W. added Mini Backpack to Purses, Totes, Backpacks...
18 Mar 16:02
-
 Kay T. favorited Mini Backpack
24 Nov 14:21
Kay T. favorited Mini Backpack
24 Nov 14:21
-
 Tierra T. favorited Mini Backpack
10 Nov 18:34
Tierra T. favorited Mini Backpack
10 Nov 18:34
-
 marilyn.steckly favorited Mini Backpack
21 Apr 02:54
marilyn.steckly favorited Mini Backpack
21 Apr 02:54
-
 lil22tada favorited Mini Backpack
18 Dec 21:56
lil22tada favorited Mini Backpack
18 Dec 21:56
-
 notdeadredhead favorited Mini Backpack
18 Jul 01:23
notdeadredhead favorited Mini Backpack
18 Jul 01:23
-
 Jacky C. favorited Mini Backpack
20 May 04:18
Jacky C. favorited Mini Backpack
20 May 04:18
-
 SarahOliveira92 favorited Mini Backpack
03 Feb 11:07
SarahOliveira92 favorited Mini Backpack
03 Feb 11:07
-
Franchesca Angelou d. favorited Mini Backpack
08 Aug 18:48
You Will Need
-
 Step 1
Your going to cut out two of each pattern piece. One for the outside and one for the lining.
For the sides you will end up with four pieces total. -
 Step 2
First we are going to start by making the pattern and at the same time giving you the measurements needed.
Mark out a rectangle 19 inches high and 12 inches wide.
Round out the edges. Make the top part more round as this will be the flap on your backpackCreate another rectangle this time 11.5 inches high and 12 inches wide. This will be the front of your backpack.
-
 Step 3
The odd long hour glass shape is 12 inches long bu 4.5inches wide. the best way to make this is by cutting out a rectangle with these measurements folding it in half and cutting the curve into the sides.
this part will be the bottom of your backpackMake another rectangle 12 inches high ans 2 inches wide. cut out two of these. They will become the sides.
-
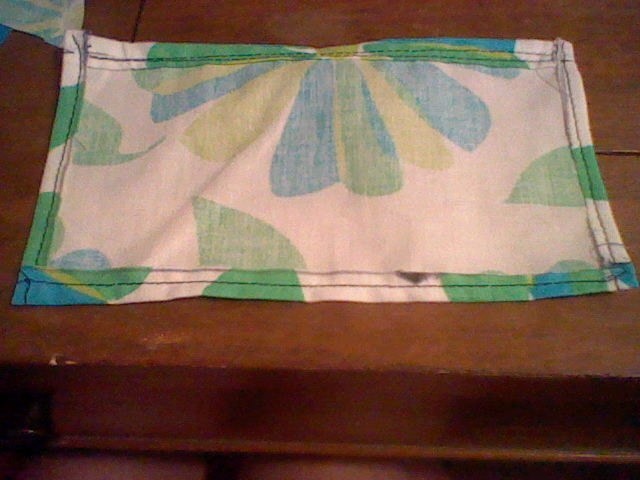
 Step 4
This is the bottom piece. I though you might need some help in cutting it out.
Just make sure every thing is even and you can cut the fabric like this -
 Step 5
If you want a pocket in your backpack cut out a rectangle 7inches long and 5 inches wide
-
 Step 6
Hem that rectangle on all sides to avoid ugly fraying on your pocket
-
 Step 7
Sew all of your corresponding pieces together (preety side out)
DON'T SEW TOGETHER THE BACK PIECE YET IF YOUR ADDING A POCKET. -
 Step 8
Sew your pocket onto the piece your using for the inside. Remember...Don't sew the top shut.
Make sure it's going to be in the back pack and not on the flap. -
Step 9
You should now have all the pieces sew to their counter parts.
The reason you don't see both lining and out side on mine is because i did not put a lining in this backpack since i was using a thick fabric. -
 Step 10
Take your side pieces and sew them to the front part of your backpack. Make sure the seams will be on the inside.
don't worry about the hem on the front part. Your going to do this after the sides are sewn on. I messed up on mine.
When you have the sides sewn on just fold everything over about an inch and line it all up. the sides are longer then the body piece to ensure you can get then even. -
 Step 11
Sew the bottom piece on.
Because of the curve your going to have to fight it with pins.
It will make sense once you start playing with it. -
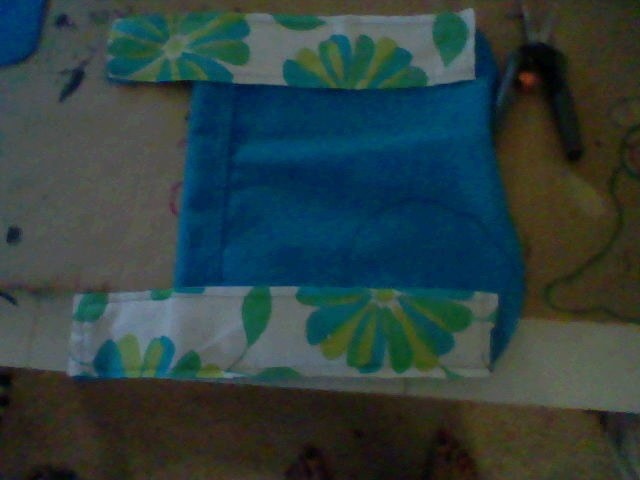
 Step 12
Your going to have something that looks like this now...Except your sides should be hemmed down to match the body
-
 Step 13
Pin and sew the back piece to the sides and the bottom. Make sure the pocket is on the outside while your sewing. this will become the inside.
When your done sewing flip your back right side out and check for holes. -
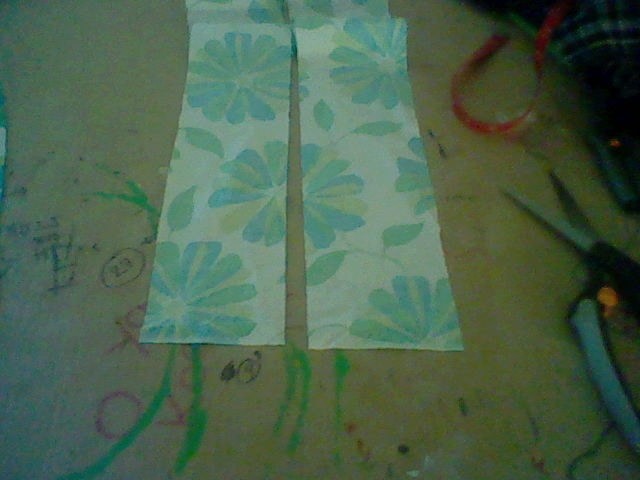
 Step 14
For the straps your going to cut out two long rectangles about 27inches long and 4 inches wide.
-
 Step 15
Take one rectangle and fold over about half an inch and sew it down on both sides. This is my way of doing straps. It evens out my crooked cutting and adds extra strength.
CHEATER WAY
Sew a tunnel with the preety side on the inside.
Flip the tunnel right side out.
Presto. -
 Step 16
Fold the strap over and sew with a zig zag stitch.
Repeat this with the other rectangle. -
 Step 17
Fold over the tips of your strap fro a cleaner look.
Pin one end to the top of one side
Pin the other end to the back side near the bottom -
 Step 18
Make sure your straps are even.
-
 Step 19
Sew them on with a pattern similar to this for strength purposes.
-
 Step 20
When sewing on the bottom part on the straps MAKE SURE YOU DON'T SEW YOUR BACKPACK TOGETHER
Your going to have something that looks like this. Just make sure there is no other part of the bag under you while your sewing. -
 Step 21
Add velcro i was lazy and glued mine on. Sewing is better
-
 Step 22
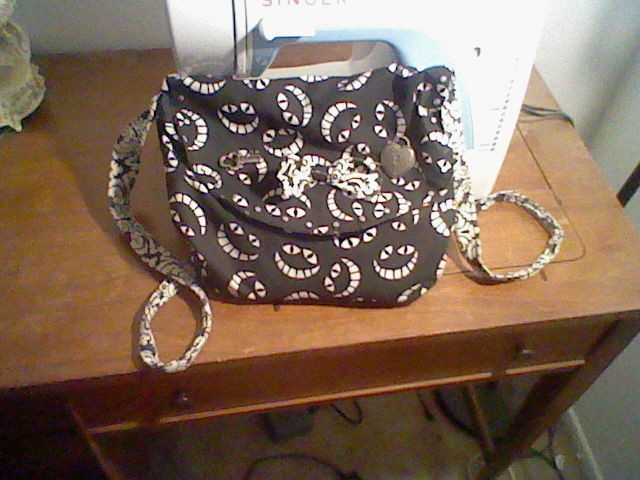
Walla!
Your new awesome mini backpack!


Comments

