

About
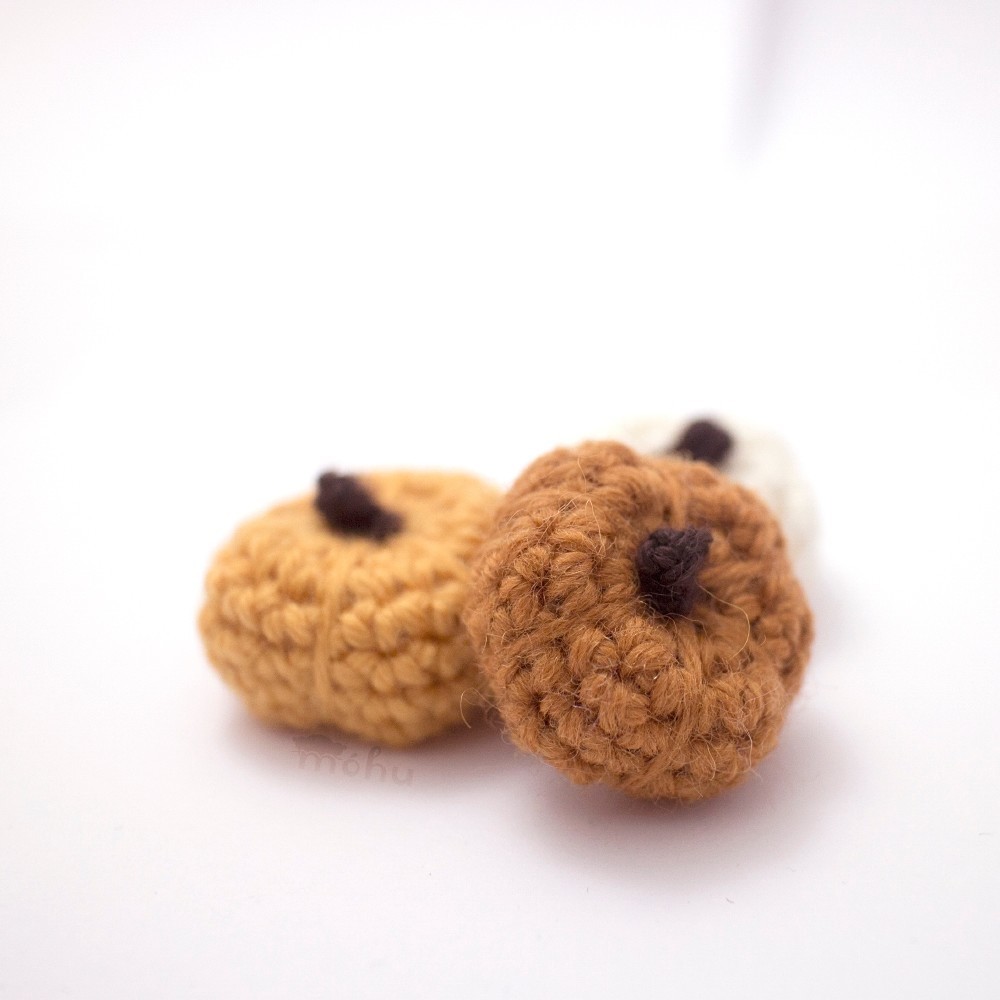
Crochet a little amigurumi pumpkin
Size:
Using medium (worsted) weight yarn and a 3.5 mm (E) crochet hook, your pumpkin will be about 3 cm / 1.2″ wide. Use thicker or thinner yarn to adjust the size.
Abbreviations:
ch = chain
sc = single crochet
sc2tog = single crochet 2 together
st = stitch
sts = stitches
sl st = slip stitch
Tags
-
 Neko-San K. favorited Mini Pumpkin Amigurumi
31 May 20:48
Neko-San K. favorited Mini Pumpkin Amigurumi
31 May 20:48
-
 Crafterella featured Mini Pumpkin Amigurumi
20 Aug 22:00
Crafterella featured Mini Pumpkin Amigurumi
20 Aug 22:00
-
 Nakia favorited Mini Pumpkin Amigurumi
19 Aug 06:41
Nakia favorited Mini Pumpkin Amigurumi
19 Aug 06:41
-
 Tammy H. favorited Mini Pumpkin Amigurumi
17 Aug 21:21
Tammy H. favorited Mini Pumpkin Amigurumi
17 Aug 21:21
-
 schwarzaoi favorited Mini Pumpkin Amigurumi
09 Aug 02:54
schwarzaoi favorited Mini Pumpkin Amigurumi
09 Aug 02:54
-
 Nimh M. favorited Mini Pumpkin Amigurumi
08 Aug 17:27
Nimh M. favorited Mini Pumpkin Amigurumi
08 Aug 17:27
-
 Chudames favorited Mini Pumpkin Amigurumi
27 Jul 08:06
Chudames favorited Mini Pumpkin Amigurumi
27 Jul 08:06
-
 ale_corason favorited Mini Pumpkin Amigurumi
19 Jul 02:45
ale_corason favorited Mini Pumpkin Amigurumi
19 Jul 02:45
-
 mohu published their project Mini Pumpkin Amigurumi
18 Jul 06:00
mohu published their project Mini Pumpkin Amigurumi
18 Jul 06:00
You Will Need
-
Step 1
Work in the round, without joining rounds. Start with a magic ring, or ch 2 and work in the first ch.
1. 6 sc in a circle.
2. 2 sc in each st around. (12 sc)
3. (2 sc in next st, 1 sc in next st) 6 times. (18 sc)
4-7. sc in each st around, for 4 rounds. (18 sc per round)
8. (sc2tog, sc in next st) 6 times. (12 sc)
9. sc2tog 6 times. (6 sc)Leaving a very long tail for sewing, cut yarn and finish off. The yarn tail should be long enough to wrap around your pumpkin a few times. Lightly stuff your amigurumi, and sew up the hole.
-
Step 2
Pumpkin segments:
Use a yarn needle to pull the yarn end up through the centre of the pumpkin. Bring the yarn around the outside of the pumpkin, then up through the centre again, and pull tightly to make a segment shape. Do this 6 times, dividing your pumpkin into 6 segments. -
Step 3
Stalk:
Using brown yarn, chain 3. Sl st in 2nd ch from hook, sl st in next ch.Cut yarn, leaving a long tail. Sew the stalk on top of your little pumpkin.


