
About
Miniature Garden Accessories
Simple and fun to make miniature gardening tools.
Tags
-
 Bobbi B. favorited Mini Gardening Tools
18 Apr 01:12
Bobbi B. favorited Mini Gardening Tools
18 Apr 01:12
-
 Nakia favorited Mini Gardening Tools
23 Jun 17:59
Nakia favorited Mini Gardening Tools
23 Jun 17:59
-
 Harmonee.seal added Mini Gardening Tools to Gardening Fun
01 Jun 16:48
Harmonee.seal added Mini Gardening Tools to Gardening Fun
01 Jun 16:48
-
Harmonee.seal favorited Mini Gardening Tools
01 Jun 16:48
-
 WerewolfCas favorited Mini Gardening Tools
13 May 10:16
WerewolfCas favorited Mini Gardening Tools
13 May 10:16
-
 echo.serviss favorited Mini Gardening Tools
18 Mar 10:16
echo.serviss favorited Mini Gardening Tools
18 Mar 10:16
-
 Sheri P. favorited Mini Gardening Tools
15 Mar 08:00
Sheri P. favorited Mini Gardening Tools
15 Mar 08:00
-
 Therese M. favorited Mini Gardening Tools
07 Mar 15:20
Therese M. favorited Mini Gardening Tools
07 Mar 15:20
-
 brooke.d.kaminski favorited Mini Gardening Tools
16 Feb 00:17
brooke.d.kaminski favorited Mini Gardening Tools
16 Feb 00:17
-
Meta H. added Mini Gardening Tools to gardening
26 Jan 23:09
-
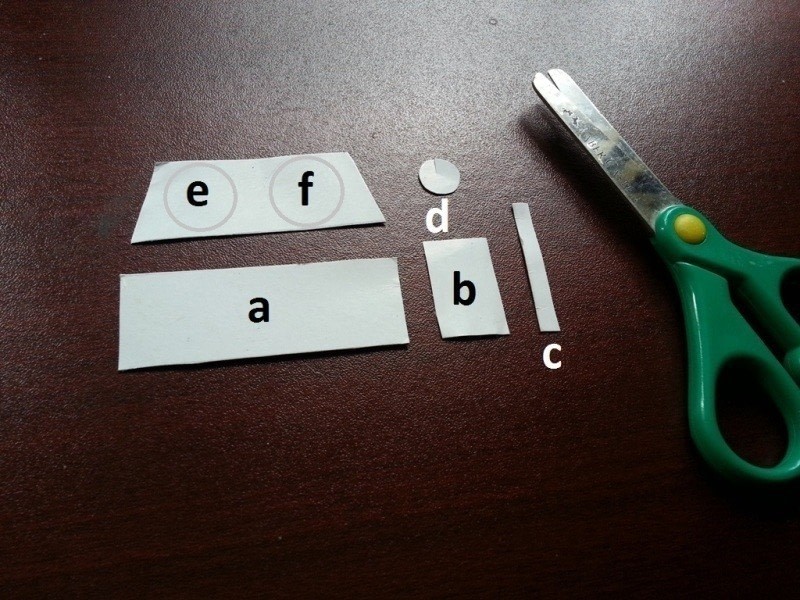
 Step 1
To make the watering pot you'll need to cut out 6 pieces of thick paper. I've numbered the parts as, a- the vessel, b- spout, c- rose, d-handle, e-bottom, f-cover.
-
 Step 2
Roll the 'a' piece and glue the sides. Make a small hole in it as shown in the picture. Glue the bottom (e) and the cover (f) with the rolled paper. Make sure to make a hole on the cover.
-
 Step 3
Take piece 'b', roll and glue the sides. Take piece be and slightly bend it to create a flat cone pattern. Glue d with b and insert it through the hole of the body.
-
 Step 4
Take piece 'c' and bend it to create the handle and glue it with the body.
-
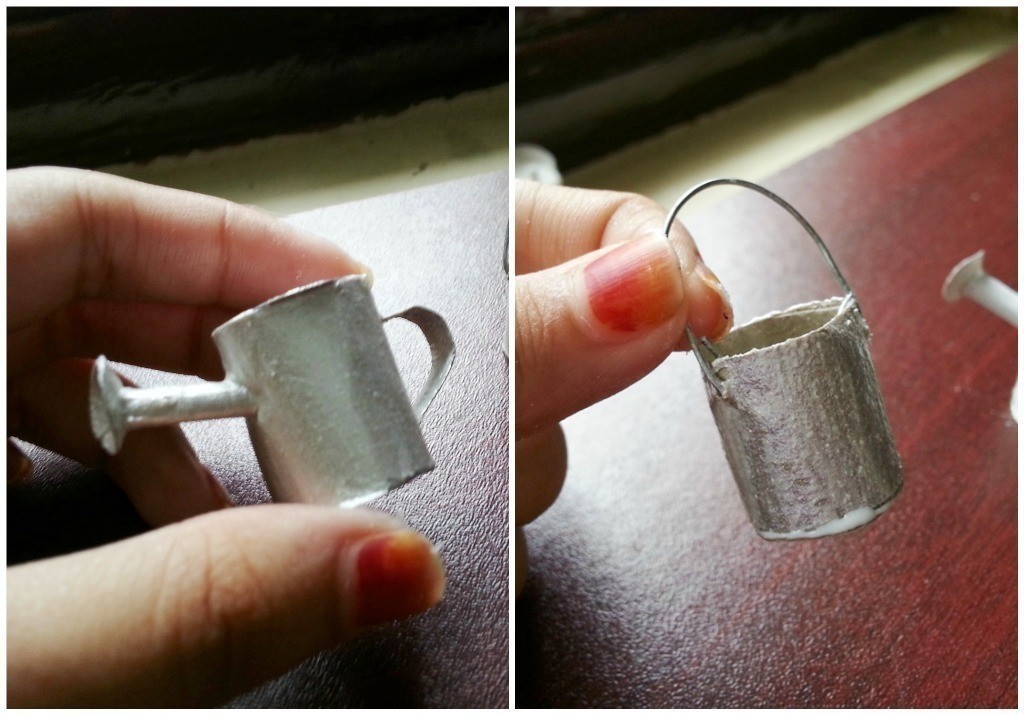
 Step 5
Making the bucket is even easier. Cut a small piece of paper, roll it and glue the sides. Glue a round piece on the bottom. Take a small piece of wire and attach it as the handle of the bucket.
-
 Step 6
I colored the watering pot and bucket with silver acrylic paint and then applied a coat of clear nail polish to secure the color.
Done!