About
Small, unique, useful and awesome!! Make yourself a mini framed corkboard!
I just wanted a little corkboard just for my crafting ideas and such. Not a huge big thing. Just smaal, tiny and practical. I also wanted it to be like those memo boards with all those ribbons. So I combined the two. Hope you enjoy making one too!
Tags
-
 emmabota73 favorited Mini Framed Corkboard
14 Oct 09:32
emmabota73 favorited Mini Framed Corkboard
14 Oct 09:32
-
 chelsie.kuskie added Mini Framed Corkboard to crafts
22 May 13:37
chelsie.kuskie added Mini Framed Corkboard to crafts
22 May 13:37
-
 Philippe T. entered their project Mini Framed Corkboard to Pogo Connect
06 May 10:21
Philippe T. entered their project Mini Framed Corkboard to Pogo Connect
06 May 10:21
-
 Serena added Mini Framed Corkboard to Summer Money
02 May 22:36
Serena added Mini Framed Corkboard to Summer Money
02 May 22:36
-
Philippe T. entered their project Mini Framed Corkboard to Dremel Multi-Tool Contest
07 Mar 21:44
-
Philippe T. entered their project Mini Framed Corkboard to Nicely Noted Contest
28 Jan 21:30
-
 PsychoticWeirdo favorited Mini Framed Corkboard
09 Sep 21:43
PsychoticWeirdo favorited Mini Framed Corkboard
09 Sep 21:43
-
 Ichigo M. favorited Mini Framed Corkboard
29 Aug 03:25
Ichigo M. favorited Mini Framed Corkboard
29 Aug 03:25
-
 Step 1
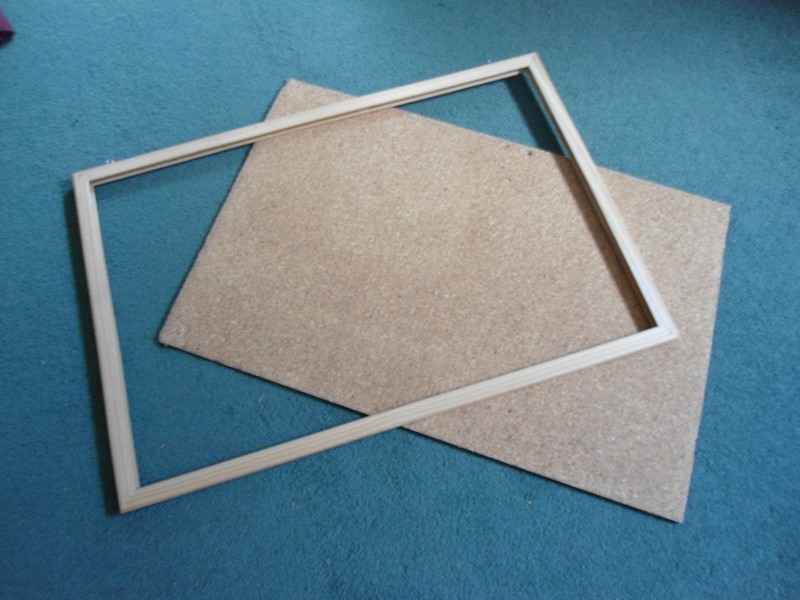
So you need a small frame, fabric (a bit thick preferably, denim would also look awesome :P) and an old corkboard (or cork from a roll if you have it, then you can skip Step 2). I got all this at a thriftstore.
-
 Step 2
First remove the actual cork sheet from the corkboard, I just had to push it out because it wasn't that thick. Dont throw the frame away, you could use it for other projects :P
-
 Step 3
Then trace the inside of the frame onto the cork. Not the glass, not the thick frame insert, but the actual opening of the frame. This is because the cork will be laying on the backing and sticking out of the opening.
-
 Step 4
Like this.
-
 Step 5
Then it's time to cut. With scissors or an X-acto knife. Be careful though.
-
 Step 6
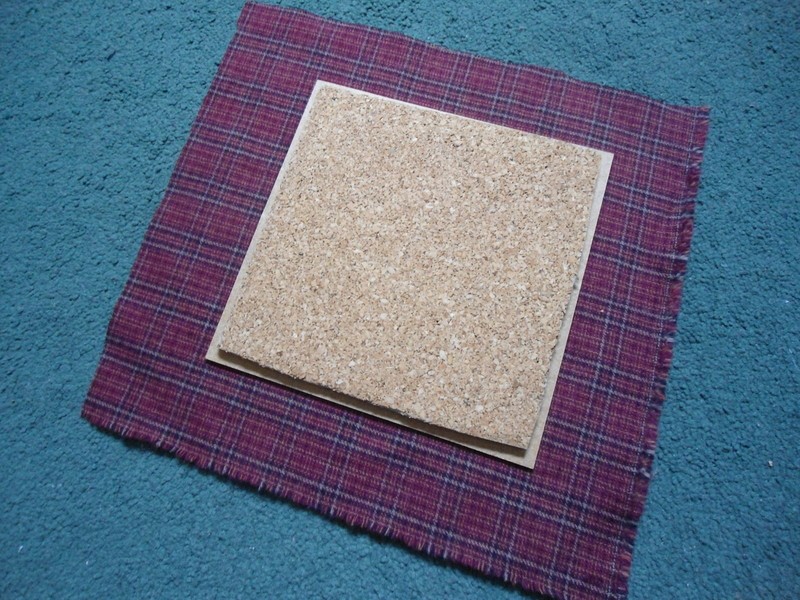
Then glue the cork onto the frames backing with hot glue. Like so. You could be done at this point, but it looks a little plain so we're going to put some fabric on.
-
 Step 7
Cut around the frame's insert like this. Then it's best to glue the fabric on the cork. Just put glue on the edges, that way the fabric will stay in place for the next steps.
-
 Step 8
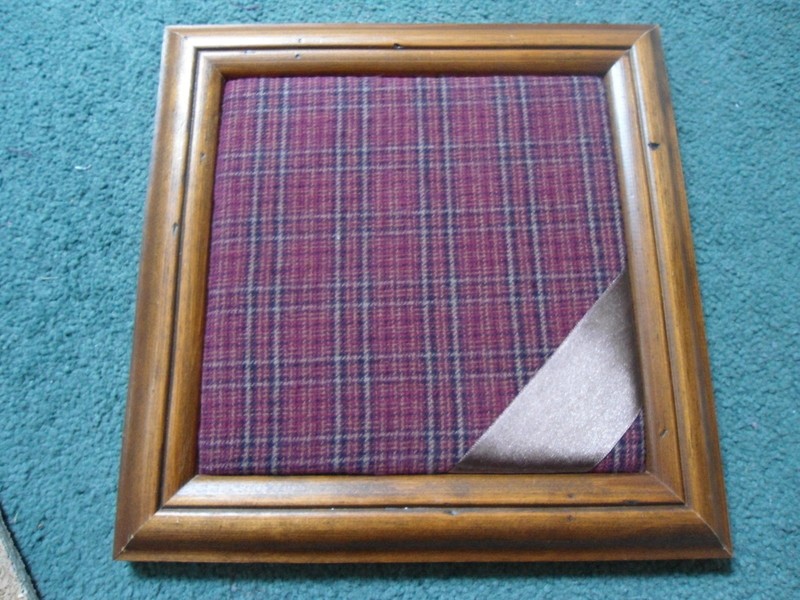
Put the insert into the frame by glueing it in. Then glue the fabric corners down first. After that glue the flaps down.
-
 Step 9
Like this.
-
 Step 10
Now you can add the ribbon if you want. Put it wherever and however you want it. I just wanted a little corner so I could use it as a pocket for notes or cards.
-
 Step 11
Now you're done. Make some personal pushpins (from my other how-to) to decorate your new mini corkboard. Have fun!!