


About
Microwave Dyeing Tutorial
Here is a super easy way to dye silk using your microwave at home! My Daughter Sara will demonstrate:
-
 Leia B. favorited Microwave Dyeing
29 Jul 08:29
Leia B. favorited Microwave Dyeing
29 Jul 08:29
-
 mmotse03 favorited Microwave Dyeing
29 Mar 06:40
mmotse03 favorited Microwave Dyeing
29 Mar 06:40
-
 Sue W. favorited Microwave Dyeing
09 Aug 17:26
Sue W. favorited Microwave Dyeing
09 Aug 17:26
-
 Rikki L. favorited Microwave Dyeing
10 Mar 12:55
Rikki L. favorited Microwave Dyeing
10 Mar 12:55
-
 Julia V. added Microwave Dyeing to To-make list
27 Nov 10:45
Julia V. added Microwave Dyeing to To-make list
27 Nov 10:45
-
Alli D. added Microwave Dyeing to Fashion Shmashion
10 Jan 03:24
-
Alli D. favorited Microwave Dyeing
10 Jan 03:24
-
 Tressa F. favorited Microwave Dyeing
07 Aug 16:53
Tressa F. favorited Microwave Dyeing
07 Aug 16:53
-
 GothicYolita favorited Microwave Dyeing
21 Jun 14:56
GothicYolita favorited Microwave Dyeing
21 Jun 14:56
You Will Need
-
 Step 1
Gather your materials together.
-
 Step 2
Make a pre-soaking solution from the vinegar and the water. Measure 2 parts water to 1 part vinegar: Take your silk thing and soak it in that solution for 15 mins. Make sure that it’s completely soaked through.
-
 Step 3
Mix your colors using the Acid Dyes. These dyes come very concentrated so you can dilute them and mix them together to make nifty colors by using the dilutant solution of the Alcohol and the Distilled Water. Mix 2/3rds of a cup Isopropyl Alchohol (70%) with 1/3rd cup of Distilled water to make the solution. This will keep your dyes from streaking too much.
-
 Step 4
Once you have your colors ready and your silk piece is soaked you can start! Take the silk out of the Vinegar solution and squeeze out the excess. Don’t wring it to much or you’ll damage it and it should be still very wet when you microwave it or it will burn. Place it in the microwave dish.
-
 Step 5
Apply your color. There are many ways to do this and you can use a brush to paint it on or just pour it on wherever you want it. Sometimes you can get vague patterns that you can brush on. You won’t get much detail and make sure your colors are contrasted enough for this or they will just meld into each other and you won’t see the pattern. You can also use elastic bands or string to do a tie dye type design.
-
 Step 6
Wrap dish in Saran Wrap and place in microwave and cook for 2 or 3 mins on High. 2 minutes is plenty if you are only doing one scarf and have a powerful microwave. You’ll know if it’s not done enough if when you rinse it out all the dye comes out. There shouldn’t be too much dye run off.
-
 Step 7
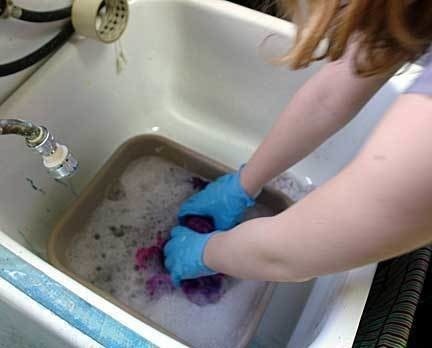
Rinse and wash scarf in mild detergent until water runs clear. Add a bit of vinegar to the second last rinse just to balance out the PH at the end. Iron or hang to dry.
-
 Step 8
You can stop here or add some more design elements. I will show you how to add some basic shapes to make your scarf more interesting. Place the scarf back into the vinegar solution and squeeze out excess as before and then lay out your scarf (I usually fold mine in half to make it easier) on a sheet of wax paper on a counter or other clean washable surface. Dye will get on your counter top but this easily washes off with the help of a household cleaner containing bleach.
Then using a very dark color or at least one that contrasts well with the other colors paint on some basic shapes.
-
 Step 9
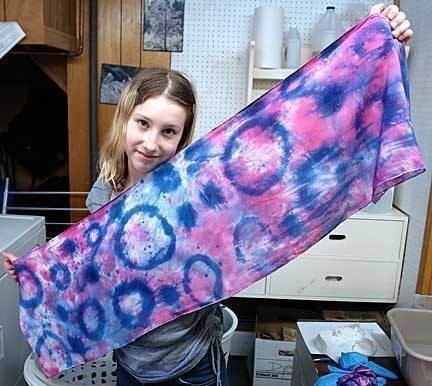
Roll the painted scarf in some wax paper and microwave as before. Wash, rinse and dry as before. Voila! A beautiful scarf to wear in many ways!


Donna Rae
Oh yes, you can do cotton or any natural fiber. Just use Fiber Reactive Dyes instead of the Acid Dyes. Acid Dyes only work on Silk and Wool whereas Fiber Reactive Dyes or Procion MX Dyes work on Cotton, Silk, Rayon (especially bright!), and almost any other natural fiber even wood!
Have fun and you can get Procion MX Dyes at Dharmatrading.com.
Good luck!
Donna Rae