

About
Great invitations for a Mickey Mouse party
These were an absolute PAIN to make, because I procrastinated and had to make so... very... many...
Tags
Downloads
- 106158_2F2014-12-09-084454-large+circles.doc 23.5 KB [ Download ]
- 106158_2F2014-12-09-084503-small+circles.doc 23.5 KB [ Download ]
- 106158_2F2014-12-09-084744-mickey+template.doc 205 KB [ Download ]
-
 Charmaine B. favorited Mickey Mouse Invitations
18 Dec 19:38
Charmaine B. favorited Mickey Mouse Invitations
18 Dec 19:38
-
 Angelica A. published her project Mickey Mouse Invitations
09 Dec 08:03
Angelica A. published her project Mickey Mouse Invitations
09 Dec 08:03
-
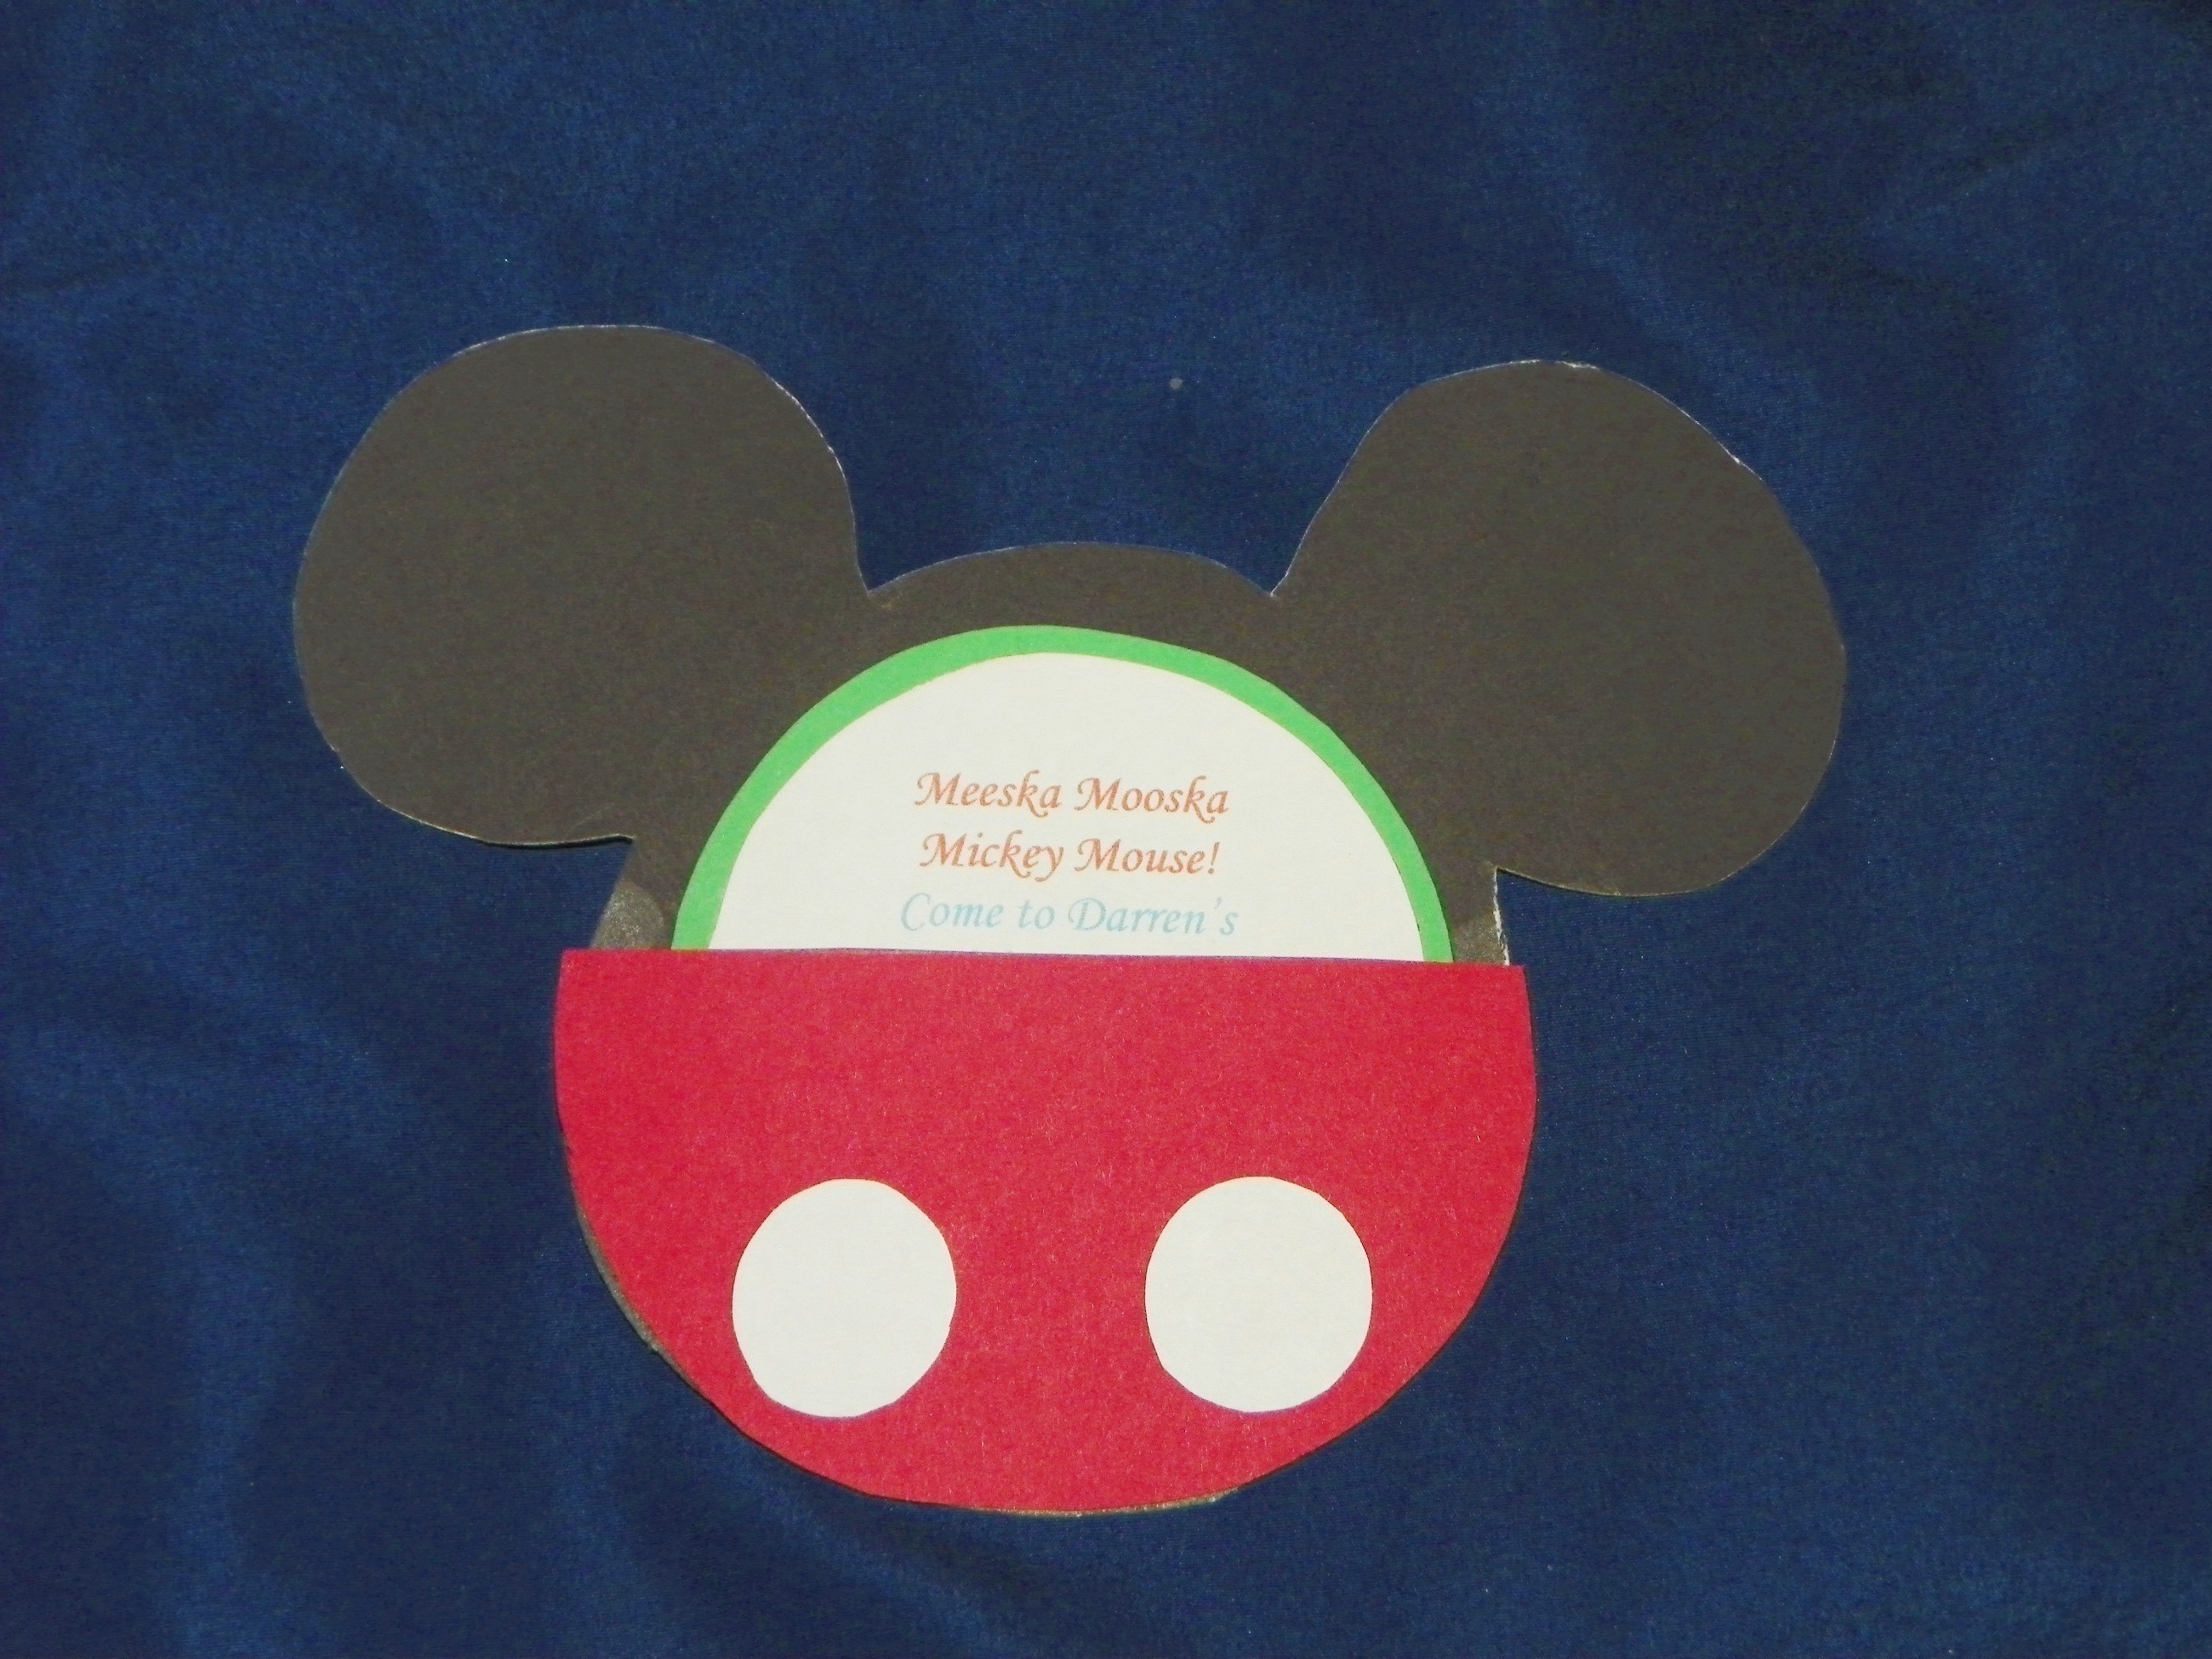
Step 1
Print out mickey template on black cardstock (or just to outline the shape on the cardstock/posterboard). Cut out silhouettes (one per invitation)
-
Step 2
Cut off bottom half of guide template (should be a half circle shape) and trace onto red cardstock (one half circle per invitation)
-
Step 3
Glue the edges of the red half circle to the edges of the mickey silhouette to create a "pocket."
-
Step 4
Use the small circle template to write the party information, print out on white paper and cut out.
I made two and wrote a poem for the front and put the "When, Where (date, time, place), RSVP (by [date], to)" on the back. Print off party
-
Step 5
After you have printed out the party information, print out the large circles on cardstock. This will be the background for the insert (mine is green, you can use any color you like). There are 5 per page, and you will need 1 circle per invitation. Cut out.
-
 Step 6
Glue the party information to the larger background circles, centering as best you can. If you chose to do double sided inserts make sure to put both sides on the background.
-
Step 7
For the "buttons", I just traced a nickle on white paper twice per invitation and glued the circles to the red halves, but you can use anything you want, including real buttons if you can afford them.
-
Step 8
Put your inserts into the "pocket"
If you did them double sided, I recommend putting the poem side facing up.

