


About
Instructions to make Domino racks for the Mexican Train game
I just recently learned to play a game called Mexican Train, and I quickly discovered that it’s kind of annoying when my dominoes fall over during the game. My parents mentioned that they had seen racks for this game that were used to prop the dominoes up and prevent them from tumbling over. What a great idea!
I couldn't find instructions to make the racks anywhere, so I made my own and I’m uploading it here for other people who want to make them, too.
It’s a very simple project and it's worth it!
Tags
-
 Louisa L. favorited Mexican Train Racks
12 Aug 13:24
Louisa L. favorited Mexican Train Racks
12 Aug 13:24
-
 Pat J. favorited Mexican Train Racks
08 Feb 14:21
Pat J. favorited Mexican Train Racks
08 Feb 14:21
-
 Peg-Garry T. favorited Mexican Train Racks
22 Jan 15:17
Peg-Garry T. favorited Mexican Train Racks
22 Jan 15:17
-
 vicki.fritzler commented on Mexican Train Racks
16 Jan 17:17
vicki.fritzler commented on Mexican Train Racks
16 Jan 17:17
-
 frances.hoover.5 favorited Mexican Train Racks
01 Jan 16:12
frances.hoover.5 favorited Mexican Train Racks
01 Jan 16:12
-
Judy S. favorited Mexican Train Racks
19 Dec 18:53
-
Judy S. added Mexican Train Racks to Plastic Canvas Projects
19 Dec 18:35
You Will Need
-
 Step 1
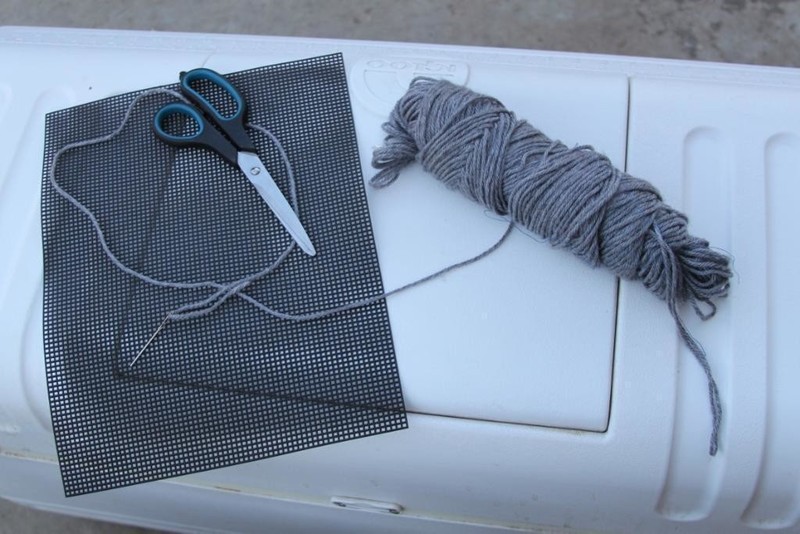
Gather your materials!
You will only need one standard size sheet of platic canvas for each rack.
You will also need some yarn to hold it all together and a yarn needle that will fit through the squares of the canvas easily. -
 Step 2
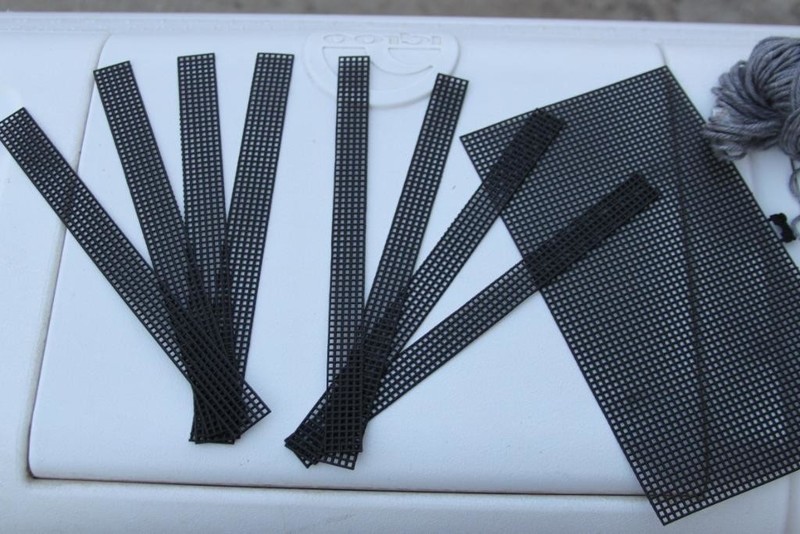
There will be 4 rows on each rack which holds 20 dominoes.
So, you will need to cut 4 strips that are 5 squares wide and 4 strips that are 6 squares wide off the top of the plastic canvas sheet.
-
 Step 3
.
-
 Step 4
When you cut the strips, make sure you cut off all the "spikes" left behind, otherwise they won't sit correctly when you're stitching everything together.
-
 Step 5
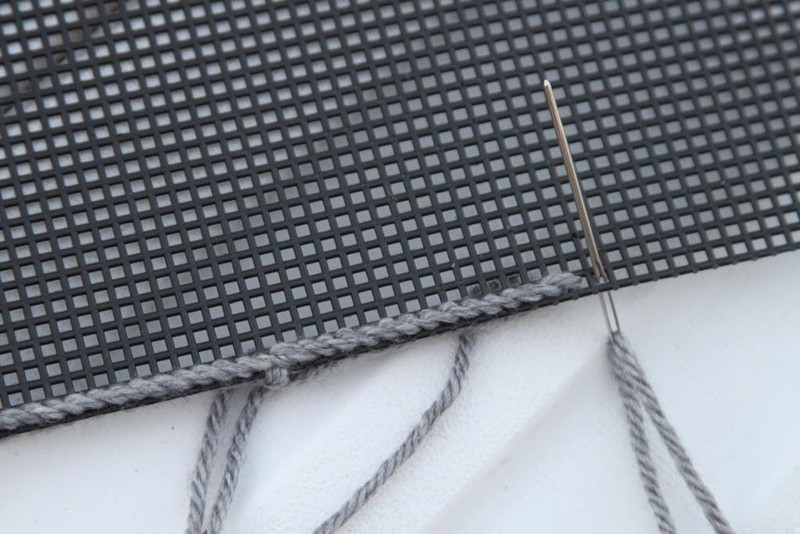
Next, you will need to use your yarn to sew a line that will act as a stopper for the first row of dominoes.
There is no exact science to this, as long as it is thick enough. :)
I stitched 3 squares forward, then jumped back two and repeated. -
 Step 6
.
-
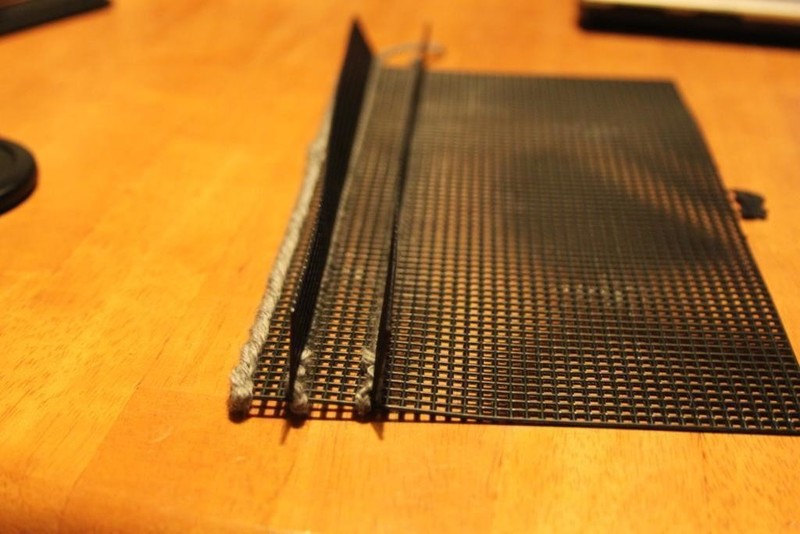
 Step 7
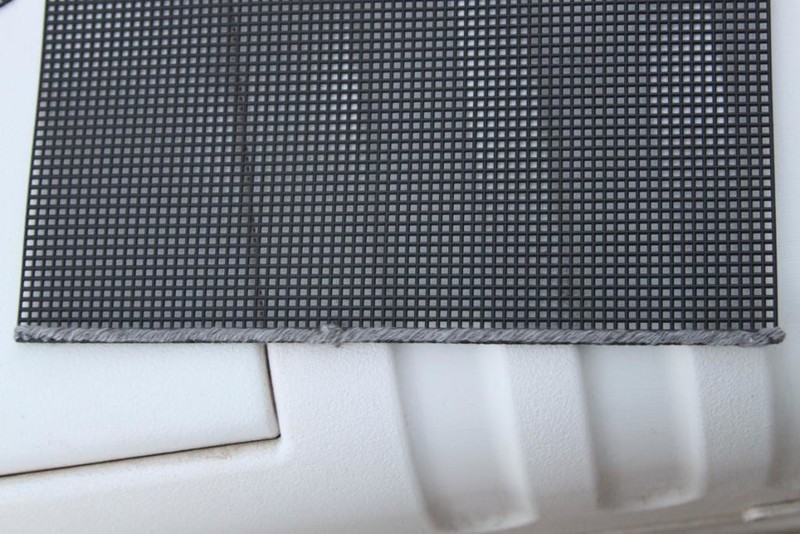
Sew one of the thicker strips [6 squares wide] 3 squares back from the blocker you just stitched.
Then, sew one of the thinner strips [5 squares wide] 5 squares away from the first strip.
-
 Step 8
.
-
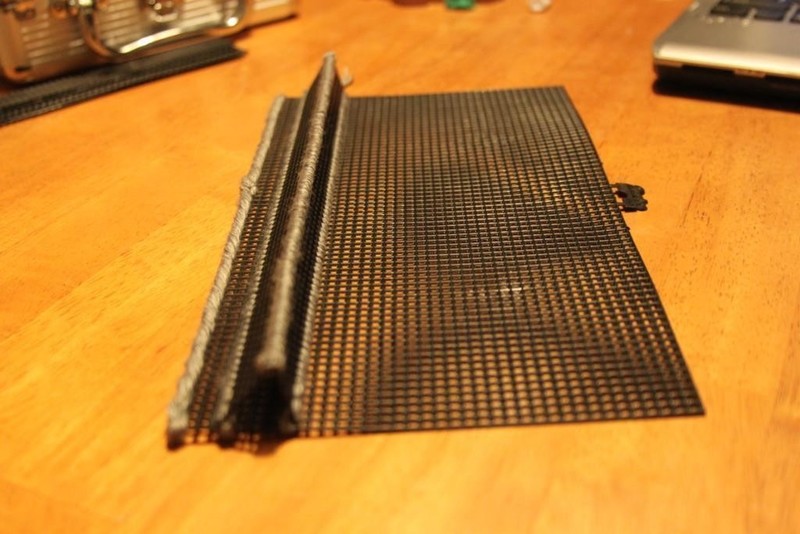
 Step 9
Sew the two strips together, and you've finished the first row!
-
 Step 10
Just repeat steps 7 & 9 for the other 3 rows.
Don't forget: Each row is 3 squares back from the last one!
-
 Step 11
Now you're done!
-
 Step 12
Have fun! :)


Comments

