


About
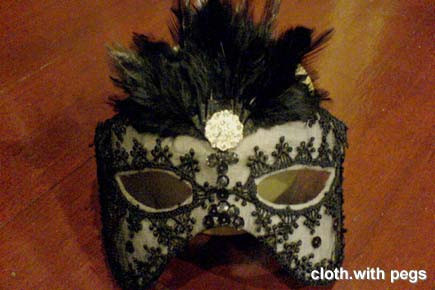
Halloween must-have!
Make your own masquerade mask from aluminum foil & masking tape, then embellish it ...
Tags
-
 Tammie S. favorited Masquerade Mask
25 Oct 19:43
Tammie S. favorited Masquerade Mask
25 Oct 19:43
-
 notthatmj added Masquerade Mask to Masquerade
20 Oct 18:18
notthatmj added Masquerade Mask to Masquerade
20 Oct 18:18
-
notthatmj favorited Masquerade Mask
20 Oct 18:18
-
 Rosalie E. favorited Masquerade Mask
19 Feb 14:45
Rosalie E. favorited Masquerade Mask
19 Feb 14:45
-
 nhothman89 favorited Masquerade Mask
11 Feb 11:29
nhothman89 favorited Masquerade Mask
11 Feb 11:29
-
 Margie A. favorited Masquerade Mask
01 Feb 14:04
Margie A. favorited Masquerade Mask
01 Feb 14:04
-
Margie A. added Masquerade Mask to halloween
01 Feb 14:04
-
Ida T. added Masquerade Mask to Crafts
02 Dec 12:17
-
Jaquelynn B. favorited Masquerade Mask
09 Oct 20:53
-
 nina.eriksen.90834 added Masquerade Mask to To-make
05 Oct 14:24
nina.eriksen.90834 added Masquerade Mask to To-make
05 Oct 14:24
-
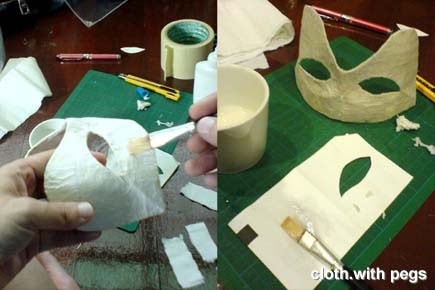
 Step 1
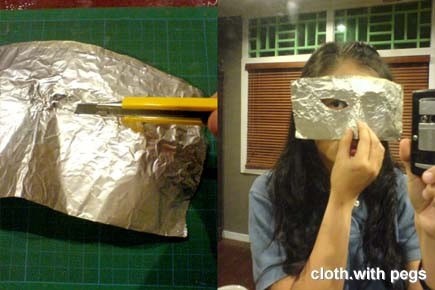
For moulding the shape of the mask, I used 3 layers of aluminium foil (those you use in the kitchen) and pressed it up against my face. Making sure I get those brows, eye sockets, nose & cheekbones.
-
 Step 2
Then, I cut into the eye sockets in flaps and folded it to the back. I tried to check in the mirror once in a while until I get the desired eye opening, for one eye first.
-
 Step 3
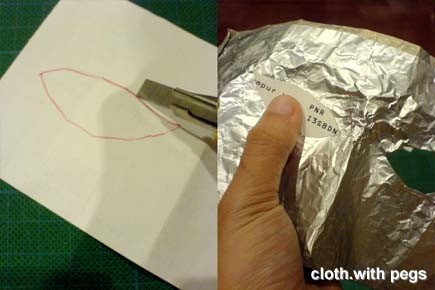
To get the (close to) exact opening size, I traced the first opening, cut it out, flipped it over (mirrored) to the other side and traced it into place. And, repeat the previous process for the eye opening.
-
 Step 4
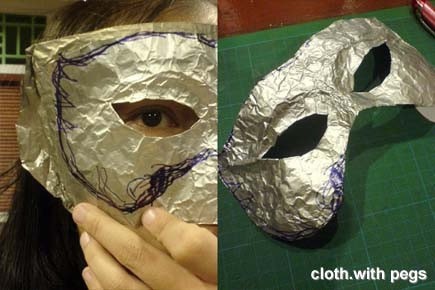
After that, looking through both openings, I sketched the outline of the mask, by pressing it up against my face and in front of the mirror. Then, I folded the extra aluminium foil along the edges, to the back. This should also make the mask have a stronger and more defined edge.
-
 Step 5
I chose to add another base to the aluminium foil, by wrapping it up in strips of masking tape. This also holds those loose aluminium flaps in place before applying the paper mache, using toilet paper & craft glue.
-
 Step 6
Application of craft glue and layers of toilet paper strips later, I finished it off with a final coat of water with diluted craft glue, and left it to dry.
-
 Step 7
On the dried mask, I glue on a layer of black tulle (salvaged from other sewing projects). I chose to not cut openings at the eyes, since there was visibility through the tulle. Since most of the garnish I chose was already in black, I also did not paint the paper mache finish, so I could get a bit of contrast with the tulle lined on it. Then I garnished it further with black sequins, black feathers, black lace trims and an elaborate ‘diamond’ button.


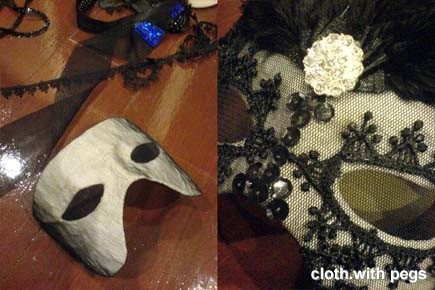

enjoy! ;)