About
A funky, and amazingly simple little ring that your friends won't be able to believe you made.
I get a lot of compliments on these rings and people ask me to make them all the time for them. They're good for using up leftover clay, and I sometimes make one in a pinch when I can't decide what ring I can use to go with my outfit. The leftover marbled clay can be used for smaller things, like stud earrings or little pendants or buttons.
Tags
-
 Sara B. favorited Marbled Polymer Clay Ring
25 Jul 16:17
Sara B. favorited Marbled Polymer Clay Ring
25 Jul 16:17
-
 Patricis O. favorited Marbled Polymer Clay Ring
14 Apr 04:30
Patricis O. favorited Marbled Polymer Clay Ring
14 Apr 04:30
-
 Deb P. favorited Marbled Polymer Clay Ring
02 Mar 19:09
Deb P. favorited Marbled Polymer Clay Ring
02 Mar 19:09
-
 Lora G. added Marbled Polymer Clay Ring to clay
02 Mar 17:23
Lora G. added Marbled Polymer Clay Ring to clay
02 Mar 17:23
-
Maureen M. favorited Marbled Polymer Clay Ring
27 Jan 23:18
-
carol & co. favorited Marbled Polymer Clay Ring
29 Jul 10:30
-
Jessica D. added Marbled Polymer Clay Ring to Accessories
05 Jan 01:28
-
 stephanie.swope1 favorited Marbled Polymer Clay Ring
06 Aug 02:44
stephanie.swope1 favorited Marbled Polymer Clay Ring
06 Aug 02:44
-
 DeVina D. added Marbled Polymer Clay Ring to jewelry
09 Jun 02:07
DeVina D. added Marbled Polymer Clay Ring to jewelry
09 Jun 02:07
-
zaineb.alrawi favorited Marbled Polymer Clay Ring
09 Mar 22:22
-
 Step 1
First, gather all the materials:
Two or more Dime-sized lumps of polymer clay in your preferred colors
Aluminum foil, to create a ring form that can hold the ring's shape while the clay cooks
A ring that fits well or a little loose(not pictured) to help properly size the ring
Paper, pencil, and scissors for designing and creating the ring template
A twist tie or string (not pictured) for measuring your ring size
Cardboard or stiff paper, to make the ring template durable
A marker (not pictured) or other small roller, to roll out the clay
A knife, to cut the clay
A very flat work surface you can cut on. I use a book. -
 Step 2
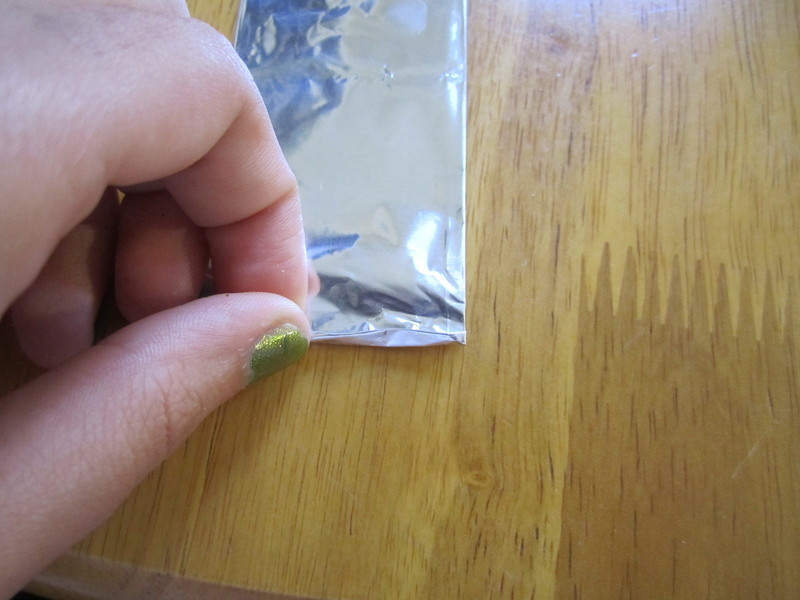
First, create the ring form. This is the most difficult part for me, but the form can be used over and over again for any type of ring.
This is done by folding a rectangle of aluminum foil into a two inch strip. -
 Step 3
Roll up the strip as tightly as possible, allowing wrinkles so that the foil will cling to itself and stay rolled up.
-
 Step 4
You'll probably have to wrap the foil-roll in more foil to bulk it up to the right size.
-
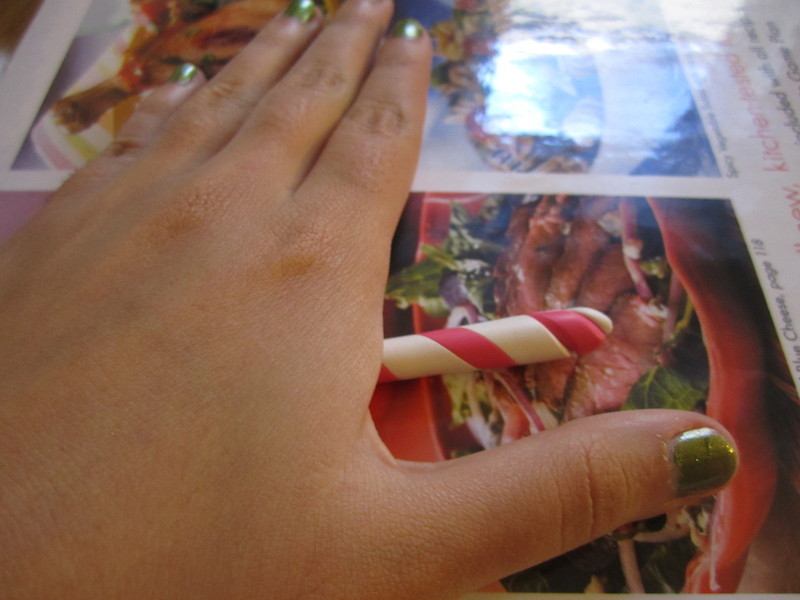
 Step 5
Use the ring (mine is glass) to test the thickness of the form, and make it a little tighter and smoother.
-
 Step 6
Now, to create the ring template.
Wrap your twist tie around the ring form and cut to measure the length the ring will fit around. -
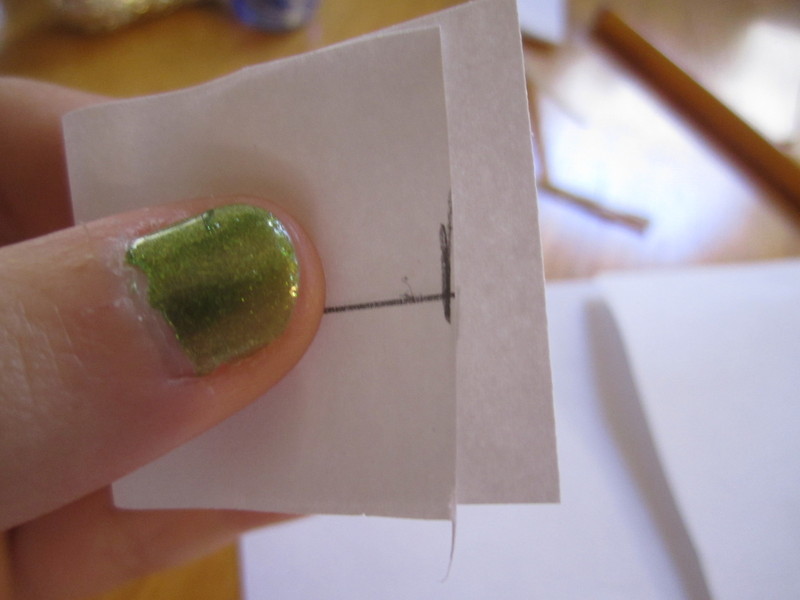
 Step 7
Mark on the paper the ends of the twist tie, leaving room on either side of the line for the width of the ring.
-
 Step 8
Connect the two marks, replacing the twist tie with a straight pencil line.
-
 Step 9
Free the other side, leaving room again for the width of the ring.
-
 Step 10
Fold the paper widthwise so that the pencil line has a fold perpendicular to it that intersects it at its midpoint.
-
 Step 11
Unfold it, then fold along the longest line, and then mark the ring's widest point on one half. Drawing and cutting it while folded will ensure both sides are even.
-
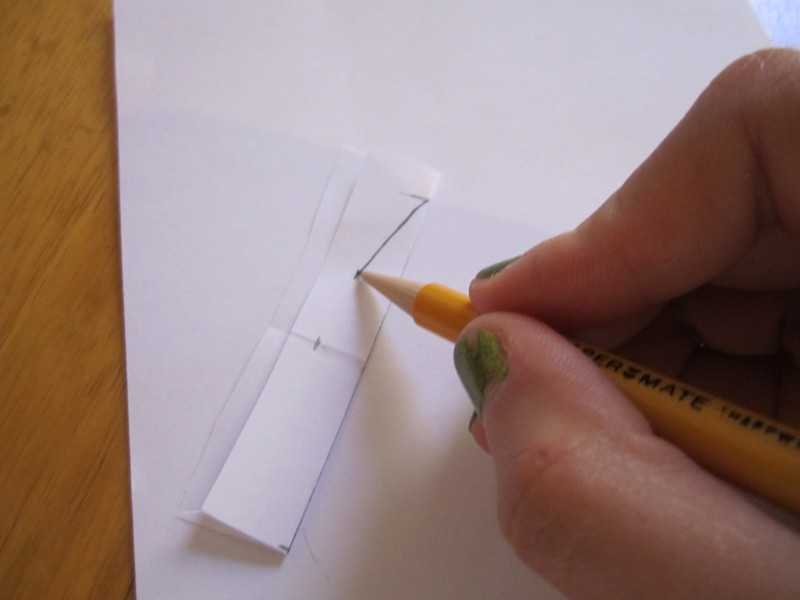
 Step 12
You'll want to draw a sort of leaf shape with two points. Keep in mind, the ring template will be twice this width when unfolded, so keep it thin.
-
 Step 13
Cut along the line while it's still folded.
-
 Step 14
Use the foil form (or your own finger) to test the ring template to see if it will fit.
-
 Step 15
Trace and cut an identical shape out of the cardboard or stiff paper if you'd like your ring template to last many more uses.
-
 Step 16
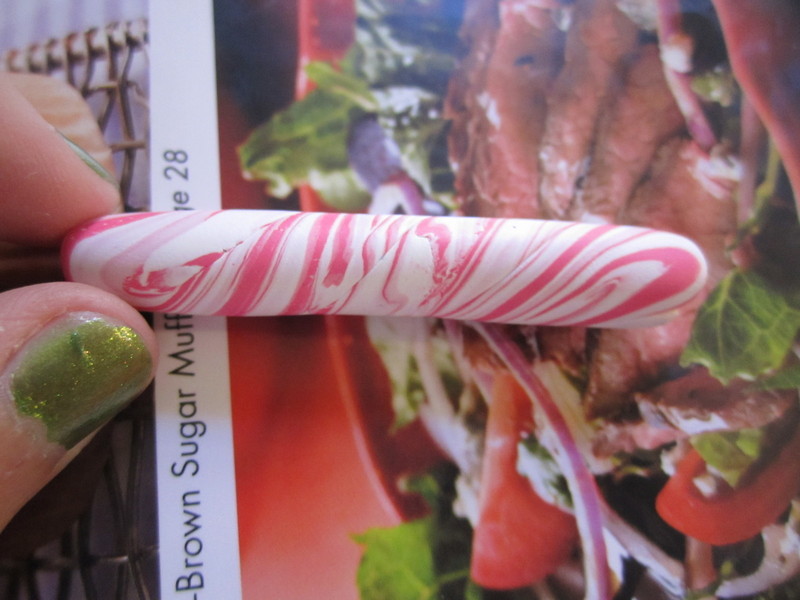
Next, marble the clay.
Knead your two or more colors separately so they are nice and pliable. The most pliable color will show best and will be the dominant color in the ring. Roll the clay into snakes about the same length as your ring template. -
 Step 17
Twist them.
-
 Step 18
Roll out the twisted clay into one smooth snake. If what you want is diagonal stripes along the ring rather than marbling, skip to Step 22.
-
 Step 19
Bend the snake in half.
-
 Step 20
Twist that.
-
 Step 21
Repeat Steps 18-20 until the colors are evenly distributed throughout the snake. Then, I usually like to twist the snake gently so that the marbling runs around it like a screw. Leave the snake a little fat and shorter than your ring template, because it will stretch to fit the template when you roll it out.
-
 Step 22
Use a marker or any other type of seamless roller to roll out the snake. You'll want to aim for around 1/8" thick. If it's too thin, the piece will be brittle. Too thick, and it may end up looking too bulky.
-
 Step 23
If there are any gaps on the edge of the clay after rolling, smooth those out with your fingers.
-
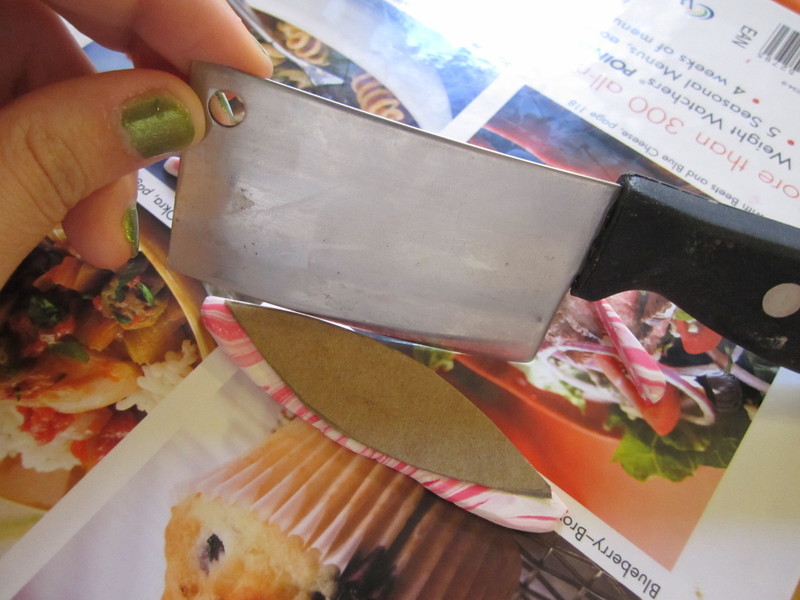
 Step 24
Set the template on top of the clay, and cut around it with a sharp, non-serrated knife. You'll want to cut straight down instead of at an angle the way I'm cutting it to demonstrate.
-
 Step 25
If you'd like to smooth out the edges so that they're round, now is the time. You can also use little cutters to cut holes in it if you like, or add clay accents on top of it. If I had my mini cookie-cutters with me, I would've stamped a heart right into the middle of this one.
-
 Step 26
Use only the non-serrated knife to get the clay of of your cutting surface.
-
 Step 27
If you want, you can choose between letting the marbling on the front or the back show. I liked the front, so I kept it that way, but sometimes using the back looks nice.
-
 Step 28
Wrap the clay around the foil form.
-
 Step 29
Be gentle when pressing the two points together. If you squish them down too much, it may make the ring too big and the bottom part too thin and it may break. If you do this, simply cut the part where the two points are fused together and re-wrap it.
-
 Step 30
You may want to gently rotate the piece around the ring form so that it doesn't stick to it when cooking.
-
 Step 31
At this point, you can bake or boil it according to the clay's package instructions. Personally, I like boiling it because it's quicker (around five minutes depending on thickness), and if I over-boil it, it doesn't get burnt, the color just fades.
-
 Step 32
Cool it with cold water and test its strength when completely cool. It should have a tiny bit of give, but if it bends too much, it still needs to be cooked.