

About
Marble Magnet Tutorial
Okay, before you start heckling, telling me that you've been making marble magnets since you were the age of 3, hear me out. First, I am always amazed by how many people do not know about marble magnets. They are such an easy and simple gift and are a big crowd pleaser around the holidays. Plus, I've got these puppies perfected to an art form so I may have a few tips that you don't know about. Convinced yet? Okay, here we go...
-
 Emma H. favorited Marble Magnets
20 Aug 12:46
Emma H. favorited Marble Magnets
20 Aug 12:46
-
 Glen M. favorited Marble Magnets
02 Aug 06:56
Glen M. favorited Marble Magnets
02 Aug 06:56
-
 RareJewel favorited Marble Magnets
27 Jul 07:51
RareJewel favorited Marble Magnets
27 Jul 07:51
-
 Zillow Zollo favorited Marble Magnets
05 Dec 03:51
Zillow Zollo favorited Marble Magnets
05 Dec 03:51
-
 Deborah v. added Marble Magnets to Want to do it myself
22 Jul 12:43
Deborah v. added Marble Magnets to Want to do it myself
22 Jul 12:43
-
Penny S. favorited Marble Magnets
01 Jul 12:05
-
 Jen C. favorited Marble Magnets
29 Mar 14:26
Jen C. favorited Marble Magnets
29 Mar 14:26
-
 deb.mathenia favorited Marble Magnets
22 Feb 01:35
deb.mathenia favorited Marble Magnets
22 Feb 01:35
-
 Ni-chan<3 favorited Marble Magnets
07 Jan 21:18
Ni-chan<3 favorited Marble Magnets
07 Jan 21:18
-
 Lorraine E. added Marble Magnets to Vintage home
23 Dec 21:15
Lorraine E. added Marble Magnets to Vintage home
23 Dec 21:15
You Will Need
-
 Step 1
First begin by gathering your supplies.
-
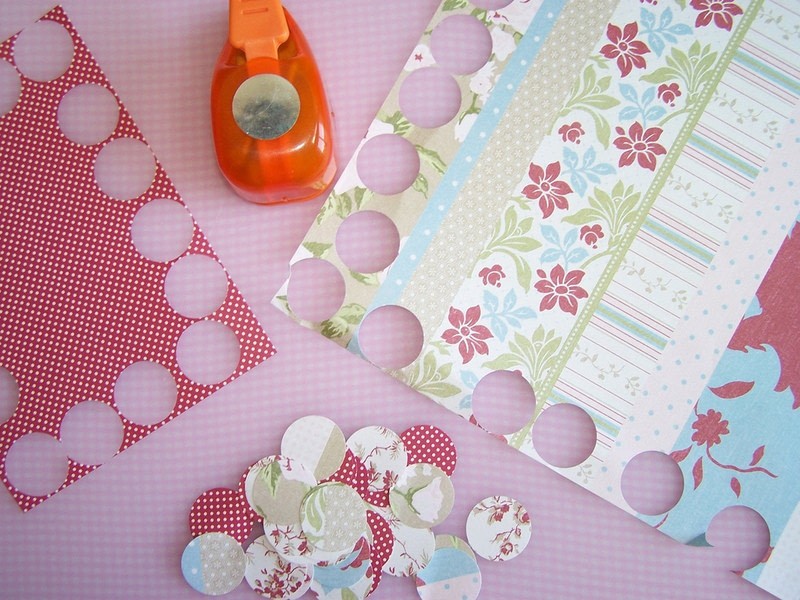
 Step 2
Use your paper punch to punch out circles from your magazine pages, paper scraps, or scrap-booking papers. Choose corresponding colors and prints that will look good together. I like to use scrap-booking papers when I make these for gifts because you can easily tailor the colors and images to fit the person you are giving them too. You can do goth or shabby chic, or anything in between! Using magazine pages can also be fun and it's a great way to re-use and recycle.
Note: When choosing a circle punch, it's better that the circle is a little bit smaller than the flat back of the marble (as opposed to larger). Just make sure the circles are also the same size or larger than your magnets (otherwise the magnet will show through the marble). For this tutorial, I used approx. 1 1/4" marbles, a 1" paper punch, and 3/4" magnets.
-
 Step 3
After punching your circles, you are ready to start gluing the circles to the marbles. Lay the marbles face-down so the flat side is facing you. As for the glue, you want to choose something that will dry completely clear and won't yellow or look cloudy. I like Judi-Kins Diamond Glaze or Crafty Chica Glossy Gloss Varnish. If you use a glue with a fine tip (like the Diamond Glaze pictured), you can spread the glue onto the marble with the tip. You want just enough glue to cover the whole back, but just a thin coat! If you are using decoupage medium (like Crafty Chica Glossy Gloss Varnish), you might brush on the glue with a paint brush. You can also put a little puddle of glue on a paper plate then "dip" the flat back of the marble lightly into the glue. Again, you want the entire back to be covered, but just a light coat.
-
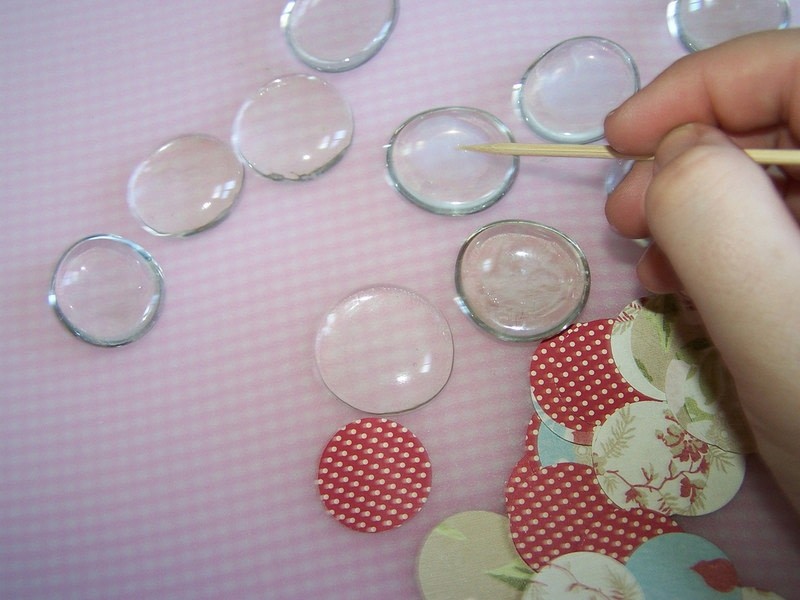
 Step 4
If you use the gluing method that I first described, you might end up with air bubbles. Pop the bubbles with a toothpick.
-
 Step 5
Carefully center your paper circles onto the backs of the marbles. Press the paper down flat, no wrinkles
-
 Step 6
Brush glue or decoupage medium on the backs for added protection. Let dry for a few hours.
-
 Step 7
Now you're ready to add the magnets. For this part, you'll need to use a strong glue or epoxy. Super-glue will work but I like E6000 the best (it's stronger than super-glue and won't seep through your paper like super-glue sometimes can). You might also want to protect your work surface. Plastic cutting boards or placemats are inexpensive and work great. Be careful, E6000 is gooey — and you also might get some fumes off of it so work in a well ventilated area.
-
 Step 8
You can try spreading the glue straight from the tube to the magnet. E6000 can sometimes come out of the tube pretty fast and it's pretty gooey so this might not be the best method for you, especially if using a smaller size magnet (like the half inch ones). In this case, spread the glue on with a toothpick. You have more control that way.
-
 Step 9
Center the magnet onto the back of the marble. Apply a tiny bit of pressure for a snug fit.
-
 Step 10
Let the glue dry for at least 24 hours. Trust me, the E6000 may SEEM like it's dry after a couple of hours but it's best to wait the full 24. Otherwise you may have some magnet fatalities!
-
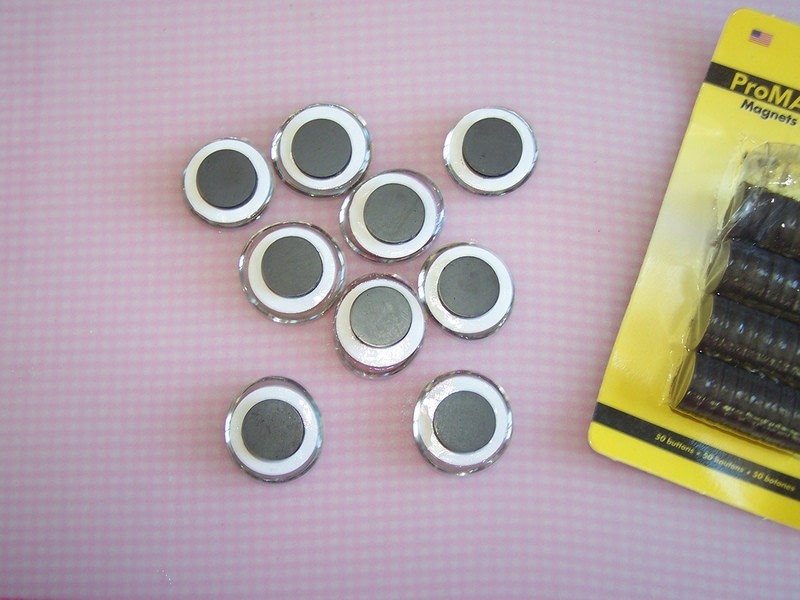
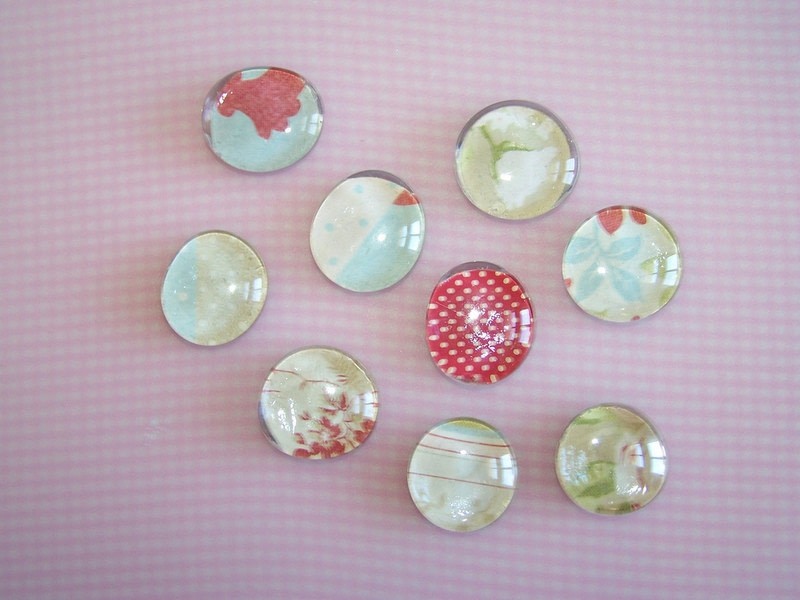
 Step 11
After 24 hours, flip your magnets over. Ta-da! Now don't these look nice?
-
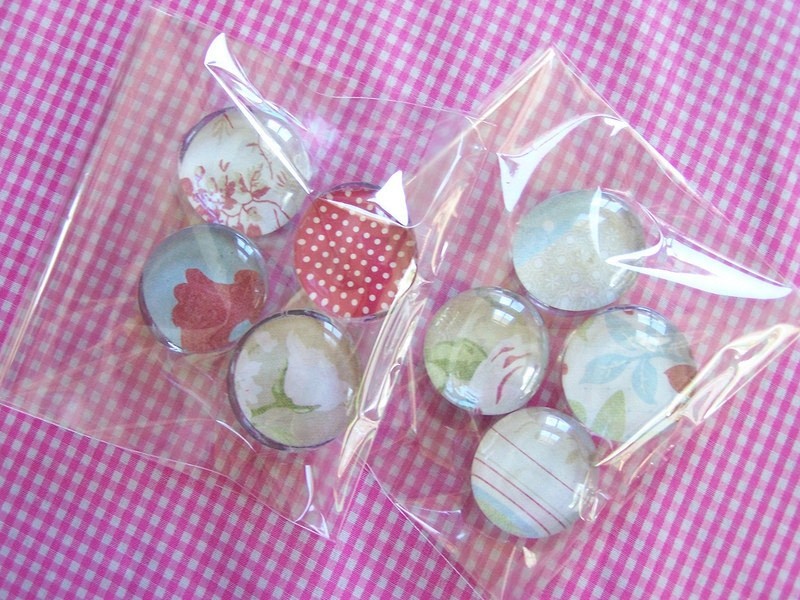
 Step 12
I like to package the large magnets in sets of 4. I put them in adhesive seal bags. They look much nicer than if you put them in zip-lock type bags. You can create labels or tags for them on your computer if you wish. When I make the smaller (3/4") magnets, I like to package them in little tins. You can get the tins in the wedding favor section of your local craft store.
-
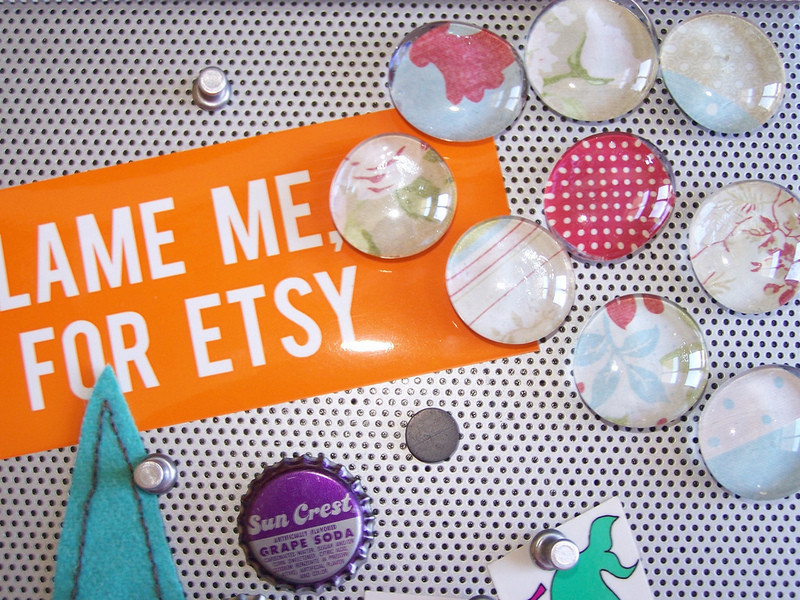
 Step 13
Here they are on my bulletin board. The bumper sticker says "Don't blame me, I voted for Etsy!" And that's a bottle cap push-pin. If you are nice, I might show you how to make those too.
I hope this one wasn't too easy for you. I'll try to keep a good mix of projects going to please the novice and advanced crafter alike. Oh, and I should also mention that while YOU might think these are easy, your non-crafty friends will be extremely impressed!
Stay tuned for next week!


Versions
See all 5 »


Comments


