About
For people who carry lots of things!
This is version 2.0 of my DS case (dorky, I know). I've made a lot of improvements and I wanted to share it cause you could use it for pretty much anything and it's very handy. :)
It does take a while but it's pretty straightforward and of course well worth it.
Tags
Downloads
- DS_case_steps_4.10.11.jpg 2.21 MB [ Download ]
-
 Dee D. added Many Pocket Clutch to bags
08 Jun 19:41
Dee D. added Many Pocket Clutch to bags
08 Jun 19:41
-
 Blair M. favorited Many Pocket Clutch
14 Mar 03:04
Blair M. favorited Many Pocket Clutch
14 Mar 03:04
-
 Ichigo M. favorited Many Pocket Clutch
28 Jul 03:21
Ichigo M. favorited Many Pocket Clutch
28 Jul 03:21
-
 Step 1
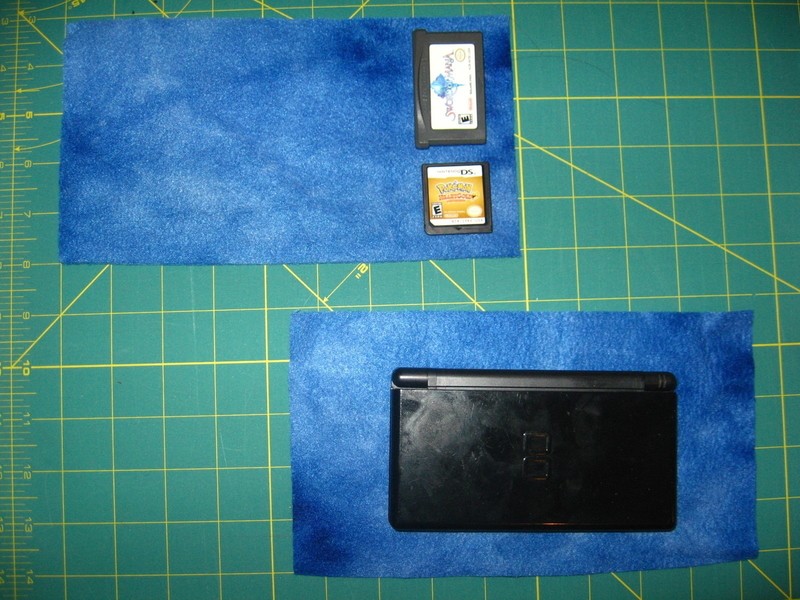
Determine the size of your purse. Cut out 2 pieces of the inside fabric a little bit bigger than your desired dimensions. These pieces will be the sides of the bag on the inside, and will be used as references to determine the sizes of the other pieces.
(If you know what you'll put in the bag, use that to determine the size.)
-
 Step 2
Cut 2 pieces of decorative fabric using the first pieces you cut as a model for size. This fabric will be on the outside of the bag.
The pieces should be large enough that you can fold the sides over the inside fabric and sew them in place. Now put these aside, you won't use them for a while.
-
 Step 3
Cut out 2 more pieces of inside fabric that are a bit smaller than the first pieces you cut. These will form the back pockets.
-
 Step 4
Cut out another 2 or 4 pieces of inside fabric to make up the front pockets. Cut 4 vertically smaller pieces if you want to put small things in the front pockets. Otherwise, cut 2 taller pieces. Or cut 1 tall piece for one side and 2 smaller pieces for the other side. Whatever you want to do!
I like the width of the front pockets to be the same as the back pockets because they can be sewn in at the same time, but it's personal preference.
And now you have 2 sets of pieces to make up the inside of the bag!
-
 Step 5
Now to add pockets to the front pocket pieces that you just cut out. First, figure out what you want your pocket sizes to be. Then, mark or pin where you want the pockets to be. Since I'm making this purse to hold GameBoy games, I made two rows of small pockets on both pieces.
-
 Step 6
If you made 2 rows of front pockets, take the top row and sew its bottom to the back pocket piece.
-
Step 7
Line up your front pockets on top of your back pocket piece. Now to create the pockets, sew where you made your marks or pinned. Remember that your pockets need to be closed on the bottom but DO NOT sew over the top! If you have 2 overlapping rows of front pockets, sew the top pockets in first.
Note: It's easier to get things out of the pockets if you don't sew all the way up.
-
 Step 8
Now line up the pocket pieces on top of the biggest piece, the first piece you cut. Sew 'em together. If you're lazy like me, you only have to sew around them once because your pocket pieces are the same width. Remember not to sew over the top of the pockets! Repeat with the second set of pieces for the other side.
The inside of your bag is now done! :)
-
 Step 9
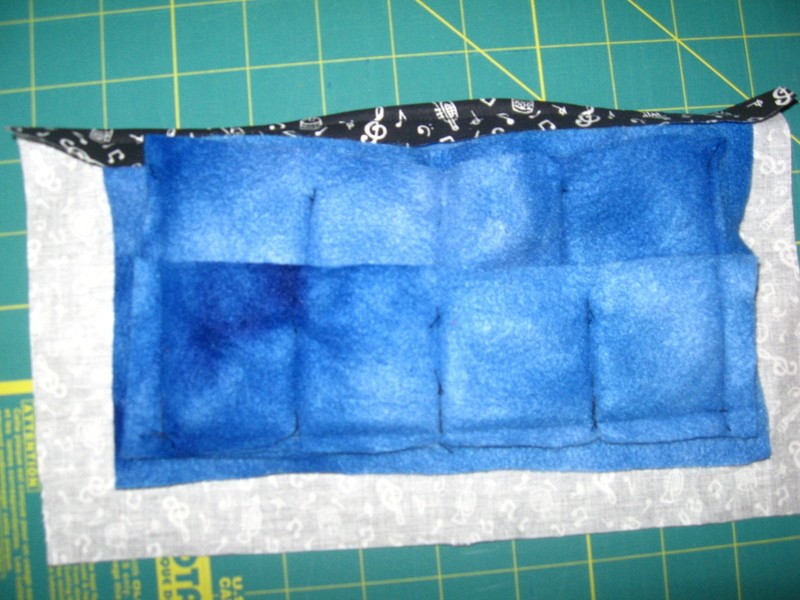
Remember the decorative pieces you cut way back in step 2? Now we'll attach them as the outside of the bag. Put them on a flat surface face down, then line up your completed inside pieces face up on top of them.
-
 Step 10
Fold the top edge of the outside fabric over the inside, pin, and sew. You'll want to be careful and make sure the top line is as straight as possible.
-
 Step 11
Now take your zipper. Pin it between and under the tops - it's kinda hard to describe, so just take a look at the pictures. Be careful that you don't overlap the zipping part of the zipper.
This picture is from the outside of the clutch...
-
 Step 12
...and this one is from the inside.
Now sew away! Keep the needle as close to the zipper as you can.
Now your purse is ALMOST DONE. :D
-
 Step 13
Fold and pin the remaining edges of the outside fabric over. If they overlap the pockets too much, cut them smaller. Now sew 'em.
-
Step 14
Now, with the purse INSIDE OUT, pin the edges of both sides together and sew. Stay close to the edge so there's more room in your purse.
Note: Unzip the zipper first... Otherwise it'll be hard to turn it rightside out. I made that mistake the first time. D:
-
 Step 15
Turn it inside out, cheer because this long ordeal is over, and stuff objects into your new purse!