About
An easy way to make a stencil to add to your favorite shirt!
This is a companion How-To to my stenciling a t-shirt How-To that I posted a while ago! After making your stencil, check out that How-To to apply it to your shirt.
Tags
-
 Sarah G. added Making A Stencil to To-make list
30 Mar 21:50
Sarah G. added Making A Stencil to To-make list
30 Mar 21:50
-
 AmandaGrrrace favorited Making A Stencil
17 Mar 07:56
AmandaGrrrace favorited Making A Stencil
17 Mar 07:56
-
 cristinakilljoyway favorited Making A Stencil
24 Jan 17:13
cristinakilljoyway favorited Making A Stencil
24 Jan 17:13
-
 Purple added Making A Stencil to To-make list
09 Jan 02:52
Purple added Making A Stencil to To-make list
09 Jan 02:52
-
 EulenSquiddles favorited Making A Stencil
13 Oct 21:24
EulenSquiddles favorited Making A Stencil
13 Oct 21:24
-
 Kaitlin A. favorited Making A Stencil
10 Jul 20:04
Kaitlin A. favorited Making A Stencil
10 Jul 20:04
You Will Need
-
 Step 1
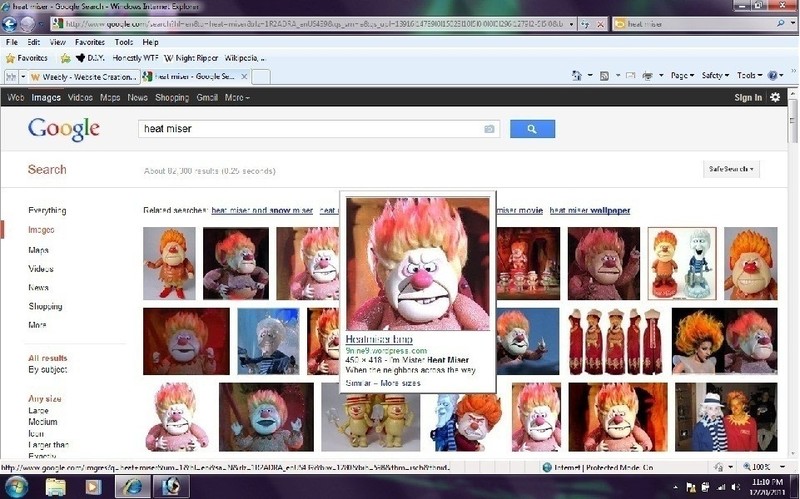
Go onto Google (or Bing or Ask or any other search engine) and find the image you want to work with.You can also use personal images and make stencils of you and your friends. Save the image.
-
 Step 2
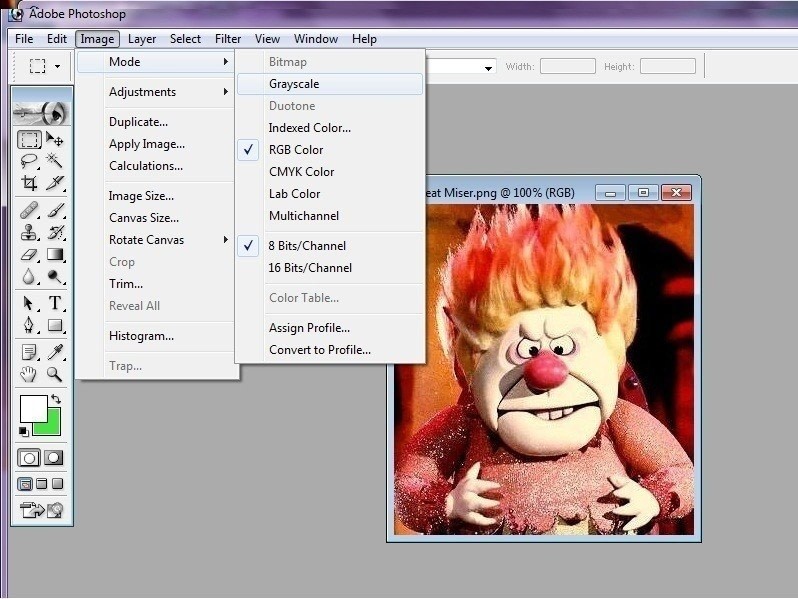
Go to Adobe Photoshop and open up the image. If the image is in color (which mine is) you have to make it black and white. Click on IMAGE from the options on top, then select MODE and finally GRAYSCALE.
-
 Step 3
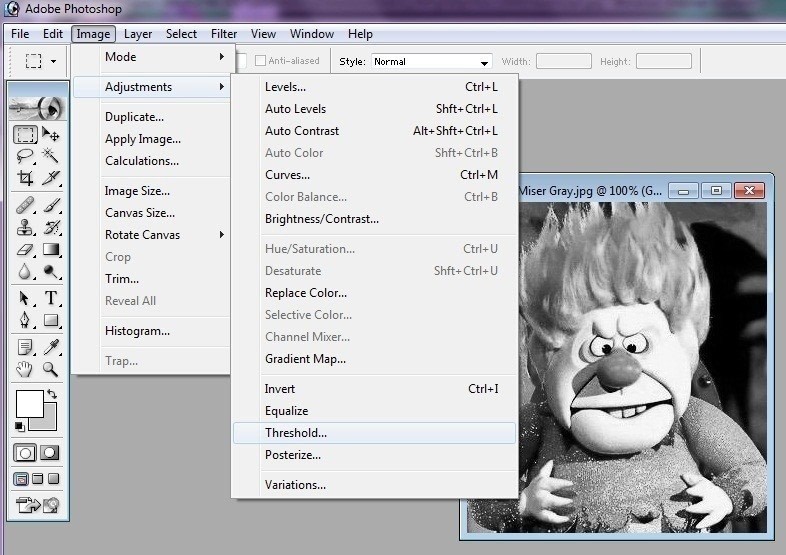
Now that the image is in Black and White you will go back to IMAGE and this time select ADJUSTMENTS then click on THRESHOLD. A tool bar will open up
-
 Step 4
When to toolbar opens up you can play around moving the threshold level up and down until the stencil starts looking how you want it to look. The clearer and bolder the colors, and the larger the black and white areas, the easier it will be later on.
-
 Step 5
Once you have played with the threshold level and got the image to look how you want it, you are going to blur the image slightly. Select FILTER. Then BLUR and finally GAUSSIAN BLUR. Another toolbar will open up.
-
 Step 6
You only want to adjust the blur sightly, to clean up edges. You will notice, as you play with this toolbar, that if you blur it too much or too little, you will lose the crispness of the stencil.
-
 Step 7
The last step in adjusting the image is to go back to IMAGE and select ADJUSTMENTS once again. Under adjustments select CURVES. A toolbox will open.
-
 Step 8
This is the final step in cleaning up the stencil. It may be hard to notice the difference in the images I've provided, but you will see the difference when you are working on it yourself. Keep playing around until the stencil looks the way you want it.
-
Step 9
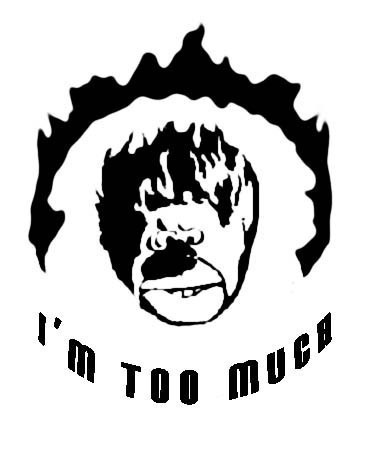
Finally you need to start cleaning up your stencil. You need to figure out what color shirt you want to put the imave on and what parts of the stencil will be cut out. I chose to cut out the black of the stencil because I wanted to place it on a white (or light) colored shirt. You will also need to connect all of the pieces that will not be cut out - in my case the white). I went in with the paintbrush tool and cleaned up, expanded or deleted parts of the stencil that I wanted or didn't want.
-
 Step 10
The final finishing touches are up to you and it depends on what kind of t-shirt you want to make! Have fun and experiment. My one piece of advice: if you are going to use words, pick a font that is blocky and not very detailed and space the letters further apart so that the paint doesnt bleed into each letter when you are painting it.