About
quick & fairly easy to do :)
following a handout given by one of my college tutors....
pretty much followin it anyway :)
-
 Coyote added Making A Single Signature Sketchbooki to Coyote Do A Art
13 Jun 04:50
Coyote added Making A Single Signature Sketchbooki to Coyote Do A Art
13 Jun 04:50
-
 Samantha T. favorited Making A Single Signature Sketchbooki
03 Apr 02:42
Samantha T. favorited Making A Single Signature Sketchbooki
03 Apr 02:42
-
 Step 1
Carefully fold 5 A4 sheets of cartridge paper in half
(i've used printer paper, didn't have cartridge at home)
A4 paper = 21cm x 29cm
-
 Step 2
Using thin card, mark out a piece that measures 31cm x 23cm. This will be cover or jacket for your sketchbook.
as you can see I used a cereal box, recycling is a good thing ^_^
-
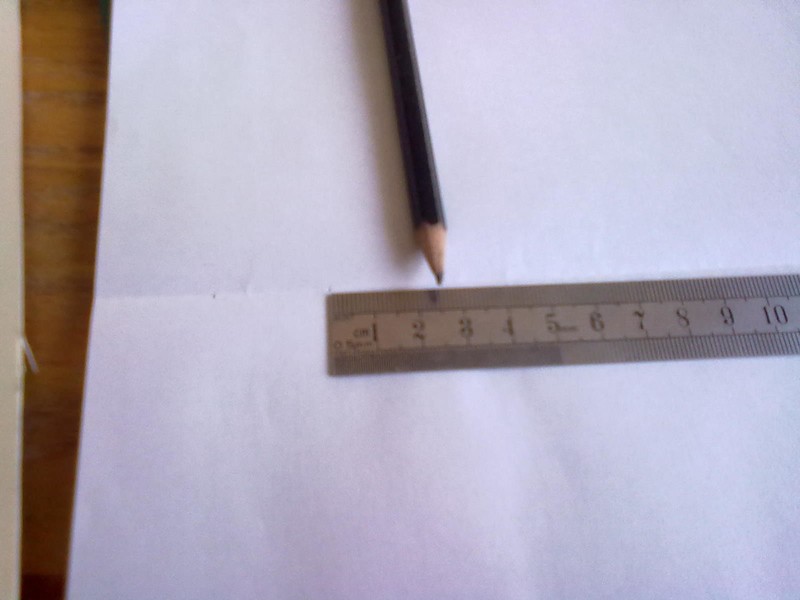
 Step 3
Next, take one of the folded A4 sheets of paper & measure down the fold & mark off at 2.5cm intervals.
i like symmetry so i did 9 in total, doing one side then the other, then the next & so on...
-
 Step 4
Once done place this page on top of the other four you folded. place the stack on top of a cutting mat.
align the papers using the table by dropping them a few centimeters above the table in loose fingers then
take a sharp implement (suggest a needle) & pierce a hole through the spine at each of the marked intervals
aim to get the holes to land on the folds you made. for accuracy do this one at a time so they are firmly in line with each otheri did each page individually, using the first one i pierced as an outline to follow the rest by.
-
 Step 5
once you've done this, re-pierce through each hole to affirm that you've gone through all the holes in the right places also to allign them all together, ready for sewing.
-
 Step 6
fold the cover/jacket in half neatly. touch parallel landscape corners to each other & fold the center.
place your stack of aligned papers into the center of the cover/jacket ensuring that all the folds & holes line up. Carefully pierce the cover ensuring once again that the holes line up with the fold of the cover/jacket.
you are now ready to sew it all together!
-
 Step 7
starting with the top-hole threat the needle down through the pages & out through the cover (remember to leave enough spare threat on the top to tie it off at the end. bring th needle back up through the next hole along on the cover. you should finish with the needle on the inside of the sketchbook at this point
-
Step 8
Repeat the previous step on the proceeding hole weaving up & down until you reach the end. When you reach the end, sew back in the other direction infilling the missing stitches.
You should finish where you first started sewing. At this point tie off the two ends together neatly & trim as desired
-
Step 9
OPTIONAL
get another piece of paper (sugar paper recommended) fold in half. This can be any colour or pattern.
This will be the inside liner for your sketchbook covers
you can either set it on with the signature (stack) or after they've been sewn in then you can stick them down to the initial page & the inside cover.
-
 Step 10
the last step is to glue the liner to the jacket. you may use a glue stick, pva or double sided tape for this task.
double sided tape has the neatest finish as the glue doesn't warp the paper.if using glue you may want to place a heavy object on top while it dries to keep it flat & smooth
-
Step 11
decorate the cover as desired ^_^