About
It will safe you a demolished household and some money.LOL
i had a scratching shelf but it was almost gone , it was just a shelf with some carpeting.
my ladies loved it.
so it hought i must make a new one, but i didn't have some scraps of carpeting so i thought why not of carton boxes.
I work most of the time on the floor and for the my protecting of my floor i always using carton boxes.
so i thought i can recycle them in to this project so they will become a third live.
it was easy to make and my furries loving me now more then ever.LOL
i thought i must make him soo that i can clean it easy so i used a shoebox lit as well.
you can turn it and pick it up and in those holes nothing can filling with dust.
I' and my cat Muis are very allergic for dust.
and to make it more durable i have wrapped the lid with some plastic coated closet paper.
so it can stand moistering as well. the scratching shelf is laying on the floor in the kitchen, so there can lay some water spoiled there. if not. you can do it too for the candy for your own eyes;XD
because i had used a box i had given of m y sis as well, it smelled of her pets so at first my furries didn't wanted to look at it.LOL soooo i have tricket them with some catnip i have rubbed in.
I had some drops with liquid of valeriaan, but... mine doesn't like that.
I think my friends are too spoiled.LOL
note:
the time is without drying time and is depending how big your shoe lid will be and how much you must cut
I hope you like this and make one for your own furry friends
thank you for stopping by , just have a happy crafting fun time;-D
-
 Katelyn T. favorited Make Your Own Reycled Cat Scratchingshelf
23 Aug 00:05
Katelyn T. favorited Make Your Own Reycled Cat Scratchingshelf
23 Aug 00:05
-
 mmotse03 favorited Make Your Own Reycled Cat Scratchingshelf
25 Feb 01:05
mmotse03 favorited Make Your Own Reycled Cat Scratchingshelf
25 Feb 01:05
-
 Aurelie L. added Make Your Own Reycled Cat Scratchingshelf to Animaux
17 Mar 18:22
Aurelie L. added Make Your Own Reycled Cat Scratchingshelf to Animaux
17 Mar 18:22
-
 RavenQuinzel added Make Your Own Reycled Cat Scratchingshelf to Pet stuff
25 Jan 20:42
RavenQuinzel added Make Your Own Reycled Cat Scratchingshelf to Pet stuff
25 Jan 20:42
-
 stick it and fix it added Make Your Own Reycled Cat Scratchingshelf to dfv
26 Sep 18:22
stick it and fix it added Make Your Own Reycled Cat Scratchingshelf to dfv
26 Sep 18:22
-
 Serena C. added Make Your Own Reycled Cat Scratchingshelf to Me
28 Apr 22:47
Serena C. added Make Your Own Reycled Cat Scratchingshelf to Me
28 Apr 22:47
-
Rebecca P. added Make Your Own Reycled Cat Scratchingshelf to Pet Stuff
04 Dec 15:20
-
Rebecca P. favorited Make Your Own Reycled Cat Scratchingshelf
04 Dec 15:20
-
Hillary M. favorited Make Your Own Reycled Cat Scratchingshelf
12 Nov 02:51
-
 greenstyle favorited Make Your Own Reycled Cat Scratchingshelf
10 Aug 17:02
greenstyle favorited Make Your Own Reycled Cat Scratchingshelf
10 Aug 17:02
-
 Step 1
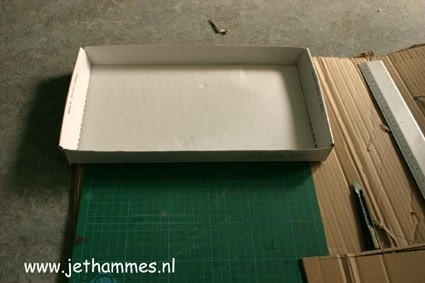
Gathering all lthe materials you need .
the cuttingmat, the carton boxes ,a good cutting knife , ruler , the lid of a shoe box and a pen -
 Step 2
Measuring the length of the inside of your lid.
and use this wide sizes for to make the carton plates.
be sure that the carton direction is in the lenght.
Please watch my picture on the carton. -
 Step 3
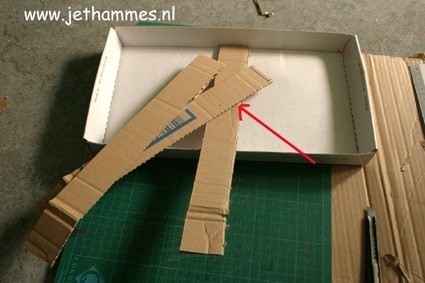
On this step you see on the top the lenght direction on the carton.
and in the opposite direction you must cut now the strokes of carton.
i used the width of my ruler it was a centimeter or 100mm , more thenthe lid. -
 Step 4
Now just make a bunch of storkes, you can see on the side of the strokes that they have a zigzag structure.
You must need that for your project !!!!!
if you have that, you done it great!!!!;-D -
 Step 5
If you have made enough of those strokes just fill your lid, don't cheat, the lid must be filled tightly;-D
soooo it can be a boring moment to notice that you must make some more.LOL -
 Step 6
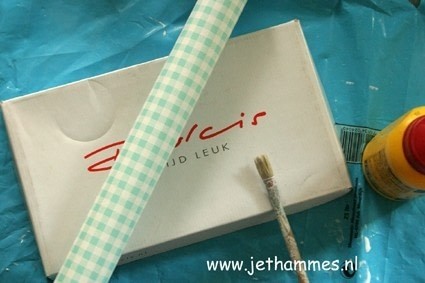
take some plasticfied paper or wax paper and wrap your lid.
-
 Step 7
You don't have to wrap t he bottom of your lid because you will glue there the strokes.
-
 Step 8
Take the stips you have made and glue them in the lenght and glue the next one on them.
Make neatly bundles. -
 Step 9
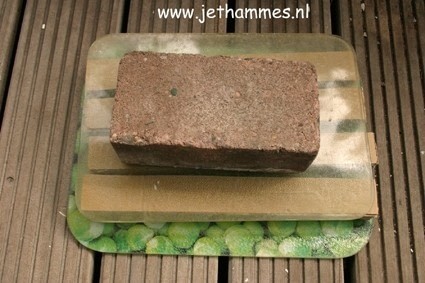
lay them on a plate with the sides down and so that the next one didn't thought the other. Lay an other plate on top and set a weight on it. I had a brick
let it dry, the drying time takes some hours. so in between just take a break and drink or eat something.LOL -
 Step 10
With a hacksaw you will make the sides on the same length and with the wood file you make them smoothly;-D
-
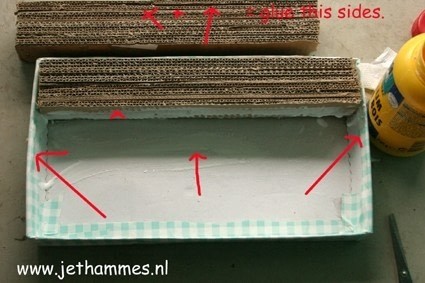
 Step 11
Take the glued bundles of strokes glue the box sides and the bottem and the sides of the bundles and put the bundles in the lid.
you use agian for this woodglue. -
 Step 12
when you have glued all the strokes in the lid like this.
pick up a bundle of rubber bands, you need those large ones!!! -
 Step 13
wrap the rubber bands on the wide and the lenght of the lid and let the almost ready scratching shelf dry;-D
Perhaps time for something else?LOL -
 Step 14
Remove the rubber band off your project and.. take some cat nips to make this new scratching shelf irresistible.
Your furrie friends will be thankfull and your furniture and wallpaper even more.LOL
thank you for stopping by and have much fun;-D