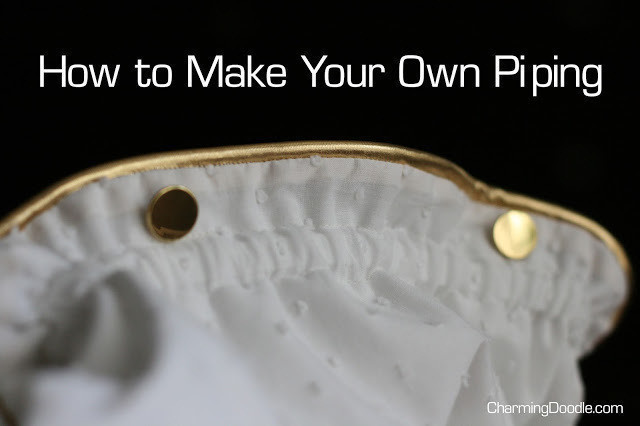

About
It's easy to make piping yourself!
Packaged, pre-made piping is great...if you want to use a standard color and only need thin piping for a project. But what if you want to make a statement with your piping and need a thicker piece or special pattern or color?
Then you need to make your own piping. The great news is that making your own is very easy!
-
 C T. added Make Your Own Decorative Piping to Clothes! x
04 Apr 22:43
C T. added Make Your Own Decorative Piping to Clothes! x
04 Apr 22:43
-
 sara d. favorited Make Your Own Decorative Piping
25 Mar 21:32
sara d. favorited Make Your Own Decorative Piping
25 Mar 21:32
-
 Tracy G. favorited Make Your Own Decorative Piping
15 Mar 12:55
Tracy G. favorited Make Your Own Decorative Piping
15 Mar 12:55
-
 Blackdoll favorited Make Your Own Decorative Piping
14 Mar 23:31
Blackdoll favorited Make Your Own Decorative Piping
14 Mar 23:31
-
gettothepoint added Make Your Own Decorative Piping to CLOTHING
14 Mar 18:54
-
jesta b. favorited Make Your Own Decorative Piping
14 Mar 00:35
-
Alissa B. favorited Make Your Own Decorative Piping
13 Mar 06:49
-
Elisa C. published her project Make Your Own Decorative Piping
07 Jan 03:30
-
Step 1
Once you've chosen your cord and fabric, it's time to decide how wide to make your piping. I usually tuck my cording into a fold in the fabric, then add the length of the seam allowance I'll be using to the bottom of the cord edge. The total length when the fabric is unfolded is how wide your strips will need to be.
For the gold piping I'm making in this tutorial, I had a 5/8" seam allowance and the cord + fabric thickness itself was about 1/4". These numbers helped me figure out that I needed to cut my strips 1 1/2" wide. Here's the calculation:
Seam allowance (5/8) + Seam allowance (5/8) + Cord and Fabric width (1/4) = 1 1/2"
-
 Step 2
The trick to making good piping that bends smoothly around the corners of your finished project is to cut the fabric on the bias. That simply means you need to cut it at a diagonal, instead of just taking a straight cut along one of the fabric edges. Doing this allows the fabric to give a little bit when it bends, instead of just looking wonky and fighting with the fabric it's sewn to.
Here is what the bias strips look like when you cut them.
-
 Step 3
As you can see, I cut strips of fabric (1 1/2" wide) diagonally across the fabric. You'll need to measure the length of each strip and cut as many strips as you need to cover the amount of cord you'd like to use as piping.
A quick note about cutting: you get the cleanest lines using a cutting mat and rotary cutter. I don't have one so I use scissors and, as you can see, the lines aren't perfectly even. But the beauty of piping like this is that the wavy edges won't be seen.
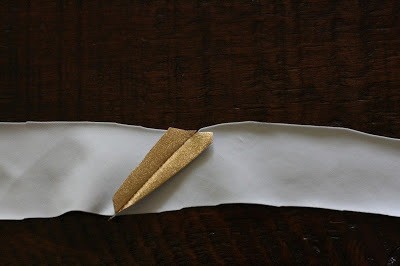
Next you need to cut the ends at an angle so you can fit the pieces, right sides together, like the photo here.
-
 Step 4
Then sew that edge together. This is how you join each additional piece you need until you've achieved the length you want for your project.
-
 Step 5
Then press your seam open so it will stay flat and smooth later. Mine didn't press well because it's a swimsuit fabric, but most of the time piping is made with cotton and will press nice and flat.
-
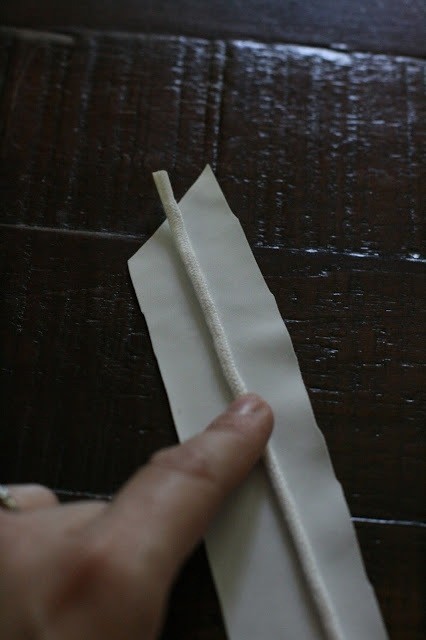
 Step 6
Once you have attached all of the pieces you need, place your cord down the center and fold the fabric strip around it.
-
 Step 7
When you see the joining seams, this is what they'll look like from the right side. Once sewn into your project the seam practically disappears.
-
 Step 8
Now it's time to sew. I find it easiest to use a zipper foot to sew piping, although there are is also a piping/cording foot you can get that I'm sure would be great to have if you make a lot of piping. What the special foot (or zipper foot) will allow you to do is get really close to the cord, ensuring that you don't get bunches or strange folds in the look of your final garment.
Place the cord really close to the foot and sew a straight line along the entire length of the cord you need. If your cord wants to slide around, you can tack it down on the ends by running a stitch or two through the cord itself (just on the end that won't be seen in your finished project).
-
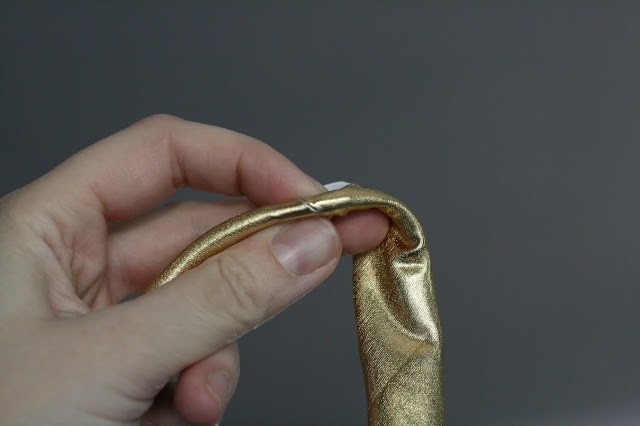
 Step 9
That's it! You've created your own beautiful piping!
-
 Step 10
And one last note about using your piping, you will simply place it raw sides together, between two layers of fabric and sew close to the piping (once again using the zipper or piping foot). At the start and ending point of the piping, overlap the ends of the cord a little bit and sew across where the ends meet. When you flip your project to the right side, you'll see that the piping dips a tiny bit but still looks nice and finished. The best place to overlap the ends is at a side seam, or somewhere that won't be seen all the time.