


About
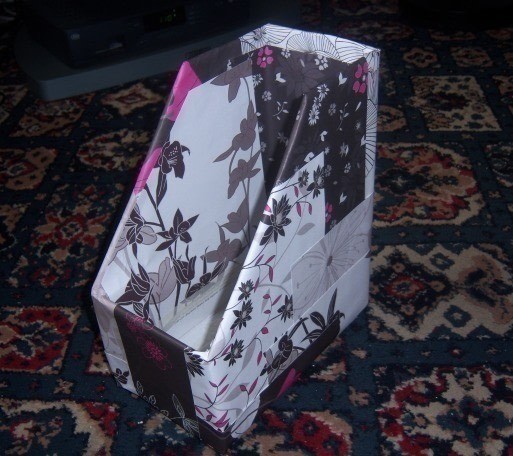
Crafty storage box!
I thought about buying one of these but making it seemed much more fun and it was! It was free, it wasn't that hard to make, it didn't take long, it looks great and it's recycled :)
If you think there's an easier way to do this then, obviously, go for it! The how-to is just the way my brain works! You can also make these by simply cutting the top of a cereal box off at an angle. I think cereal boxes are a bit too flimsy for this though and none of ours were big enough anyway.
-
 Jeanne F. favorited Magazine Holder
27 May 20:53
Jeanne F. favorited Magazine Holder
27 May 20:53
-
 Leyley favorited Magazine Holder
02 Feb 11:53
Leyley favorited Magazine Holder
02 Feb 11:53
You Will Need
-
 Step 1
These are the shapes you need to cut out. You can make them any size as long as you have enough cardboard.
I used a cardboard box so parts were already folded round nicely which made it easier. Once you have cut out one of the main peices (with As on them), you can draw around it onto another peice of cardboard so it's all equal. Using these two peices you can determine what size the front (with C,B,C) needs to be. The last peice at the bottom of the picture is for the base of the box.
I hope this makes sense; the dashed lines represent where you must cut. The full lines represent where you must score with your knife. If one side of your cardboard is laminated like mine is then scoring on the laminated side works best. I have labelled the parts that fold with letters and when you put it all together, match up the letters and stick down with tape.
-
 Step 2
Tape all the peices together!
-
 Step 3
Ta-da! I went mad with the tape!
(uurgh I hate our carpet!)
-
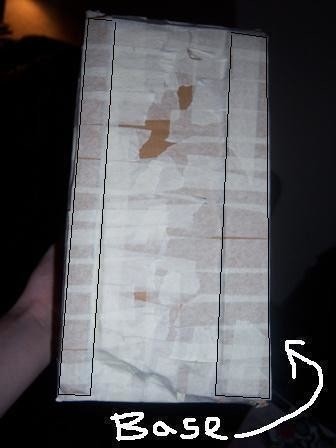
 Step 4
If you are like me then you can't do anything without it being wonky! I have added rectangles of cardboard to the base of the holder to balance it out.
(The main project picture looks wonky but it isn't it's the angle of the camera!)
-
 Step 5
Decoupage, paint, cover with fabric, anything you like....and done!


Versions

Comments

