


About
Beautiful Lotus...Anytime...Anywhere.
This is a lovely Lotus Blossom...enjoy!
Tags
-
 Alex Z. added Lotus Blossom Tutorial to Интересное
12 May 16:42
Alex Z. added Lotus Blossom Tutorial to Интересное
12 May 16:42
-
Dana H. favorited Lotus Blossom Tutorial
06 Jun 18:29
-
 The Dark Vixen added Lotus Blossom Tutorial to Things to Try Sometime
26 Mar 15:39
The Dark Vixen added Lotus Blossom Tutorial to Things to Try Sometime
26 Mar 15:39
-
The Dark Vixen favorited Lotus Blossom Tutorial
26 Mar 15:38
-
Marie R. added Lotus Blossom Tutorial to ART
12 Feb 15:13
-
Marie R. favorited Lotus Blossom Tutorial
12 Feb 15:13
-
 ShortHairedGirl favorited Lotus Blossom Tutorial
01 Jan 03:25
ShortHairedGirl favorited Lotus Blossom Tutorial
01 Jan 03:25
-
Annika G. favorited Lotus Blossom Tutorial
17 Jan 01:04
-
 harleygirl6815 added Lotus Blossom Tutorial to Paper Crafts
29 Nov 04:44
harleygirl6815 added Lotus Blossom Tutorial to Paper Crafts
29 Nov 04:44
-
harleygirl6815 favorited Lotus Blossom Tutorial
29 Nov 04:44
You Will Need
-
 Step 1
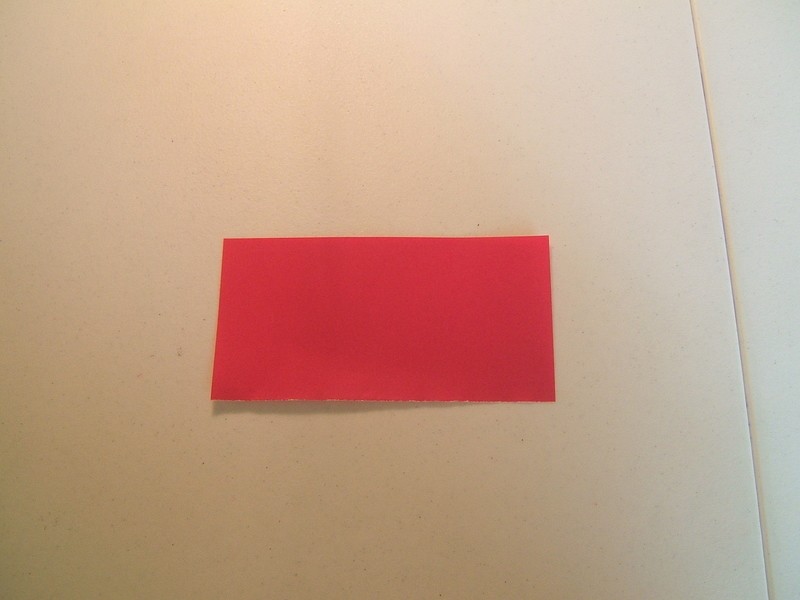
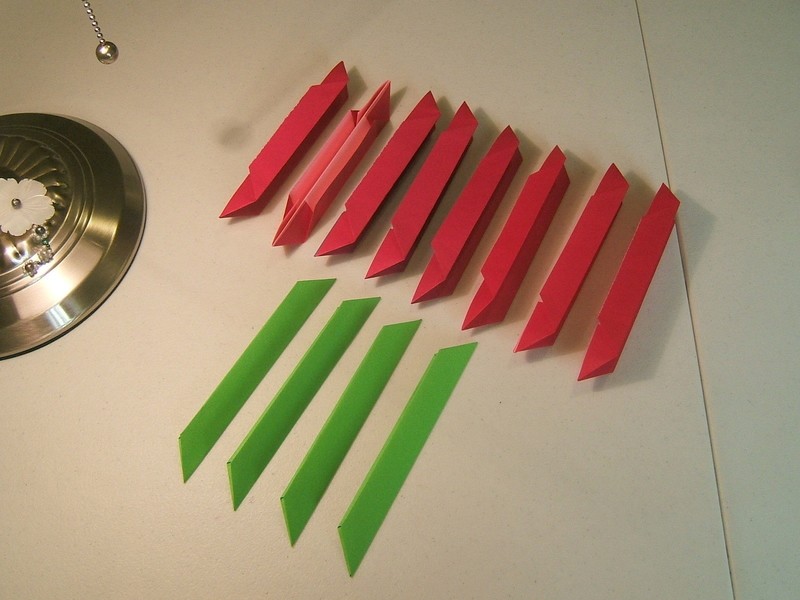
To make this Lotus Blossom you will need 8 small pieces of paper for the flower portion of the project. Each piece measures 6 inches long by 3 inches wide. 4 pieces of green paper for the leaf portion of the project. Each pieces measures the same...6 inches long by 3 Inches wide.
-
 Step 2
Start with the flower portion first. Take one of the rectangles, and fold in half lengthwise.
-
 Step 3
Here is your folded piece. Make sure that the colour is shown on the outside.
-
 Step 4
Next, you are going to open it, and fold the 4 corners down so that it meets the center line that you just folded in step 3.
-
 Step 5
Bring one side toward that center line and fold...Do the same on the other side.
-
 Step 6
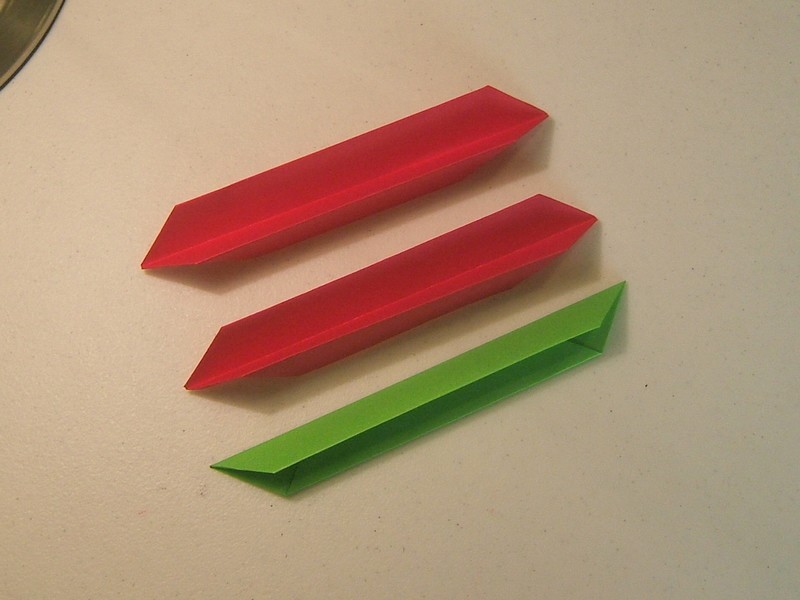
Here is what the model should look like now.
-
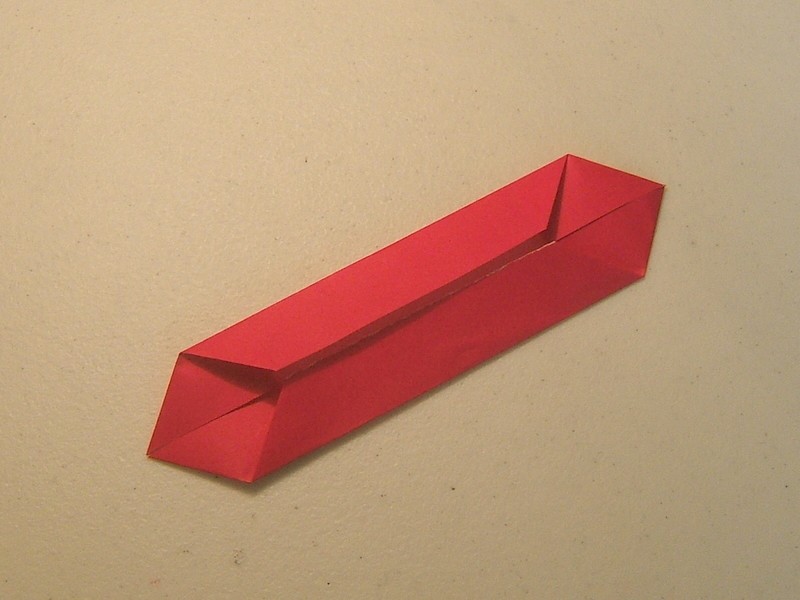
 Step 7
Then we are going to fold the model in half - BACK on itself using that center line that we created in step two. The paper should be open at the top. Create 7 more of these for a total of 8 modules.
-
 Step 8
Now we have our 8 modules, next we are going to fold our green pieces of paper which are the leaf portions of our blossom
-
 Step 9
Take one of the green pieces of paper, and fold lengthwise as shown.
-
 Step 10
Unfold and fold the four corners toward the middle center line as before. (sorry, my paper is dual colored.)
-
 Step 11
Fold one side toward the middle centre line, and then do the same for the other side.
-
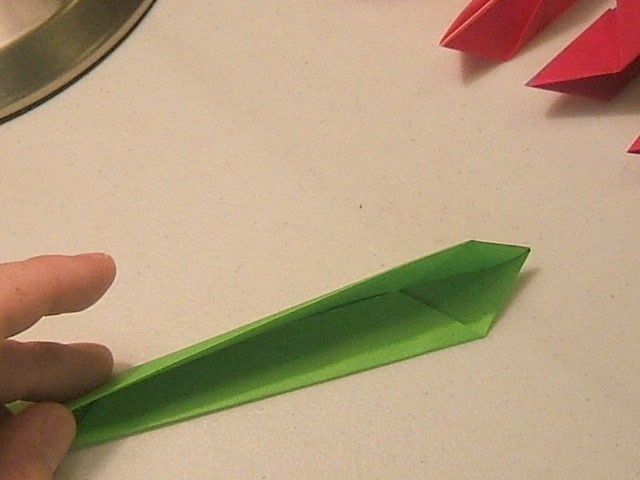
 Step 12
NOW THIS TIME, when you fold the module in half, you will fold it bring the sides in together. Make all 4 of these modules.
-
 Step 13
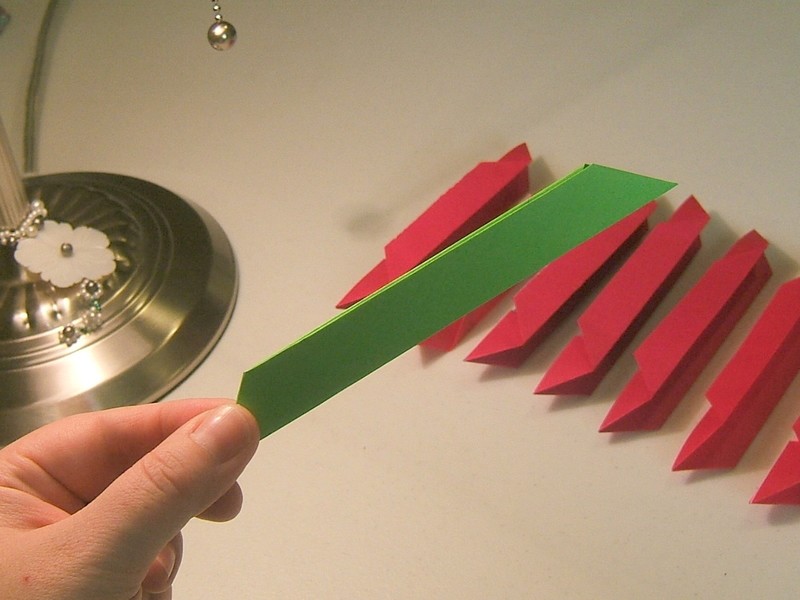
This is what the green ones should look like.
-
 Step 14
Here are ALL of our modules, and we are ready to rock!
-
 Step 15
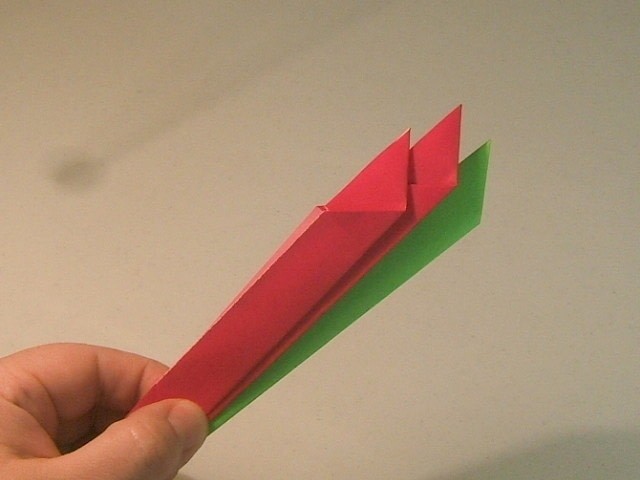
Next we are going to divide our modules into 4 bundles. Each bundle will consist of 2 red modules and one green module.
-
 Step 16
We are going to pick up the green module first. Then we are going to lay a red module over the green one. Then we are going to take the last red one in our group and lay it on top. They will fit nicely together. Do this with all 4 groups.
-
 Step 17
This is what our stack should look like.
-
 Step 18
Next are going to tie a string tightly around the middle. Cut off the excess.
-
 Step 19
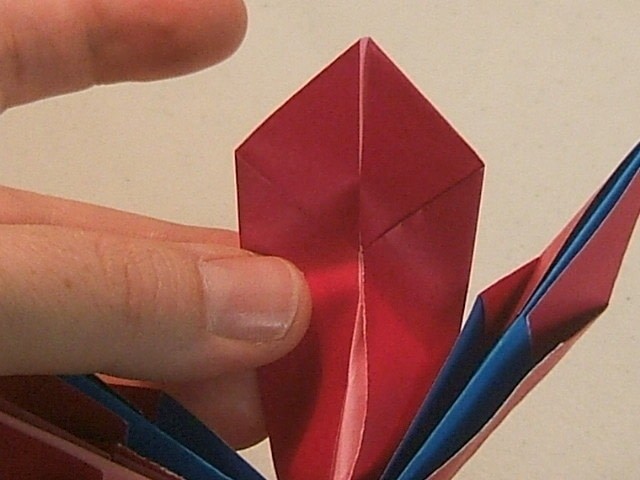
Using the centre string as a guide fold the modules in half so that it spread out like the diagram.
-
 Step 20
Turn module over. Take one red piece and start folding up towards the string as shown. If you look at step 19, there are a total of 8 "sections". Once you fold up one petal, skip the next "section", and fold up the next one. So all in all, you only fold up 4 petals in this step.
-
 Step 21
This is what you should have so far....a petal in every other section. Now we are going to fold up the petals that we skipped over in step 20.
-
 Step 22
Okay...now we have completed our first layer of petals. We are going to continue to completing the second layer of petals in the exact same way. The reason why we stagger the petals like this is to create a realistic effect.
-
 Step 23
We've almost got the petals done....
-
 Step 24
Yay! The Petals are done! Now grab a very small paint brush so we can use the handle of it to slightly curl back the petals.
-
 Step 25
Almost done! Now it's really starting to come alive. We are going to slightly curl up the petals...see next step.
-
 Step 26
Kinda hard to tell, but the leaf tip is actually pointing UP, not down.
-
 Step 27
You did it!


Versions

Posted by
S S.

Posted by
Awkward Squirtle

Posted by
caittylee c.


x3 I made a white flower because of A:TLA's "Order of the White Lotus," but a colorful one would be pretty too.
CO + K User
CO + K User