About
Little drawstring pouches for your little projects on the go.
These 'mini skein wonders' are perfect for your little projects. One pouch only uses a little bit of fabric and a little bit of yarn, making it a perfect "scrap" project! And as a bonus; They are super cute to look at :)
What do you need to know:
How to knit. This tutorial shows how to knit in the round, but you could also knit it flat.
How to block your knit.
How to sew. It is preferred that you know how to sew, but the instructions are pretty clear, so you could do without much sewing experience.
Measurements:
18 cm (7 1/10 inch) high and 14 cm (5 1/2 inch) wide (laid flat, so 28 cm (11 inch) around)
Gauge for knitting 10x10 cm (4x4 inch): 27 stitches, 40 rows in stockinette
Knit piece finished measurements (after blocking): 10 cm(4 inch) high and 14 cm(5 1/2 inch) wide
Cutting dimensions of the fabric pieces:
Cut two rectangles out of your fake suede that are 15 cm(6 inch) wide, and 10 cm(4 inch) high. This will be your bottom piece.
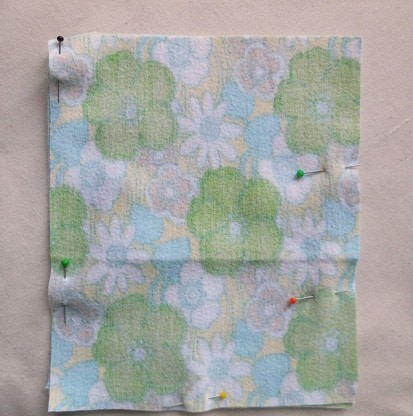
Cut two rectangles out of your lining fabric that are 15 cm(6 inch) wide, and 18 cm(7 inch) high. This will be your lining piece.
Cut two strips out of your lining fabric that are 30 cm(11 4/5 inch) wide, and 3 cm(1 1/5 inch) high. This will be your drawstring tunnel piece.
Sewing notes and tips:
-All seams are 5 mm(1/4 inch) wide.
-If you sew with fabric that tends to unravel quickly, I suggest you zigzag along the edge after sewing every seam.
-I recommend that you press your seams after every step. This way you get a clean finish, it’s easier to sew the next seam and it makes your seams look crisp and neat.
- If you are unsure of your sewing abilities at certain steps, you could baste your pieces first, either by hand or by machine. If you baste the pieces by machine, use a long stitch length.
- If you don’t have a sewing machine, you could sew this entire pouch by hand. It would just take you a bit longer.
- When beginning and ending a seam, don’t forget to backstitch.
-It is always wise to stop sewing with the needle down. This way you will always be in charge of your project.
Good Luck! :)
-
 Kinhime Dragon added 'Mini Skein Wonders' to crochet
18 Jan 20:22
Kinhime Dragon added 'Mini Skein Wonders' to crochet
18 Jan 20:22
-
 marybethblus favorited 'Mini Skein Wonders'
20 Oct 19:19
marybethblus favorited 'Mini Skein Wonders'
20 Oct 19:19
-
 Stephanie B. added 'Mini Skein Wonders' to little bits
12 Oct 20:12
Stephanie B. added 'Mini Skein Wonders' to little bits
12 Oct 20:12
-
 Jennifer R. added 'Mini Skein Wonders' to Gift Ideas
13 Jun 21:20
Jennifer R. added 'Mini Skein Wonders' to Gift Ideas
13 Jun 21:20
-
 ale_corason favorited 'Mini Skein Wonders'
12 May 18:50
ale_corason favorited 'Mini Skein Wonders'
12 May 18:50
-
 zoë added 'Mini Skein Wonders' to To-make list
10 May 18:15
zoë added 'Mini Skein Wonders' to To-make list
10 May 18:15
-
 kurisu published her project 'Mini Skein Wonders'
19 Apr 09:37
kurisu published her project 'Mini Skein Wonders'
19 Apr 09:37
You Will Need
-
 Step 1
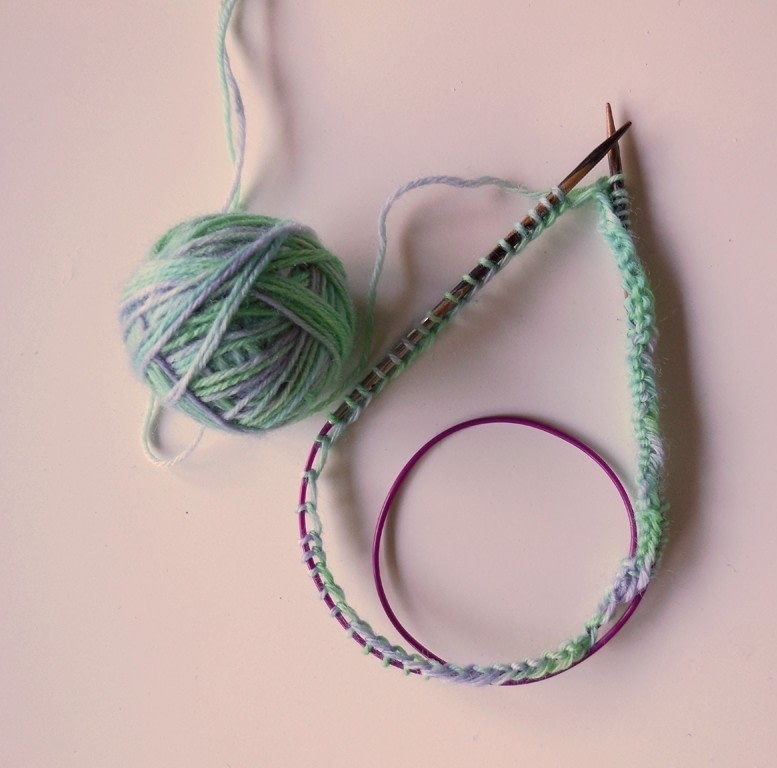
Part 1: Knitting
Cast on 74 stitches, and slide those stitches to you left needle.
-
 Step 2
Pull your working yarn, and your yarn end tight to create a small circle. (if your working yarn comes from the right, you are doing a good job) Make sure all your stitches are pointing inwards. With your right needle, knit into the first stitch to close the round. Pull really tight so you don’t get a gap later on, and continue knitting.
-
 Step 3
Keep going until the stitches on your left needle are beginning to feel tight (this is still the first round).
-
 Step 4
Stop knitting, and pull out your right needle. Slide the stitches onto your left needle, and continue working in the round. Make sure you pull the first stitch after this step tight, so you don’t get stitches that are too loose.
Continue in this manner until you have worked 40 rows of stockinette stitch. Bind off your stitches loosely, and slide off the last stitch.
-
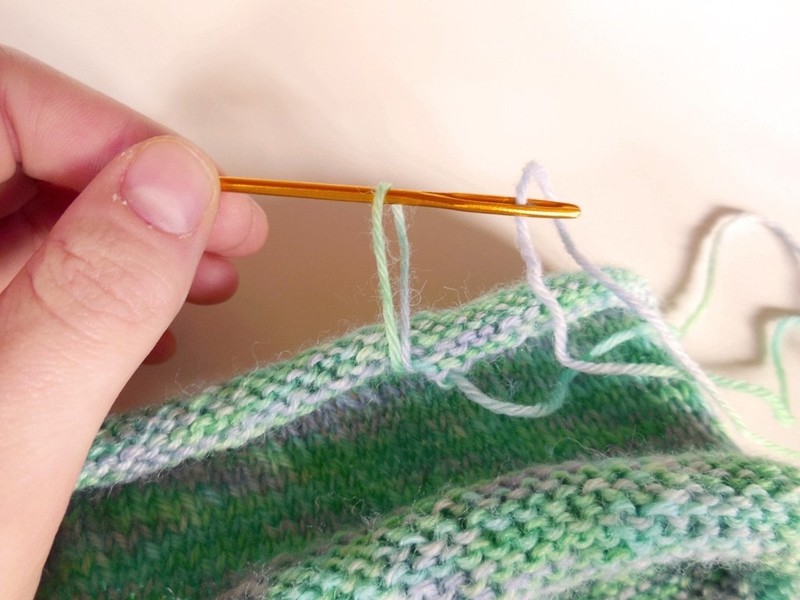
 Step 5
Thread the yarn through your darning needle, and pull through the last loop.
-
 Step 6
Now pull the yarn through the first stitch on your left.
-
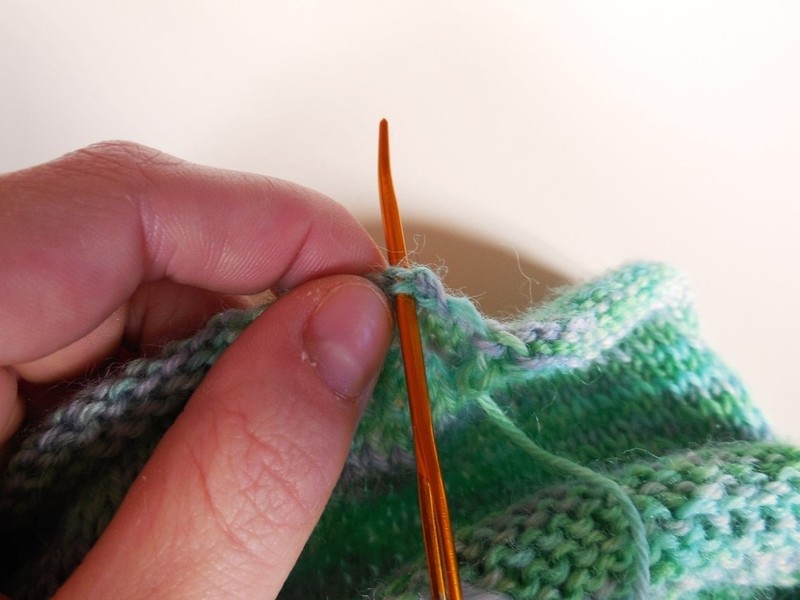
 Step 7
Pull it through the first stitch on your right, and lastly work the tread through some of the top stitches for a nice finish.
-
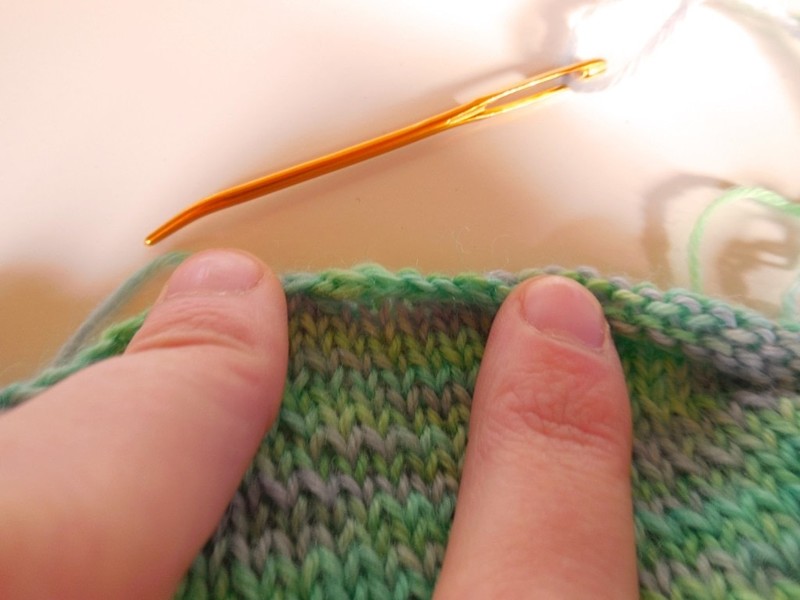
 Step 8
This way all stitches look the same.
That’s it! Easy right?
For the straight knitters: After you have bind off your piece, leave a long tail. Fold your knit in half width wise, and sew the sides together with the long tail. Your piece should be blocked at the dimensions that are given below.
-
 Step 9
Block your piece.
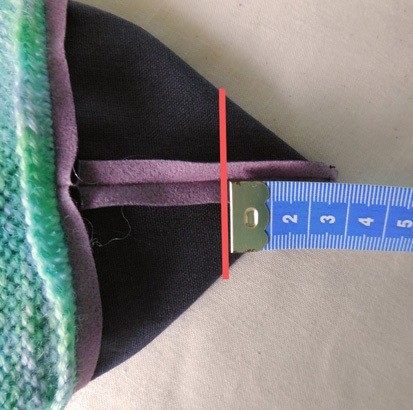
The dimensions after blocking should be 10 cm (4 inch) high, and 14 cm (5 1/2 inch) wide. It is important to make sure your knit is the correct size, because you will use these dimensions to do the rest of the tutorial. Also it’s much easier to work with, because you will eliminate the “curling” ends this way. -
 Step 10
Step 2: Sewing
Step one: The bottom
Lay your two bottom pieces on top of each other with the right sides of the fabric together. Pin and sew the side seams of the bottom piece. Do not close the bottom seam yet.
-
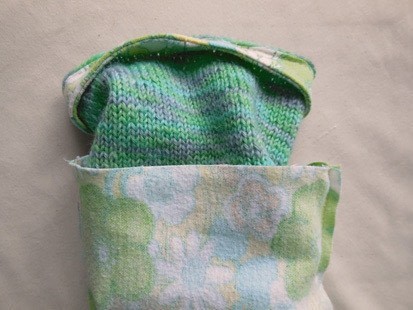
 Step 11
Slide your knit into the bottom piece with the right sides together (see picture). Pin in place beginning with the center front and center back, and then pin the sides. This way you can distribute the fabric evenly, and makes sure everything is centered. Sew around.
-
 Step 12
This is how it would look on the right side (after you have pressed the seam).
-
 Step 13
Now slide your knit piece up (see picture), so we can sew the bottom seam of the bottom piece. Pin and sew the bottom seam with the right sides together.
-
 Step 14
Now it’s time to box those corners! Lay your bottom flat in a way that the bottom seam and side seam touch each other on the right side of the fabric (the side you can’t see right now), creating a triangular shape. Pin it down, and measure 2 cm(4/5 inch) from the tip to the inside. Mark this height and sew across to create a smaller triangular shape.
-
 Step 15
Do the same to the other side, and clip those corners.
-
 Step 16
Turn your piece right side out, and give the corners a little push. This is what it should look like from the outside. Pretty neat huh :) The bottom part is now complete, so give yourself a pat on the back or a big high five (or both, I would do both), and continue with part two!
-
 Step 17
Step two: The lining
I think a lot of people fear sewing lining in stuff, but I promise, after you’ve done this, you can apply this method to put a lining in virtually anything!
Lay the two lining pieces right sides together and pin the side and bottom seams, the top remains open. Leave a 6 cm(2 2/5 inch) gap at one of the sides like shown in the picture. It is very important not to make it too small, because your whole pouch will go through there, and you will later see why.
-
 Step 18
When sewing the lining you need to stop where you’ve marked your gap, backstitch in place, and continue at the second pin. It is really important that you backstitch before and after the gap, because you need to pull your pouch through it. When reaching a corner you need to stop 5 mm(1/4 inch) before the corner with the needle down, pivot, and continue sewing. Repeat this with the second corner.
-
 Step 19
Now you have to box the corners in the same manner as you did with the exterior bottom. Box ‘em baby!
-
 Step 20
Step three: The drawstring tunnel
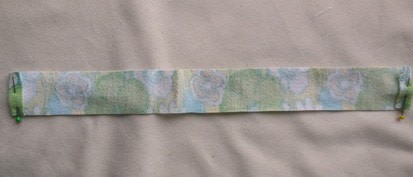
Fold one strip in half with the right sides together, and sew the side seam to create a tunnel.
-
 Step 21
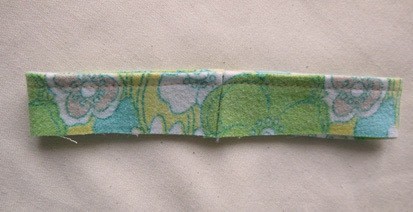
Fold the sides of the other strip 5 mm(1/4 inch) back with the wrong sides together. Press these folds, so it’s easier to sew them later on.
-
 Step 22
Now pin the top of the strips right sides together, beginning with the folded sides. The folds become the tunnel opening. It’s important that there is no room between the folds, so make sure it stays put when you sew it. It is recommended that you baste this piece first to make it easier to sew, but you don’t have to. Choose a point farther away from center to prevent any shifting, and sew all around.
-
 Step 23
After pressing this seam, fold the piece over with the wrong sides together, and top stitch through the top of the seam, about 2 or 3 mm(1/8 inch) from the edge. You can see that the folds of the tunnel opening are meeting each other nicely. The top stitching prevents tearing the tunnel opening, making it more sturdy, and to make the top edge look nice and flat.
You’ve done great so far, and we’re almost there! It’s time to put it all together, yay!
-
 Step 24
Step 4: Putting it all together
Shove the bag into the drawstring tunnel with the right sides together. The raw edges of the tunnel are facing upward, and the tunnel opening is facing the right side of the bag. Make sure the opening is in the center of one side of the bag. Also make sure the folds stay together, so you don’t get a big gap later on.
Pin everything in place and baste the two pieces together (begin sewing off center like the previous step), as close to the edge as possible. Why do I need to baste so close to the edge? After this step your next stitch will be a normal stitch for sewing the lining to the bag, that will be parallel to the basting stitch . Because we’ve sewn so close to the edge, we have room for this “lining stitch” to be 5 mm(1/4 inch) wide. Otherwise there is a chance that you need to make your seam wider (which is a shame of all that knitting you did), or the basting stitch will peek out when you turn your work right side out.
-
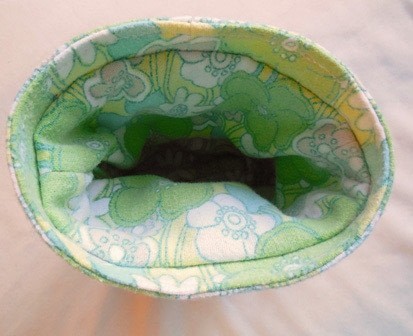
 Step 25
After you’ve basted your tunnel to the bag, it’s lining time! Shove the bag into the lining with the right sides together. All the raw edges meet at the top. Make sure the drawstring tunnel is facing down, like the picture above. Pin it in place, beginning at the center front and back, and then do the sides. All you can see now is wrong sides of anything, that’s good! If you want to baste it first, go ahead. Now sew the top, slowly.
-
 Step 26
Now it’s time for a little magic, the moment where you have been waiting for! Stick your fingers into the gap, in the side of your lining, and pull the bag all the way out.
-
 Step 27
All you can see now are right sides of anything, that’s good.
-
 Step 28
Lastly, you need to sew the hole in the lining. You can either do it by hand, or use the machine. It’s all up to you. As you can see, I did it with my machine. Once that little pouch is full, I’ll never see that seam again ;)
-
 Step 29
Now push the lining into the bag, and press the lining in, so it is nice and flat.
If you’ve come this far, I’m real proud of you! Go get some chocolate to celebrate your big victory :)
-
 Step 30
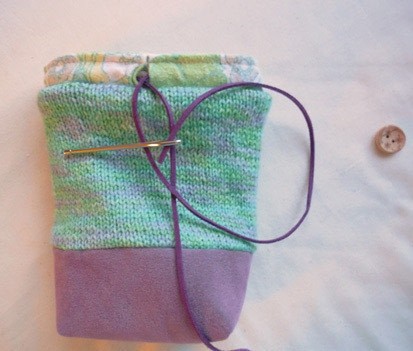
Step 5: The finishing touch
Of course, a drawstring pouch, wouldn’t be a drawstring pouch if it wasn’t for the actual string. So take a darning needle and your string, and pull the string through the tunnel opening. Take your button, and push one end of the string through the button hole. Then repeat for the other end. Tie some knots at the end of your string where you want the button to stop, and trim the ends if necessary. Now your done!
-
 Step 31
Admire your work! You did good :)