

About
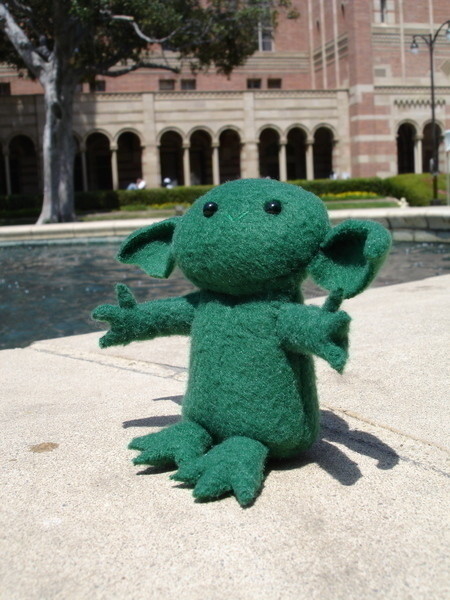
pint-sized, plush Jedi master
This little guy is from a pattern of my own design (my first, actually), and I'm insanely pleased with the way he turned out. He's all hand-sewn, which means he took forever to finish since I'm not particularly adept with needle and thread.
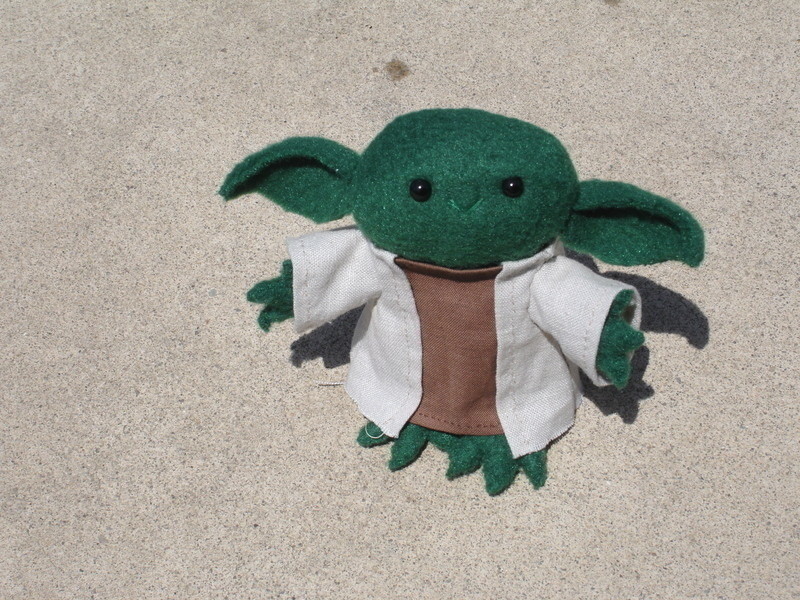
The how-to for Yoda is here! Clothes to follow....
Tags
Downloads
- yodapattern.pdf 1.27 MB [ Download ]
-
 Ms Dorito added Lil' Yoda to Plushie
12 Jun 17:14
Ms Dorito added Lil' Yoda to Plushie
12 Jun 17:14
-
 Jenn H. favorited Lil' Yoda
16 Jan 06:27
Jenn H. favorited Lil' Yoda
16 Jan 06:27
-
 Katie A. favorited Lil' Yoda
02 Jan 01:21
Katie A. favorited Lil' Yoda
02 Jan 01:21
-
 KatSL favorited Lil' Yoda
02 Dec 06:33
KatSL favorited Lil' Yoda
02 Dec 06:33
-
 Annie G. favorited Lil' Yoda
09 Aug 15:15
Annie G. favorited Lil' Yoda
09 Aug 15:15
-
Rebecca C. favorited Lil' Yoda
08 Jul 06:54
-
Julie R. favorited Lil' Yoda
29 Apr 00:18
-
Parnelli P. favorited Lil' Yoda
02 Feb 17:11
-
 Maggs added Lil' Yoda to Star Wars
16 Sep 11:12
Maggs added Lil' Yoda to Star Wars
16 Sep 11:12
-
 Nimh M. favorited Lil' Yoda
08 Aug 16:40
Nimh M. favorited Lil' Yoda
08 Aug 16:40
You Will Need
-
Step 1
Cut out pattern and cut out pieces. Remember for any part that needs 2 pieces (i.e. the head and feet) to fold the fabric right sides together and cut 2.
-
Step 2
MAKE FEET:
With WS together, whip stitch feet, leaving back end open for stuffing.
Stuff feet with scraps of fleece or with polyfil. I used a small knitting needle to stuff the toes. -
Step 3
BEGIN BODY:
Pin front pieces together with RS facing. Sew long, straight side together with 1/8" seam (All seams are 1/8").
Pin back pieces together with RS facing. Sew long, straight side together.
Sew fron and back together. With RS facing, pin front and back together on diagonal sides and sew. You should now have a tube.
-
Step 4
ATTACH FEET/FINISH BODY:
Basically, the feet are sewn into the body. Line up feet on inside (RS) of body tube and pin in place. Pin bottom to body tube with RS facing (feet will be on the inside) and sew.
Flip body right side out and stuff. Line up front and back of body and whip stitch closed.
-
Step 5
MAKE EARS:
Line up the top edge of the back ear with the top edge of the front ear. Pin in place and whip stitch together.
-
Step 6
MAKE HEAD:
Cut holes in one piece of head and attach safety eyes. Because the eyes are so small, you may need to sew around the holes to reinforce them and to make sure the fabric doesn't fray. Embroider on the nose.
Pin RS of head together with ears at desired position (they'll be on the inside) and sew, leaving an opening for turning. Turn head right side out and stuff. Mattress stitch closed.
-
Step 7
ATTACH HEAD TO BODY:
Whip stitch head to body.
-
Step 8
MAKE ARMS/FINISH YODA:
With RS of arm facing sew seam starting at armpit to wrist. Flip arm RS out, line up fingers, whip stitch hand closed.
Stuff arm. I used a small knitting needle to stuff the fingers.
Whip stitch arms to body. That's it! Yay! May the force be with you!
Versions

Comments


