
About
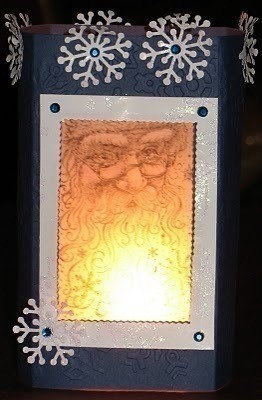
Add a little light to your night
Light up your night with a battery operated tea light luminary.
-
 Rebecca M. favorited Lighted Luminary
18 Jun 00:14
Rebecca M. favorited Lighted Luminary
18 Jun 00:14
-
 Peg R. published her project Lighted Luminary
16 Feb 04:53
Peg R. published her project Lighted Luminary
16 Feb 04:53
-
Step 1
Begin by cutting a piece of card stock to measure 11” long x 5 ½” tall with a paper trimmer. Either leave it plain or use an embossing folder and embossing machine to add a pattern. You can, also, use patterned paper to create the base.
-
Step 2
Score the paper at the 2 5/8”, 5 ¼”, 7 7/8” and 10 ½” marks on the scoring board. You will have 4 sections that are 2 5/8” each in size and one section that is ¼” that will be the tab. The second panel from your right will end up being the front of the luminary when it’s folded.
-
Step 3
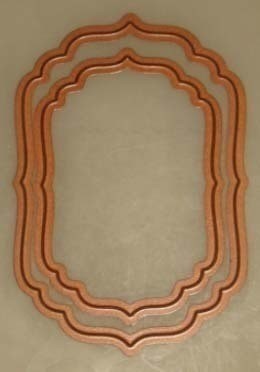
For the window in the luminary, use the smaller of the dies that you used to create the frame and lay it in the center of the panel that is the front of the luminary. I like to use painter’s tape to help keep the die in place. Run it through your die cut machine.
-
 Step 4
Create the frame for around the window of the luminary by laying 2 consecutive sizes of dies on your die cutting machine plates and placing a piece of patterned paper on top of them. Run the sandwich through the machine to create the frame for the window. Then, adhere the piece to the front of the luminary using a little glue.
-
Step 5
NOTE: The lighter weight vellum you use the more the light will show through when the luminary is lit.
Cut a piece of vellum to measure 2 5/8” x 5” and mark with a pencil where the top, bottom and side edges of the window is on each side. This will be the guide for where you need to place the stamp. Stamp the image on the vellum using a black ink pad and an acrylic block. Allow the ink to dry for a few minutes and then center the vellum in the window. If you need to move the stamped image over a little to get the part of the image you want in the window to line up simply trim off the vellum that will overlap the scored fold of the luminary.
-
Step 6
Adhere the vellum with a little glue to the inside of the luminary base with the ink of the stamped image facing out. Be sure to place the glue on the vellum so that it does not show in the window opening.
-
Step 7
Punch pieces that match the theme of your paper and stamped image and add around the front, sides and back of the luminary. Add some adhesive stones for a little bling.
-
Step 8
Add a battery operated tea light candle to light up your night.
-
Step 9
Fold the sections of the luminary closed making sure it forms a square and adhere the tab to the inside of the luminary to create a finished corner.