


About
Twit-Twoo!!
I had an impulse to make myself a Leather Owl Bag yesterday. I'd never used leather before to make anything, so i read up on it and made sure i bought leather needles for my sewing machine.
I made my own pattern for this bag, and i'll show you how i made my pattern here too.
Hope you enjoy the How-To!!
Tags
-
 Kiven P. favorited Leather Owl Bag
14 Jan 08:18
Kiven P. favorited Leather Owl Bag
14 Jan 08:18
-
 Joani T. favorited Leather Owl Bag
27 Sep 06:05
Joani T. favorited Leather Owl Bag
27 Sep 06:05
-
 Isabella Toscano favorited Leather Owl Bag
26 Aug 11:11
Isabella Toscano favorited Leather Owl Bag
26 Aug 11:11
-
 skyler w. favorited Leather Owl Bag
26 Jul 15:07
skyler w. favorited Leather Owl Bag
26 Jul 15:07
-
 vivek j. favorited Leather Owl Bag
20 Jul 05:53
vivek j. favorited Leather Owl Bag
20 Jul 05:53
-
 vera hale favorited Leather Owl Bag
19 Jul 06:35
vera hale favorited Leather Owl Bag
19 Jul 06:35
-
 Amanda P. favorited Leather Owl Bag
04 Jul 04:45
Amanda P. favorited Leather Owl Bag
04 Jul 04:45
-
 Dean M. favorited Leather Owl Bag
23 Jun 06:18
Dean M. favorited Leather Owl Bag
23 Jun 06:18
-
 Randy C. favorited Leather Owl Bag
16 May 07:14
Randy C. favorited Leather Owl Bag
16 May 07:14
-
 wondertide favorited Leather Owl Bag
22 Feb 00:35
wondertide favorited Leather Owl Bag
22 Feb 00:35
-
 Step 1
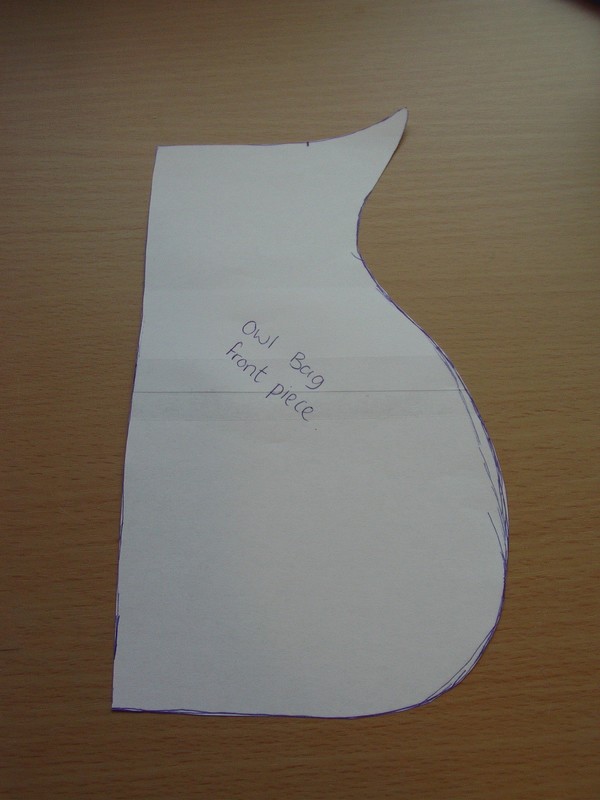
First of all you will need your paper to draw half of your owl shape. Cut it out then use this to flip over and draw your full owl shape (this makes sure both sides are even!) This is the pattern for the front of the bag.
-
 Step 2
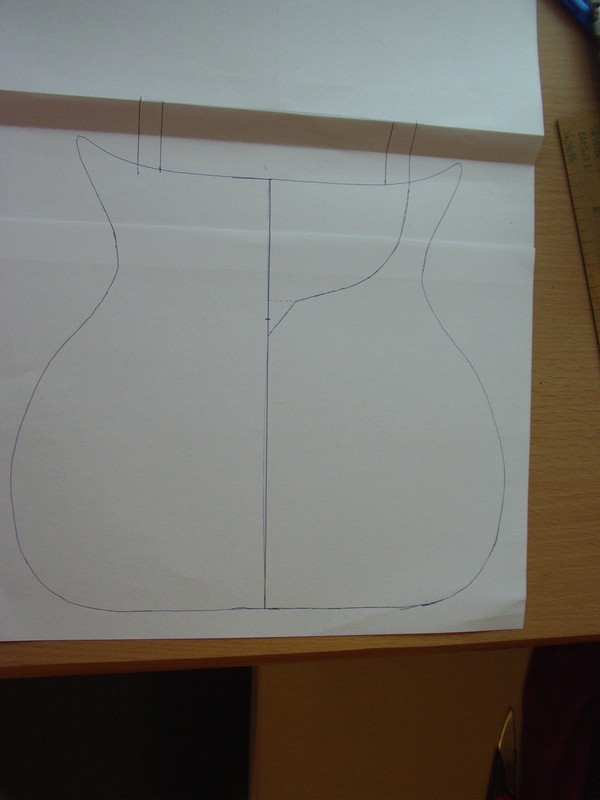
Using The pattern for the front of the bag, trace around then draw an half of the owl's face (this is what will be the flap to close the bag).
-
 Step 3
Now you'll need to decide on the depth of the bag as you'll need to add this amount to the top of the owl shape.
-
 Step 4
Fold the added-on bit in half horizontally, and trace the outline of the owl's face from underneath. Cut this out.
-
 Step 5
Now fold the owl in half vertically and trace the shape of the Owls face on to the other half.
-
 Step 6
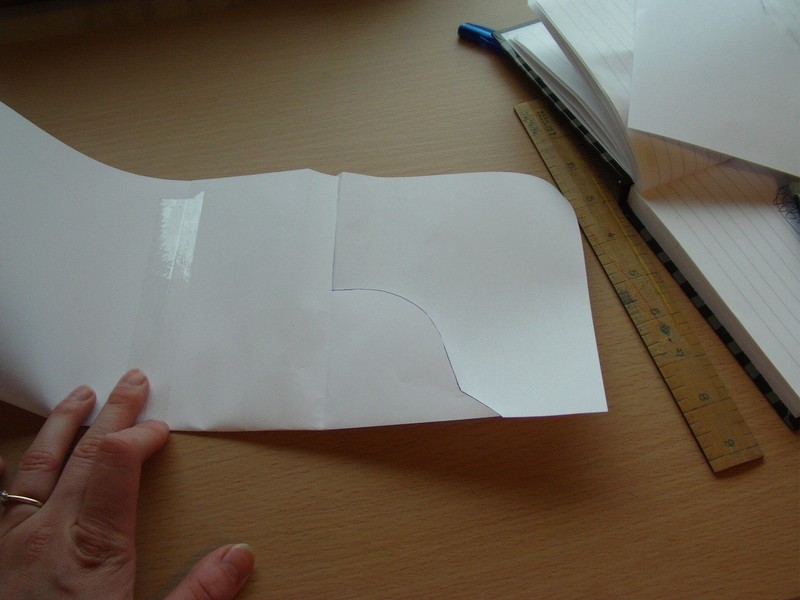
Cut this out. It should look like this
<----
Now cut around the Owl's body too. -
 Step 7
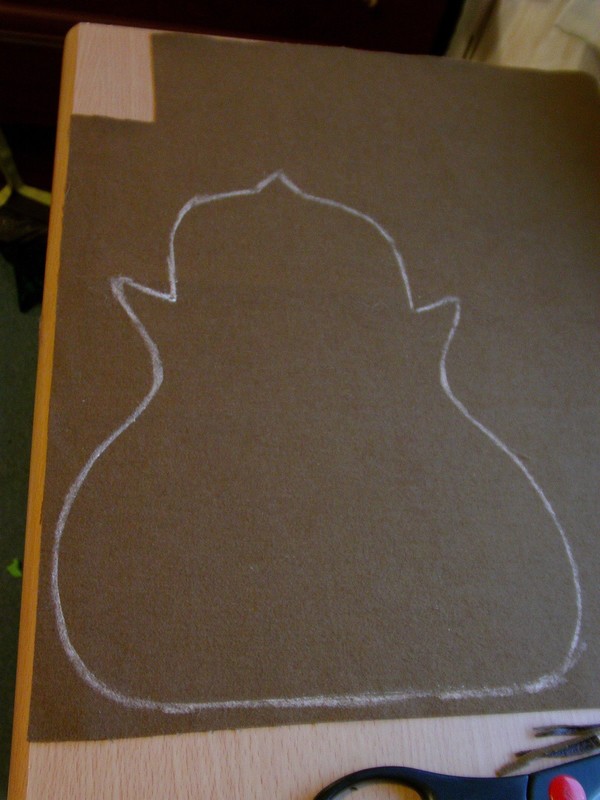
Use thses patterns to transfer on to the reverse side of your leather.
-
 Step 8
and cut them out.
-
 Step 9
Now using your paper, cut out feather shaped to use as a stencil. I made 2 different sizes.
-
 Step 10
Using the stencils, cut out as many feathers as you wish in different colours
-
 Step 11
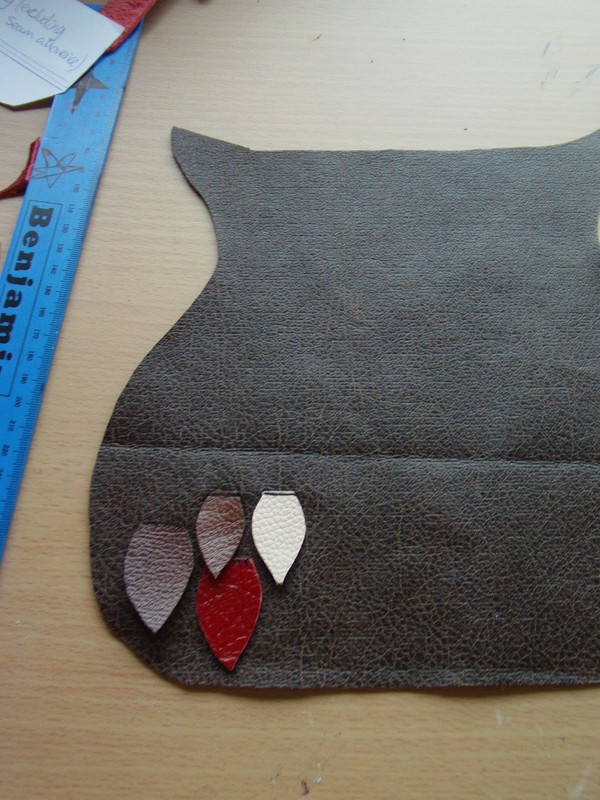
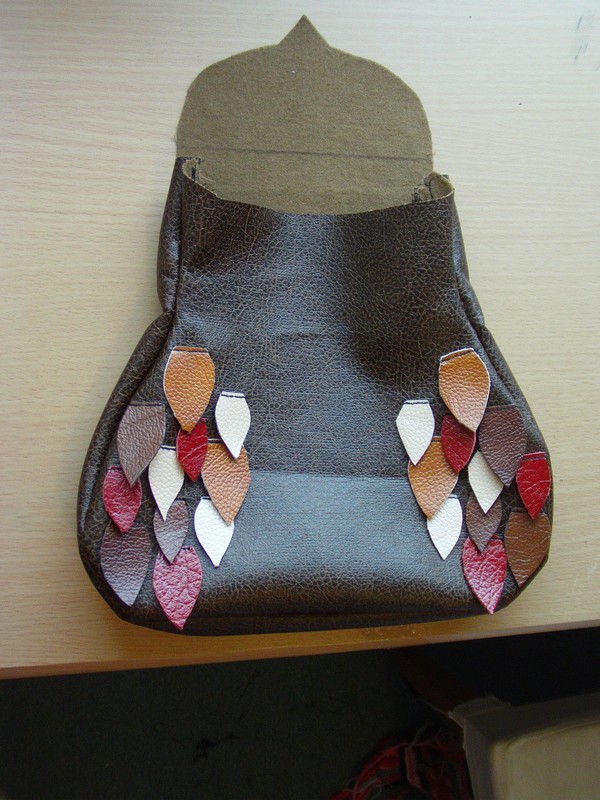
start to sew them in to place (making sure you've changed the needle to the leather one).
-
 Step 12
now see your bag taking shape!!
-
 Step 13
At this point i measured around the piece with string to get the measurement for the strip that will form the depth of the bag.
Cut out this length and for the width use the depth you decided on for the bag.
Mine was 79cm x 3cm. -
 Step 14
Now, with right sides together, sew the strip to the front of your bag.
Do the same for the back.
-
 Step 15
Turn it the right way and check that it's sewn all around the edges.
-
 Step 16
Now i used a belt as a strap, but use what you like. Sew it to the side of your bag.
-
 Step 17
:)
-
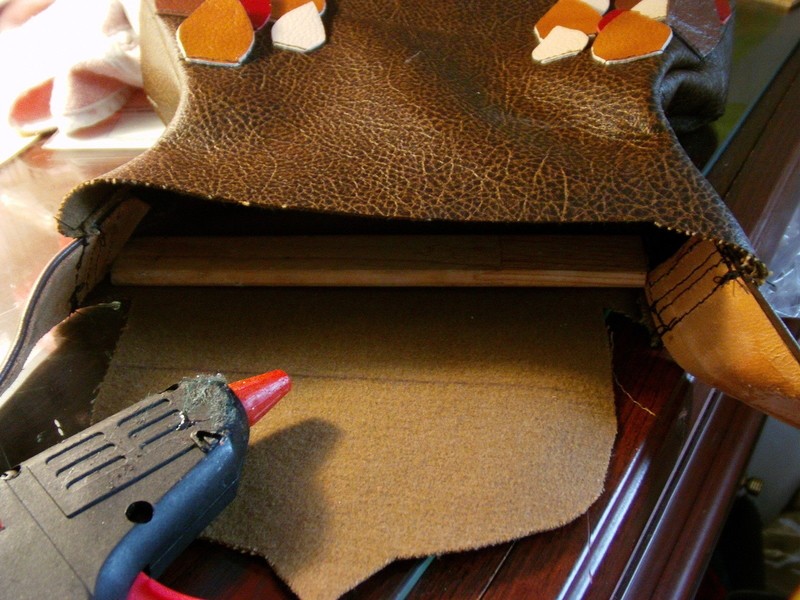
 Step 18
I noticed my bag wasn't holding it's shape very well, so i ironed on interfacing inside and used a piece of wood on the back to hold the shape better.
-
 Step 19
Now i put the magnetic clasp on....
-
 Step 20
And cut a beak out of the leather to cover it up.
-
 Step 21
Finally it's time for the Owl's eyes, Cut a template out then use to cut out in leather. Add smaller Circles then buttons to finish the eyes off.
Glue on to the flap of the bag.*EDIT* the glue doesn't hold to well, so sew to secure properly!
-
 Step 22
FINITO!! You're done :)


Surprisingly it wasn't that hard to sew...but i did spend AGES reading up on what not to do etc so i didn't bugger it up!!
You did an awesome job with the leather as well, you can't tell that it's your first time using the stuff - I'm sure it must have been stupidly hard to sew.
You really deserved that!!!really awesome project
and.... such a great tute as well, thank you for your sharing!±!!!!xxxx