About
Lanyard bracelets. The grown up version!
This project brings back memories, in more than one way. 1) I loved lanyard when I was a kid, and I clearly remember making sooo many keychains and bracelets. 2) This DIY reminds me of S&P's first ever project, the Braided Chain Bracelet, from last summer. And 3) ...Well, my entire bedding set during my Freshman year of college were these exact colors. My comforter was reversible neon green and bright blue, and I even had hangers and towels in the same colors. By the time I graduated I was more into the darker jewel tones, but I still can't resist a good pop of color.
Tags
-
 Key West Witch favorited Lanyard Double Chain Bracelet
12 May 16:18
Key West Witch favorited Lanyard Double Chain Bracelet
12 May 16:18
-
 Corleen M. favorited Lanyard Double Chain Bracelet
30 Aug 23:38
Corleen M. favorited Lanyard Double Chain Bracelet
30 Aug 23:38
-
 Stesnyashka16 added Lanyard Double Chain Bracelet to To-make list
27 Mar 12:45
Stesnyashka16 added Lanyard Double Chain Bracelet to To-make list
27 Mar 12:45
-
 Sylvie M. added Lanyard Double Chain Bracelet to necklace
23 Jan 23:14
Sylvie M. added Lanyard Double Chain Bracelet to necklace
23 Jan 23:14
-
 mochacat favorited Lanyard Double Chain Bracelet
03 Sep 23:50
mochacat favorited Lanyard Double Chain Bracelet
03 Sep 23:50
-
 HylianWriter534 favorited Lanyard Double Chain Bracelet
07 Aug 01:49
HylianWriter534 favorited Lanyard Double Chain Bracelet
07 Aug 01:49
-
 Ashley W. favorited Lanyard Double Chain Bracelet
22 May 13:03
Ashley W. favorited Lanyard Double Chain Bracelet
22 May 13:03
-
 mmotse03 favorited Lanyard Double Chain Bracelet
13 May 03:21
mmotse03 favorited Lanyard Double Chain Bracelet
13 May 03:21
-
 banu added Lanyard Double Chain Bracelet to Cool stuff!
30 Mar 06:00
banu added Lanyard Double Chain Bracelet to Cool stuff!
30 Mar 06:00
-
banu favorited Lanyard Double Chain Bracelet
30 Mar 06:00
-
 Step 1
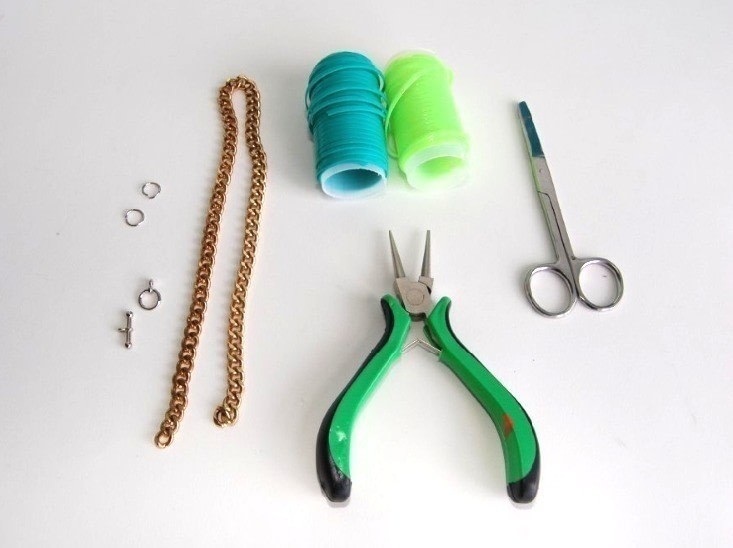
Supplies:
- Chain, twice the length of your wrist
- Lanyard, 1-4 colors
- Scissors
- Jewelry pliers
- Jump rings
- Toggle or clasp closures -
 Step 2
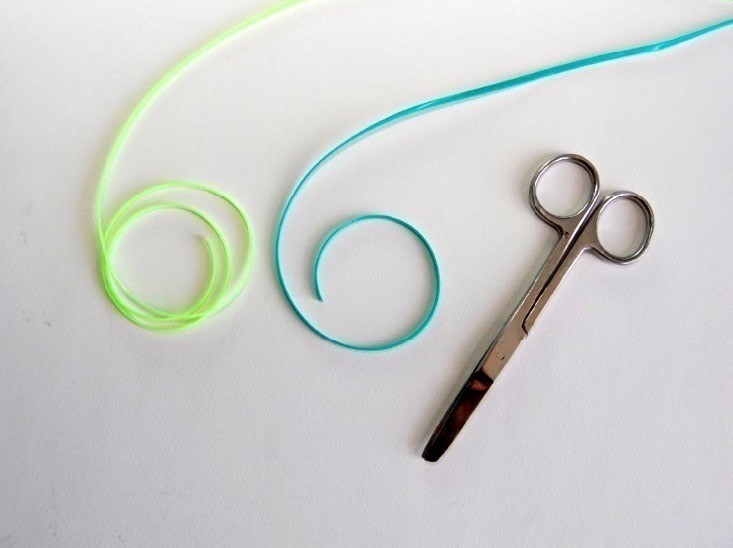
1) Cut two strands of lanyard, about 60 inches each
-
 Step 3
2) Fold both strands in half and tie a knot. Separate the strands like above; I used two colors so it'd be easy to follow along.
-
 Step 4
3) Fold the chain in half. Insert the two middle strands - one of each color/side - into the center link of the chain.
-
 Step 5
4) Take the outer blue strand and insert it directly through the next empty link. It should end up "behind" the chain.
-
 Step 6
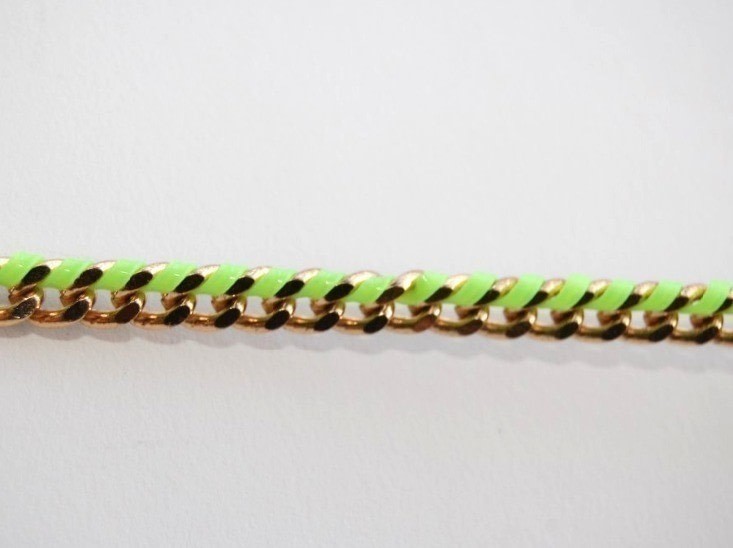
5) Fold it over the chain and towards the left, and insert it through the next empty link. Keep repeating, and you'll end up with something like this. Make sure you pull pretty tight; the slippery finish of lanyard makes it likely to unwravel and loosen from the chain.
The chain might be kind of wonky while you'r doing this, but just keep on going. You can straighten everything out later.
-
 Step 7
6) Repeat until you reach the end of the chain.
-
 Step 8
7) Take the inner blue strand, and bring it under the chain and through the next empty link. I placed an arrow where the first "stitch" was.
-
 Step 9
Closeup.
-
 Step 10
8) Keep repeating until you reach the end of the chain. You'll want to pull tight like you did with the first strand, but make sure not to pull TOO tight. You'll later be weaving the neon green through the blue lanyard, in order to connect the two sides.
-
 Step 11
9) Take the outer strand of the second color - in this case neon green - and start weaving the lanyard through the chain. You're essentially repeating steps 4 and 5.
-
 Step 12
10) Repeat until you reach the end of the chain.
-
 Step 13
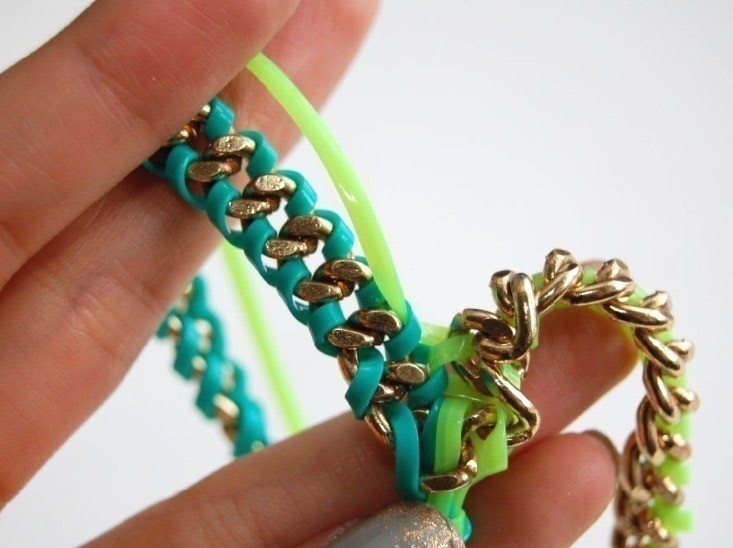
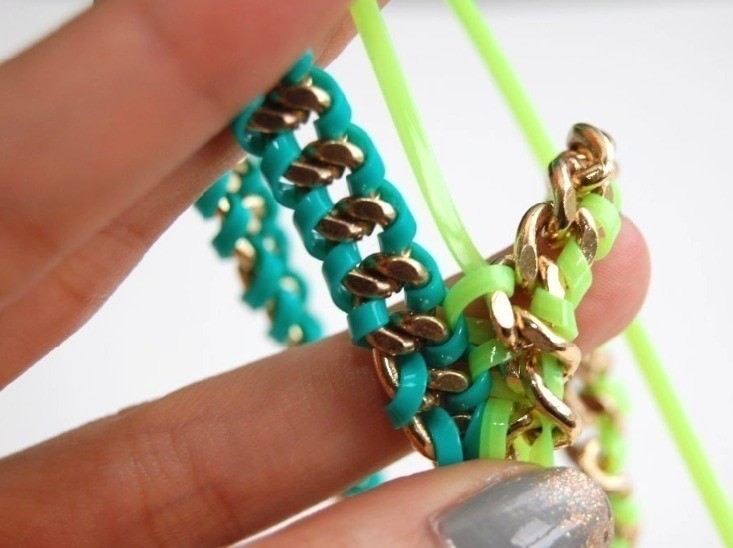
11) Taking the inner/second neon green strand, insert it through the next empty chain link. From here on you'll be inserting it through the adjacent blue stitch, then bringing it back into the chain.
-
 Step 14
I found it was a lot easier to work with upside down!
Green goes through the blue...
-
 Step 15
And then down through the next empty link.
-
 Step 16
12) When you're done with both sides, tie the strands off with tight knots, and trim.
-
 Step 17
Pull tight, and repeat.
-
 Step 18
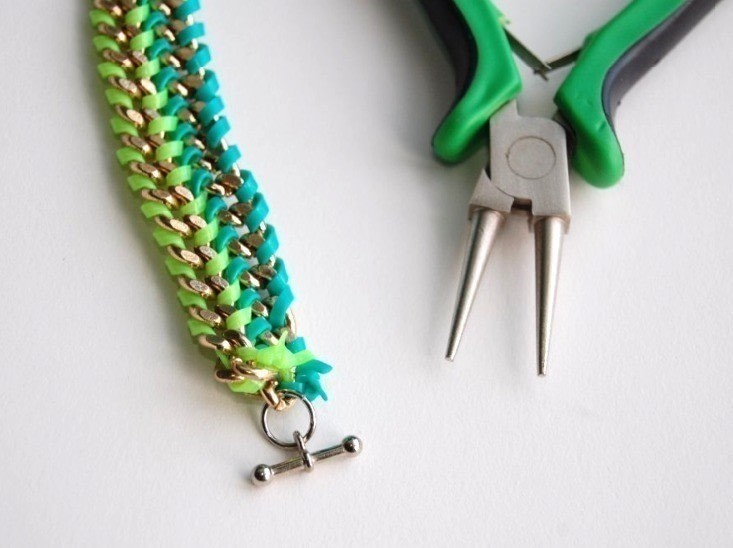
13) Add the jump ring and bracelet closure of your choice.
-
 Step 19
14) Go back to the other side of the bracelet, unwravel the first knot you made and cut the two loops. Tie them off with tight knots and trim.
-
 Step 20
15) Add the other half of the bracelet closure.
-
 Step 21
Finished product!
-
 Step 22
I had to make a black and gold version...the classic color combo that I love so much. The black lanyard kind of reminds of me patent leather, actually.
I'd really recommend using a thick, heavy duty curb chain for this. However, keep in mind that this probably means it's a bit hard to cut. You might need a wire cutter or jewelry pliers - but probably a wire cutter - to trim the chain. If you get the chain cut in a hardware or craft store, I'd also recommend maybe having the employee further trim the chain for you in the lengths that you need (again, twice the length of your wrist), since you're there anyway. I lucked out and happened to have two strands of this chain left in the length I needed...but I know this chain is impossible to cut with a pair of scissors or pliers. In other words: don't hurt yourself trying to cut this really heavy chain!
-
 Step 23
Enjoy! :)


Comments