About
Upcycle a boring bangle bracelet into a sophisticated lace one!
I got inspired by a bracelet I found at this link http://www.giftwrappedandgorgeous.co.uk/product--68.htm, and realized I had a huge glass bangle I never wore, as well as some lace that has been sitting around for a while. Thus, my own version of the lace bangle was born! Also, don't be scared by the time it takes, it's only that long because the glue needs to dry.
-
 InterpretThat favorited Lace Covered Bangle Bracelet
28 Feb 12:17
InterpretThat favorited Lace Covered Bangle Bracelet
28 Feb 12:17
-
 Bevvii D. favorited Lace Covered Bangle Bracelet
22 Nov 02:43
Bevvii D. favorited Lace Covered Bangle Bracelet
22 Nov 02:43
-
Bevvii D. added Lace Covered Bangle Bracelet to 3Y3 <3
22 Nov 02:40
-
Jodie K. added Lace Covered Bangle Bracelet to rings
23 Jun 20:04
-
 eFenuska added Lace Covered Bangle Bracelet to Jewelry and Accessories
09 May 18:57
eFenuska added Lace Covered Bangle Bracelet to Jewelry and Accessories
09 May 18:57
-
 Alice N. added Lace Covered Bangle Bracelet to Accessories
21 Jan 19:55
Alice N. added Lace Covered Bangle Bracelet to Accessories
21 Jan 19:55
-
 Anika W. favorited Lace Covered Bangle Bracelet
04 Nov 13:41
Anika W. favorited Lace Covered Bangle Bracelet
04 Nov 13:41
-
 Step 1
Cut out a piece of lace that is long enough to go all the way around your bracelet and wide enough to go around the width of the bracelet, plus a little bit extra in both directions.
-
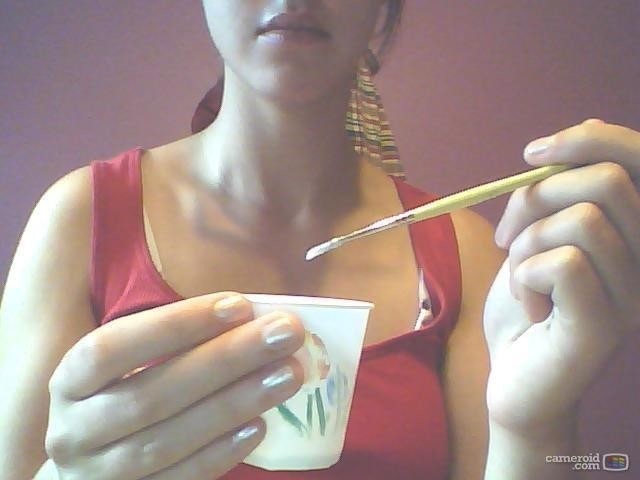
 Step 2
Grab your decoupage glue or equivalent. I don't have modgepodge and am too cheap to buy any, so I used a mix of three parts white glue, one part water, which worked fine for me.
-
Step 3
Coat about an inch of your bracelet in the glue, then press down the edge of your lace on it, making sure the lace is sticking. Repeat this action- add glue, press down lace, all the way around. When you get all the way around, leave about a half inch of overlap. If you have extra, cut it off. If the glue isn't drying very fast, you may want to use a hair dryer to speed up the process.
-
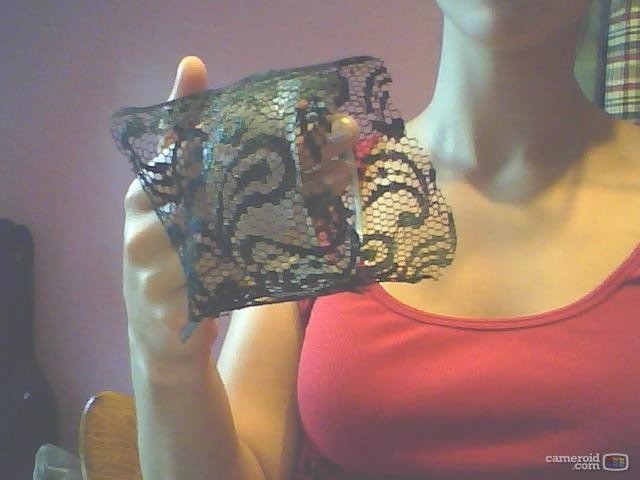
 Step 4
This is what you should have so far. If you have a lot of excess on the edges, which I did, trim it down a little, BUT make sure that you don't cut off too much. There should be enough so that when you fold both sides of extra lace to the inside of the bracelet, the edges slightly overlap.
-
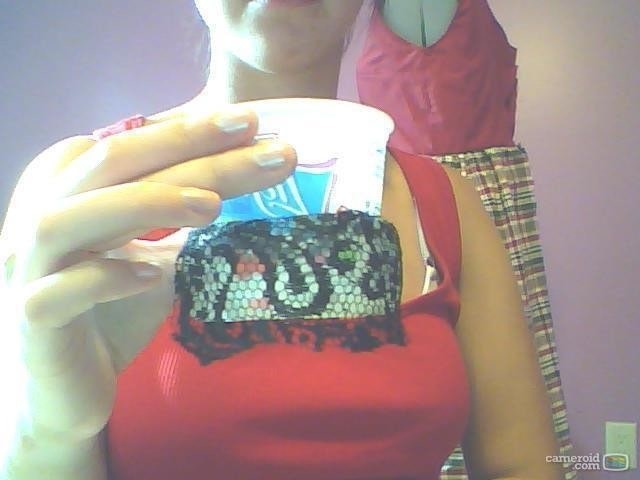
 Step 5
Coat one lengthwise half of the inside of the bracelet in glue. Fold the extra lace on that side down.It's probably not staying down, but no fear! Grab a small yogurt container, can, or round object that fits snugly inside your bracelet, and push it inside the bracelet. I liked using the yogurt cup because then I could use the end of my glue brush to tuck in lace that was poking out. Let dry for a few hours, the longer the better I'd say, but at least 2. After that side is dry, repeat for the other side.
-
 Step 6
And this is what you should get! Pretty cool, right? I think I might use some clear nail polish just to give it a glossy top coat. I'd love to see this done with colored bangles, or smaller ones!