About
How to make a cute beret from lace fabric
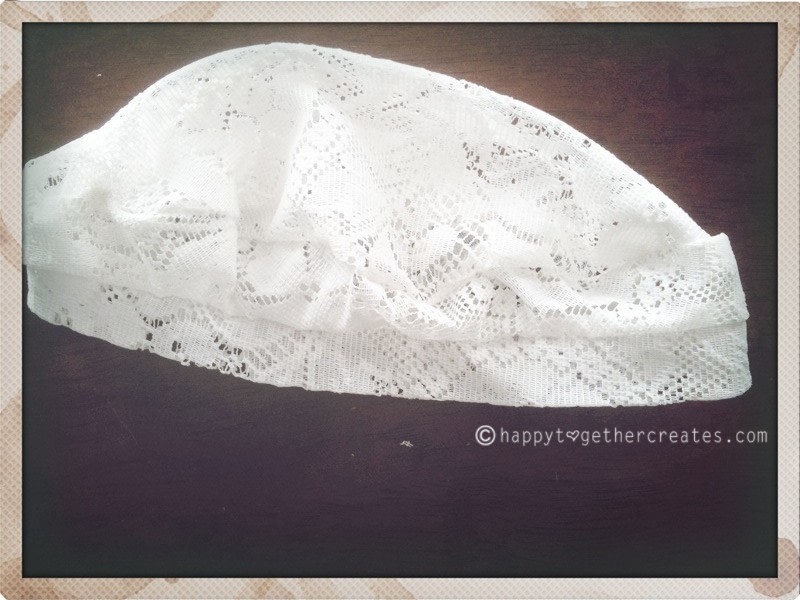
This is a tutorial on how to make a beret from lace. I used an old curtain I found at a thrift store. It was perfect for this!
Tags
-
 Kimya J. favorited Lace Beret
25 May 23:54
Kimya J. favorited Lace Beret
25 May 23:54
-
 Cheryl H. favorited Lace Beret
28 Sep 10:28
Cheryl H. favorited Lace Beret
28 Sep 10:28
-
 Maxine M. added Lace Beret to To-make list
18 Apr 05:20
Maxine M. added Lace Beret to To-make list
18 Apr 05:20
-
 Alex B. favorited Lace Beret
25 Dec 22:43
Alex B. favorited Lace Beret
25 Dec 22:43
-
 Samantha C. favorited Lace Beret
11 Oct 21:11
Samantha C. favorited Lace Beret
11 Oct 21:11
-
 julie.mckenzie.7503 favorited Lace Beret
24 Apr 22:18
julie.mckenzie.7503 favorited Lace Beret
24 Apr 22:18
-
Megan R. added Lace Beret to New Projects
15 Apr 07:19
-
Emmy S. favorited Lace Beret
07 Apr 13:06
-
 Miss_Fit added Lace Beret to Hats
30 Mar 04:07
Miss_Fit added Lace Beret to Hats
30 Mar 04:07
-
Miss_Fit favorited Lace Beret
30 Mar 04:07
You Will Need
-
 Step 1
Start by measuring the circumference of your head. Next determine the radius of the circle. The equation to use is:
radius = circumference/ (2 x pi)So mine looked like this:
radius = 23"/6.28 which rounded up equals about 3.7"
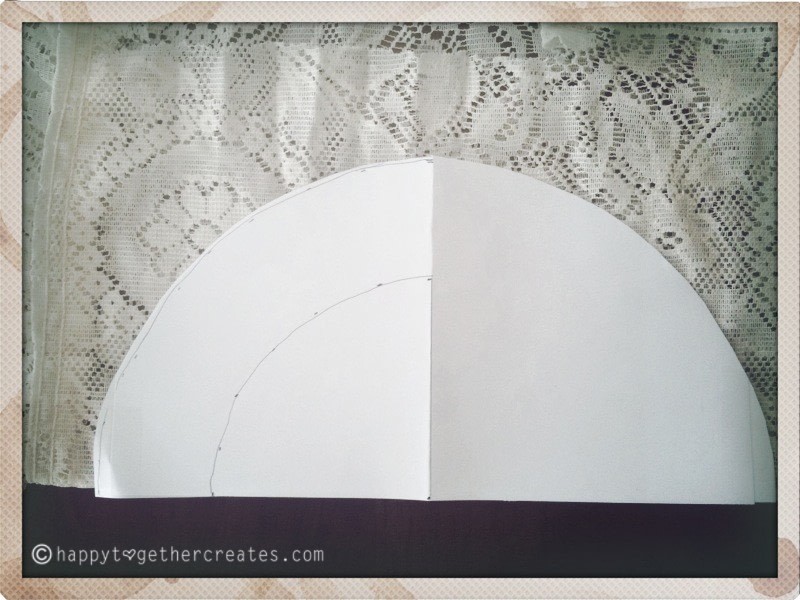
Now you need to grab some paper, pencil, and something to create a circle with (either a ruler or compass). I took one piece of printer paper and folded it in half so I could make a half circle. I took a ruler and made various dots all 3.7" inches away from edge of the paper on the fold. -
 Step 2
Then I connected the dots. Of course, you can use a compass and make this easier.
-
 Step 3
Now you are going to make another 1/4 of a circle 2.5" further from your original. So just add 2.5" to your radius for the new radius. Then I just did the little dots the same way and connected them. (I realized I did have to add some more paper so it would fit though :).
-
 Step 4
Then I folded the paper in half on the original fold I made and cut out the half circle on the furthest line.
-
 Step 5
Once opened, it's a half circle to use.
-
 Step 6
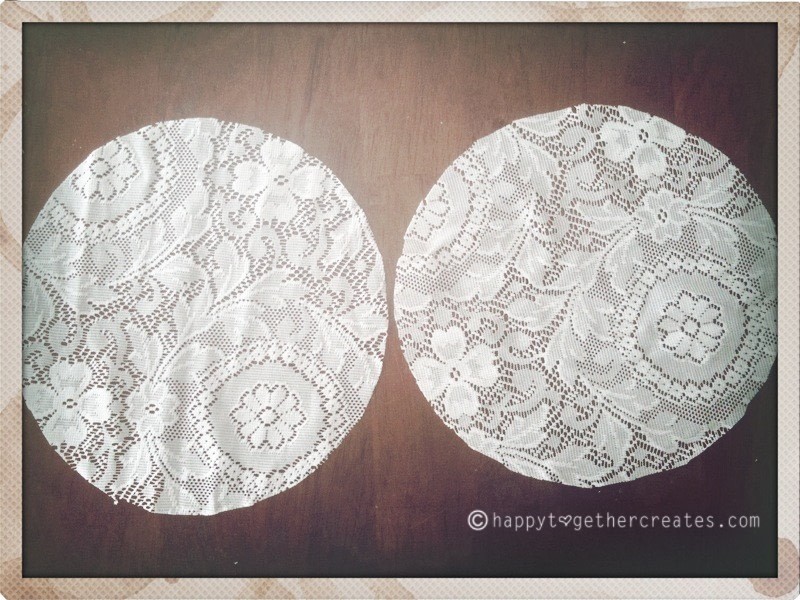
Now fold your fabric in half and place your pattern on the fold. Cut it out. Repeat one more time.
-
 Step 7
You now have two circles.
-
 Step 8
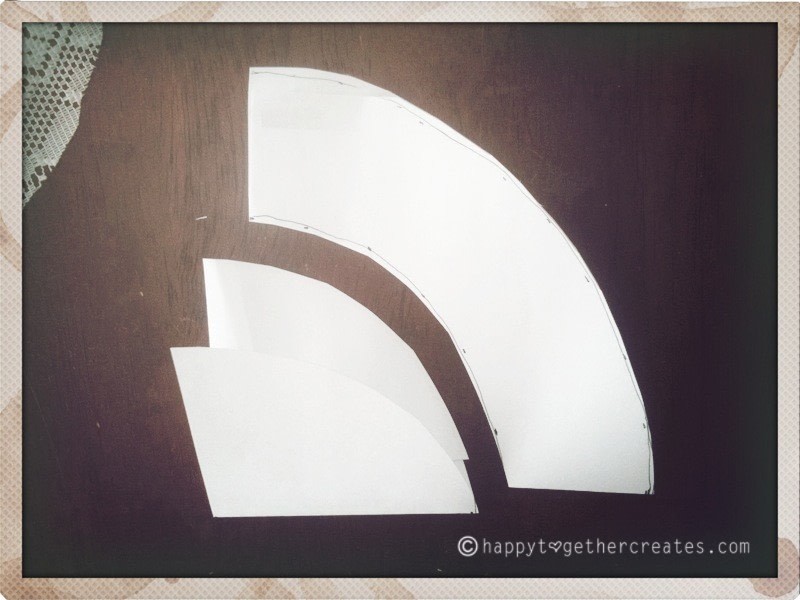
Fold your pattern piece in half once again and cut out the first smaller half circle you created.
-
 Step 9
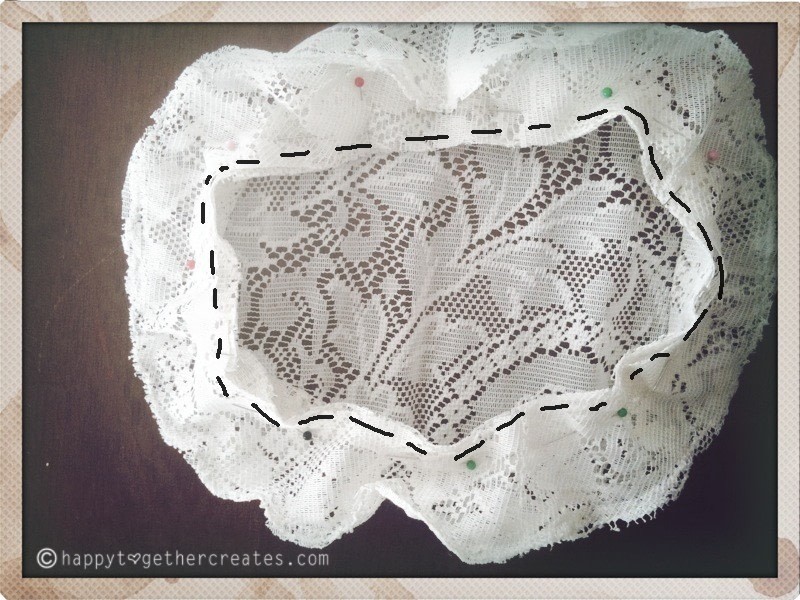
Open and place pattern piece on one of the circles and cut out the middle.
-
 Step 10
It will look like this.
-
 Step 11
Now place that piece on top of the other circle, right sides facing, and pin together. Sew around the edges with a small straight stitch. Go over the raw edge with a v-stitch if you like.
-
 Step 12
Now you need to cut the band part. Pull on your fabric to determine which way the lace stretches some. You want the stretch to go horizontally. Then cut a piece out that measures (circumference of head + .5") x 3". The longest length (the head size + .5") should be cut horizontally, where the stretch is.
Since I was using a curtain, I just cut off a piece at the top. Since it was already folded in half, I only cut it to be 1.5" tall though.
-
 Step 13
So I just folded it in half, right sides facing, and sewed together. But, since most of you probably won't do that, take your piece of fabric and fold it in half long ways (short ends meet), right sides facing, and sew together. Then fold in half height wise (this will still be a circle, but the bottom will be the fold and the top will be the two raw edges).
-
 Step 14
With your hat still wrong side out, pin the band to it. The raw edges should all meet. I found pinning in two spots, opposite of each other, then pinning the rest made it easier with this type of lace material.
-
 Step 15
Once it's pinned, sew together with a small straight stitch. V-stitch around the raw edge if you like.
-
 Step 16
And that is one lace beret ready to be worn! I like to wear mine to the side, but play around with it and see how it works best for you :) I would also suggest maybe using one or two bobby pin to help keep it in place.