


About
why buying a Koi for 1000 of Pounds, when you can make your own, individual Koi almost for free?
A project on this site was my inspiration for this. And since it was the upcoming birthday of my husband, i decided to do this. I am not making a bit tutorial but i will post any links, that helped me to do this.
Of course you can adjust the size of the paper, the frame and such as you wish.
Ps: I actually wanted to upload the videos instead of links in the description. But the upload didn't stop. So i decided to do it that way. The same problem was with the pictures.
Be careful with the hot glue. You may burn your fingers.
Tags
-
 Kursus 7. favorited Kois On A Stretcher Frame
10 Dec 05:58
Kursus 7. favorited Kois On A Stretcher Frame
10 Dec 05:58
-
 Melissa Beth favorited Kois On A Stretcher Frame
06 Nov 03:46
Melissa Beth favorited Kois On A Stretcher Frame
06 Nov 03:46
-
 Shawnshawn D. favorited Kois On A Stretcher Frame
06 Jul 23:48
Shawnshawn D. favorited Kois On A Stretcher Frame
06 Jul 23:48
-
 Susan P. favorited Kois On A Stretcher Frame
20 Feb 20:34
Susan P. favorited Kois On A Stretcher Frame
20 Feb 20:34
-
Lee B. favorited Kois On A Stretcher Frame
18 Aug 02:50
-
 Aprilia N. favorited Kois On A Stretcher Frame
19 Jun 16:16
Aprilia N. favorited Kois On A Stretcher Frame
19 Jun 16:16
-
 FfionJayneWMMC favorited Kois On A Stretcher Frame
11 Feb 10:15
FfionJayneWMMC favorited Kois On A Stretcher Frame
11 Feb 10:15
-
 C.Rami favorited Kois On A Stretcher Frame
10 Feb 00:26
C.Rami favorited Kois On A Stretcher Frame
10 Feb 00:26
-
 SprinklePopCupcake (Sprinkles) favorited Kois On A Stretcher Frame
09 Feb 04:14
SprinklePopCupcake (Sprinkles) favorited Kois On A Stretcher Frame
09 Feb 04:14
-
 Jessica A. favorited Kois On A Stretcher Frame
07 Feb 00:03
Jessica A. favorited Kois On A Stretcher Frame
07 Feb 00:03
-
Step 1
this was the small water lily i made. if you go to http://www.besserbasteln.de/Origami/Pflanzen%20falten/seerose.html you can see the tutorial on how to fold it.
-
Step 2
here you see the bigger water lily i have made. http://www.origami-kids.com/flower-video/lily-4/origami-water-lily-modular--A4XoZYwl3RZo.htm
-
Step 3
Here you will find the most important thing of the project. The folding for the Koi. http://www.youtube.com/watch?v=FW2V3WZTwvw
-
Step 4
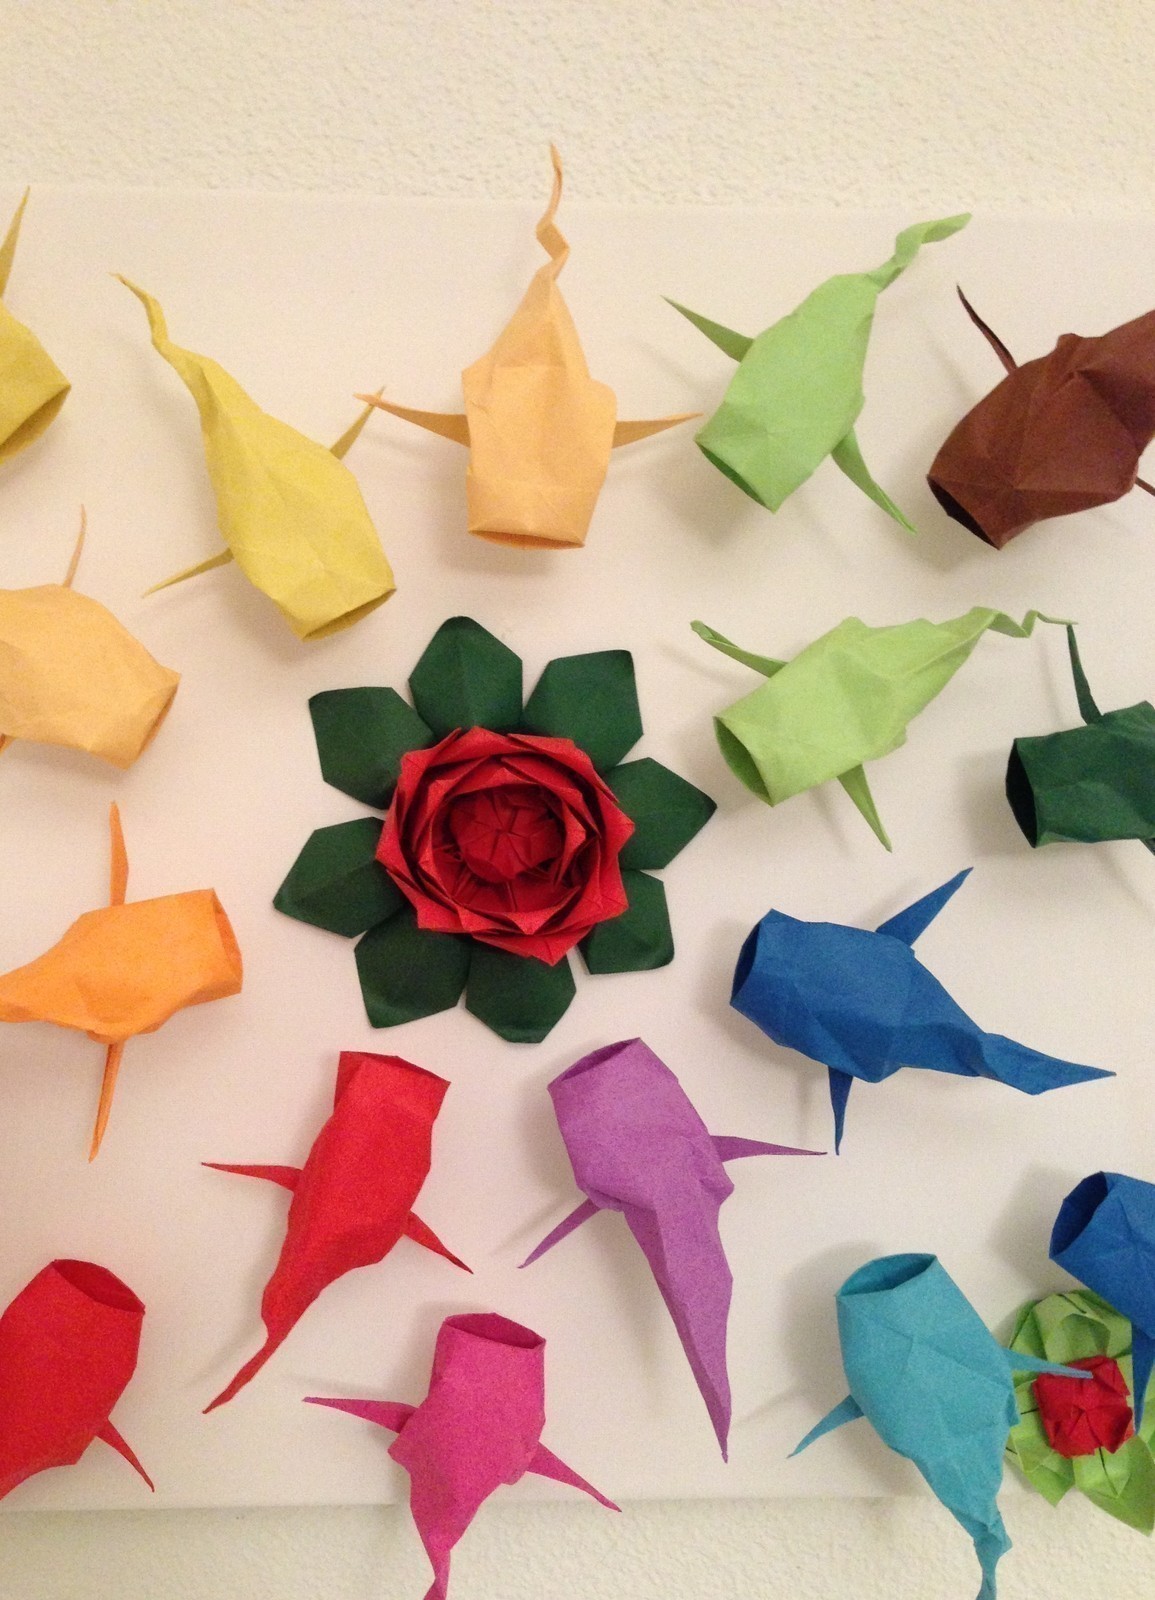
First of all you need to think about the colour and amount of the Kois and fold them. I folded around 20 and it took me about 2-3 hrs to fold them.
-
Step 5
The next step, if you want this, is to fold the water lilys.
note: to hide the wire in the bigger lily, just fold the small part of the smaller water lily again, and glue it into the middle of the bigger one.
-
Step 6
to see how it looks best, place everything on the frame and adjust it until you like the look of it. then glue the big lily on it.
-
Step 7
make some kind of stand for the Kois with the wire and glue it to the bottom of the Koi.
the other you have to glue onto the frame (obviously). hold it for a few seconds to make sure it sticks perfectly.
-
Step 8
for the end, glue your small water lily onto the frame. of course this step is optional. i just thought, it might look nice and fills a blank spot.
-
Step 9
your done. hang it up your wall or give it away as a present.
Comments

