


About
We be Jammin' (and Cannin') this Holiday!
I first tried canning just to see if I could do it and found a new love affair. If you have never canned anything in your life, this is by far the easiest way to start. With minimal supplies you can have a healthy, home made jam that can keep up to a year.
It should be noted there is some prep work to be done and your jam needs to be tended to, but this is very forgiving. Enjoi.
*** When selecting fruit for your jam make sure you pick items that are ripe but not overly so. This will ensure the maximum amount of flavor and vitamins. Also if this recipe can be used to process tough skinned fruits like peaches and mangos - Remove peel and core first!***
-
 Mochi Mochi favorited Jam!
19 Oct 18:07
Mochi Mochi favorited Jam!
19 Oct 18:07
-
 Step 1
You should prep your jars in advance. While some recipes call for just washing your jars in hot, soapy water OR processing in a water bath, I like to do both. Place your jars and rings (****NOT THE LIDS) in the water bath (large stock pot with spag. strainer) and set to boil for at least 10 minutes. The lids have a rubber ring and can deteriorate in high heat, so wash in hot, soapy water ONLY!
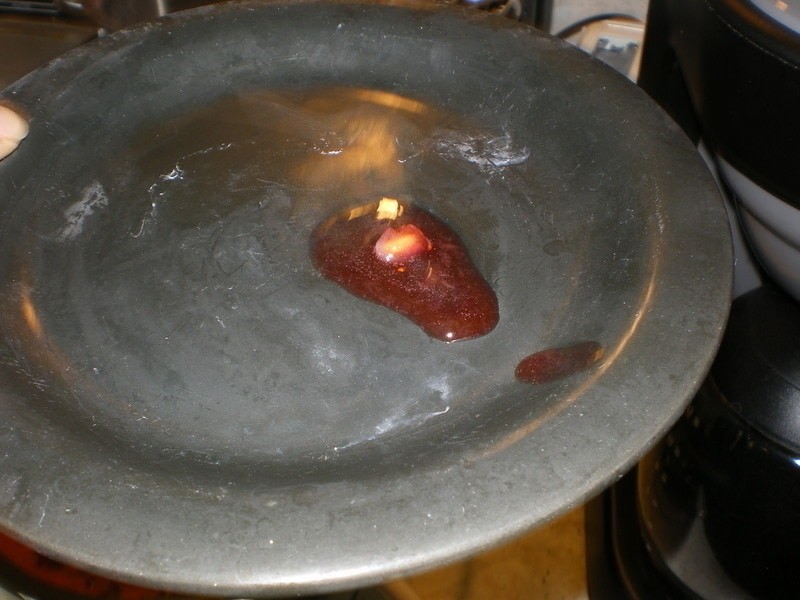
Turn off heat and allow the jars to stay in water until you are ready to fill. This is so the jars don't crack when you hot pack them.One additional step that is not neccesary but helpful: place a small saucer in the freezer. Just do it. In later steps the mystery will be resolved. promise.
-
 Step 2
Here are some of the tools needed to help make your experience easier, although I didn't have all the fancy stuff when I first started. The two blue items are a set of jar tongs used to lift and lower jars into the water bath. The funnel is of course to keep you from getting too sloppy. Pectin (the little yellow box) is used as a presevative, but is relativly all natural. It is not necessary but drastically reduces the chance of giving yourself food poisoning. the wine bottle opener is for daytime winos (like me. j/k).
-
 Step 3
Remove the green tops of the strawberries and slice in quarters. For the Pom I found that seperating the red fruits from the white rind is easier if you do so in a bowl of water. The fruit sinks and the rind floats. easy peasy lite, lite and breesy.
-
 Step 4
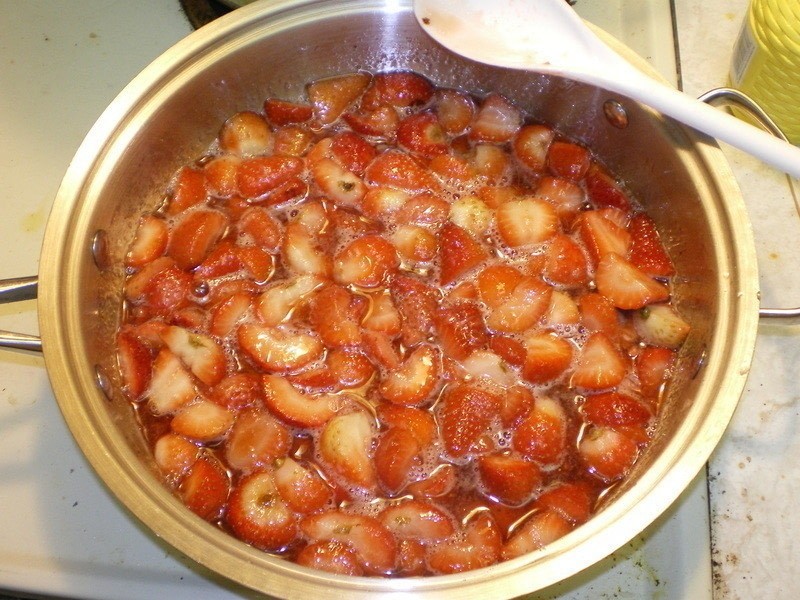
Over medium heat combine sugar (1.5 cups for me), lemon juice and strawberries. The water in the berries will be all you need (adding additional water will result in soup.) Continuously stir until the sugar dissolves (about 5-8 minutes) refrain from turning up the heat, you will burn your berries.
-
 Step 5
Add 1 box of pectin for every 4 quarts of berries. I halved the recipe for a smaller batch of jam, thus I only used 1/2 box. Continue to simmer for another 2-4 minutes, stirring occasionally.
-
 Step 6
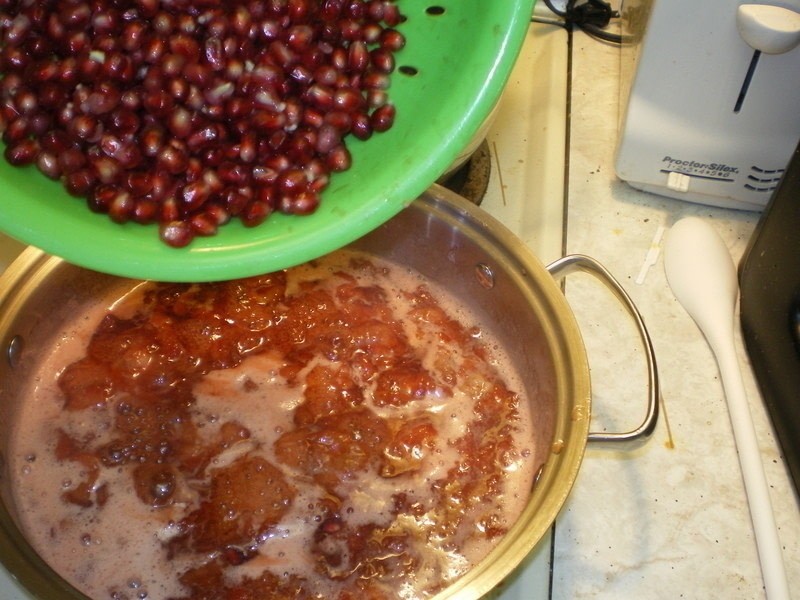
The strawberries should have a mushy texture and be easily crushed by your spoon. Add the Pom seeds (so pretty). Simmer on medium heat for 5-7 minutes. I used a potato masher to crush the entire mixture but your spoon will do fine. If you want a little more substance to your jam, don't pulvarize or you could again end up with soup.
-
 Step 7
While the mix is simmering, pull your jars out of the water bath (with tongs or otherwise). They will be very hot and caution should be exercised. Set aside and refrain from touching the inside or rim of the now setrile jars.
-
 Step 8
The mystery of the plate-in-freezer is revealed here. Bring the mix to boild for about 1 minute the remove from heat. Take a spoon of the mix and place on the plate (after taking out of the freezer of course). Wait about 20-30 seconds then tip the plate. If the mix creeps slowly, then your gel is set. If the mix runs wildly down the plate, place the saucepan back on boil for another minute, stirring. Test again after a minute alternating until the mix has gelled. This step is to ensure your mix is cooked enough to produce jam. It works.
-
 Step 9
Spoon the hot mix in the jars, leaving about 1/4 "headspace" (fancy word for gap at the top of jar). I had enough to fill 1 and 3/4 jars. You can have more headspace in a jar, however use this within a week to avoid getting sick. With the handle of the spoon, maneuver air bubbles to the top of the jar.
-
 Step 10
Wipe the rim of the jar and secure the two part lids on. Never reuse the rubber rimmed lids as they really only hold a good seal once. The rims can be reused, provided they are rust free and in general good shape. Screw lids on as tight as you can by hand. Don't be a savage, they will come a little loose when you boil anyway.
-
 Step 11
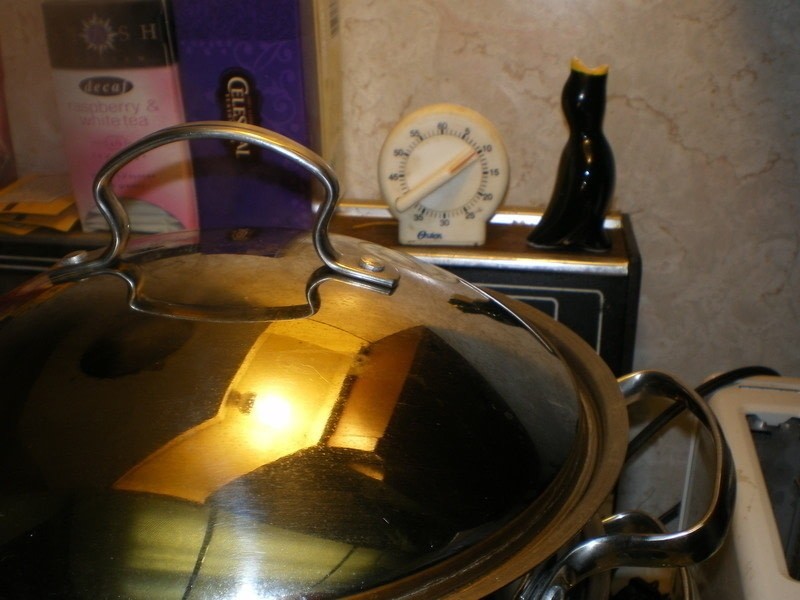
Use your trusty jar tongs and place in water bath that is at a full boil. Process jars for at least 10 minutes at full rolling boil, adding 1-2 minutes for every thousand feet of altitude. Exact times can be googled.
-
 Step 12
Make sure there is at least 1 inch of water above and below(place on rack or spag. strainer like me) so water circulates freely. You run the risk of the jars cracking if they are placed directly on the bottom of a pan. Also make sure there is space between jars so they don't bang together and break.
-
 Step 13
After processing for alloted time, remove the jars and allow to cool at room temprature for at least 24 hours. The jars I purchased have a button (like a jar of store bought pickles) and when you remove from water bath you should hear an audible pop. This means you got a good seal. It may take a few minutes, you can also check by pressing on the middle of the lid. It should not pop back if the seal is right. Tighten down lids. If not, get a new lid and re-process. DO NOT re-use rubber rimmed lids. I can't say that enough, you run the risk of making yourself really sick. If theres a question about the seal err on the side of caution and re-process.
-
 Step 14
After cool store for up to a year in a cool dry place (cupboard)unopened. Make sure to label your masterpieces and date them. Always check for mold growth and discard the contents if any sign of mold is present or a foul odor upon opening. The nice thing about canning is as long as there are no defects in the jars (nicks on the rim, cracks etc.) you can keep using them after you enjoi their wondorous insides.


CO + K User
I should try this now that I'm a mom...and keep the tradition going. Thanks for bringing back great memories!