
About
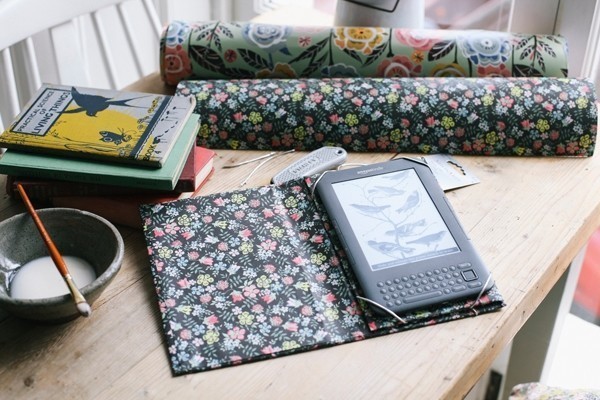
Sew your own iPad case
-
 Shelley S. added I Pad And Kindle Case to kindle
05 May 22:43
Shelley S. added I Pad And Kindle Case to kindle
05 May 22:43
-
Sally y. favorited I Pad And Kindle Case
20 Jul 00:25
-
 Chudames favorited I Pad And Kindle Case
01 May 01:59
Chudames favorited I Pad And Kindle Case
01 May 01:59
-
 Sarah S. added I Pad And Kindle Case to Cheap things to try
23 Mar 01:47
Sarah S. added I Pad And Kindle Case to Cheap things to try
23 Mar 01:47
-
Mariana Z. favorited I Pad And Kindle Case
18 Mar 05:57
-
 artpanda18 favorited I Pad And Kindle Case
14 Mar 16:29
artpanda18 favorited I Pad And Kindle Case
14 Mar 16:29
-
 Marica M. favorited I Pad And Kindle Case
06 Mar 21:12
Marica M. favorited I Pad And Kindle Case
06 Mar 21:12
-
 RandomActsOfCraftyness favorited I Pad And Kindle Case
24 Feb 11:24
RandomActsOfCraftyness favorited I Pad And Kindle Case
24 Feb 11:24
- zombibi favorited I Pad And Kindle Case 22 Feb 07:09
-
Calah L. favorited I Pad And Kindle Case
31 Jan 17:26
-
 Step 1
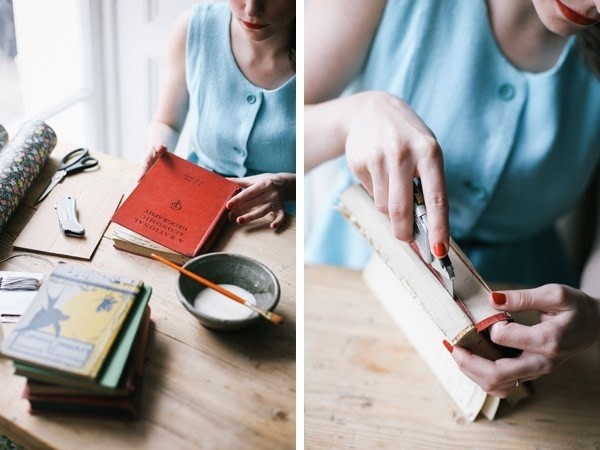
1. Carefully cut out the pages from your hardback book – use a very old and very dull book so you don’t feel as bad tearing it up!
-
 Step 2
2. Cut a piece of paper about half an inch larger than the hardback book’s cover when laid flat. Glue the paper to the outside of the cover, folding the excess edges over the inside of the cover and smoothing out the paper to avoid any air bubbles or wrinkles. Secure the inside edges with sticky tape.
-
 Step 3
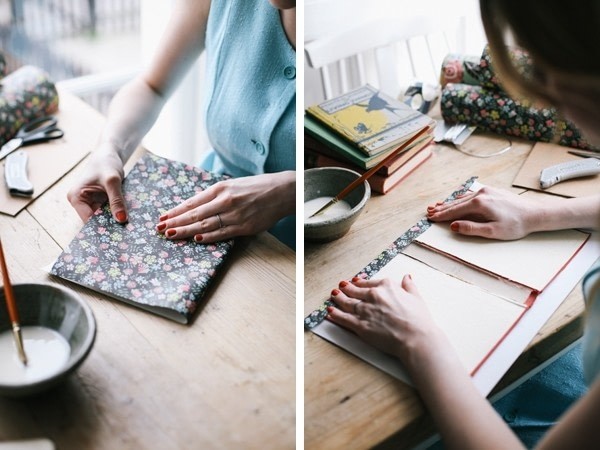
3. Cut another piece of paper which is very slightly smaller in height than the inside of your book cover. In respect of the width, the paper only needs to be about two thirds of the width of the cover – you’ll see why in a moment! Glue the paper to the inside of the cover, making sure to cover the left side and center in full.
-
 Step 4
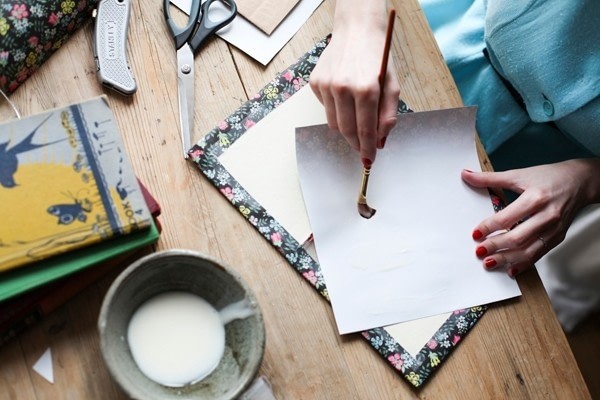
4 & 5. Cut a piece of cardboard just a little smaller than the right side of the book cover – this will become the base for your Kindle / iPad / other electronic whatnot and is the reason why you didn’t need to cover the entire inside of your case! Cover the cardboard in paper (you could use a contrasting paper if you fancy) and secure the edges with lots of sticky tape – no need to worry if the backside of the cardboard piece is messy, you won’t be able to see it once it’s finished.
-
 Step 5
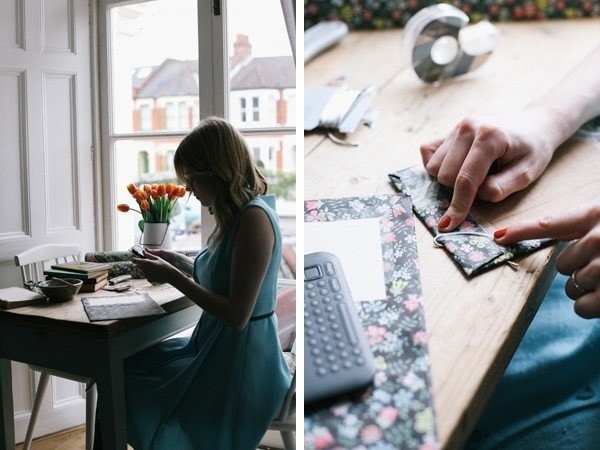
6. Now the tricky part. Take some elastic and wrap it around your kindle / iPad and the cardboard piece to measure how much you will need for each corner. Be careful to ensure that the elastic pieces aren’t too long – they need to be slightly on the small side, so as to allow the elasticity to hold your kindle / iPad in place. Wrap the elastic around each corner of the cardboard and secure with plenty of sticky tape.
-
 Step 6
7 & 8. Once the four elastic corners are in place, measure a long piece of elastic which will wrap around the entire cover to keep it closed while knocking around in your bag. Stick to the backside of the cardboard piece, about an inch or so from the right-hand side (if facing the right way). Using lots and lots of glue, stick the cardboard piece to the right side of the cover. Plop a big pile of books on top and leave to dry (overnight preferably).
-
 Step 7
Et voilà! A pretty custom-made case for your kindle or iPad which costs next to nothing and looks fabulous!