


About
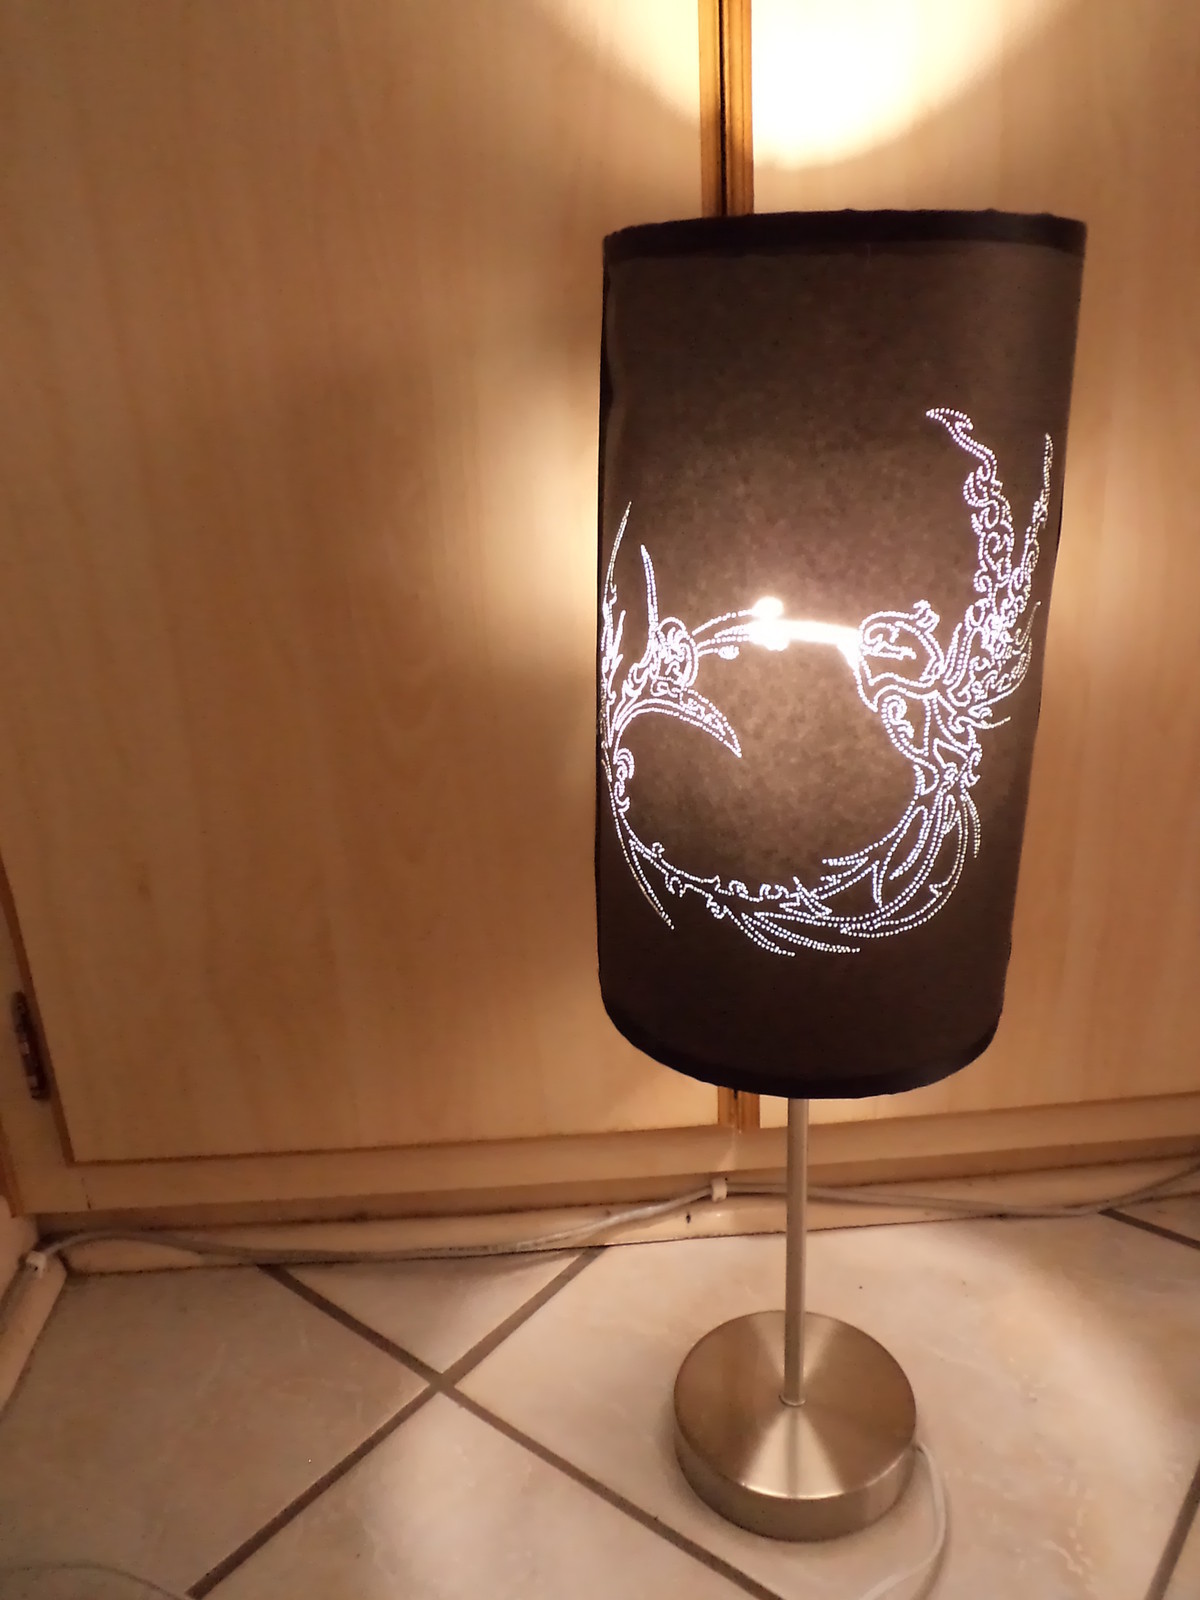
Pierced Paper Lampshade
Tags
-
 Cathy K. favorited Hummingbird Illumination
10 Oct 08:37
Cathy K. favorited Hummingbird Illumination
10 Oct 08:37
-
 stephanie.goodsell.54 added Hummingbird Illumination to Clothing
04 Feb 18:01
stephanie.goodsell.54 added Hummingbird Illumination to Clothing
04 Feb 18:01
-
 Bird55021 favorited Hummingbird Illumination
13 Sep 18:25
Bird55021 favorited Hummingbird Illumination
13 Sep 18:25
- Geni Greenhill favorited Hummingbird Illumination 25 Apr 23:35
-
DeathsEmphasis favorited Hummingbird Illumination
12 Apr 02:08
-
 Caaryn S. favorited Hummingbird Illumination
09 Mar 05:34
Caaryn S. favorited Hummingbird Illumination
09 Mar 05:34
- kesvn favorited Hummingbird Illumination 28 Feb 05:20
-
 njsnyder62 favorited Hummingbird Illumination
13 Feb 09:59
njsnyder62 favorited Hummingbird Illumination
13 Feb 09:59
-
 Brittney B. favorited Hummingbird Illumination
08 Feb 02:52
Brittney B. favorited Hummingbird Illumination
08 Feb 02:52
-
 Rebecca T. favorited Hummingbird Illumination
19 Jan 03:17
Rebecca T. favorited Hummingbird Illumination
19 Jan 03:17
-
Step 1
Print the desired design on normal printer paper.
Fasten the printed image to the black card stock with a few paperclips. This way there is no need to draw the design on the card stock.
Pierce through both sheets of paper, all along the lines of the design. Try to maintain an even spacing between piercings.
Note: If the piercings are to close to one another, the paper will tear and you will be left with a slit instead of pin holes.
Placing a sturdy pillow underneath the paper while piercing works well.
My card stock was A4 size, so I had to glue two sheets together. I did the design twice; once per sheet.
-
Step 2
Strip the old lamp shade covering off.
I was left with two rings.
Now, this is the tricky part. You'll probably need an extra set of hands. I did this by myself and it was difficult.
You need to glue the rings to the paper. I placed the paper face down on the working surface. Glued the edge of both rings on opposite sides of the paper, and then continued gluing while rolling the ring until the I reached my starting point and the paper formed a cylinder.
-
Step 3
Glue the ribbon over the edges of both rings. Also glue a strip of ribbon over the part where the card stock meets.
Plug in and enjoy
