


About
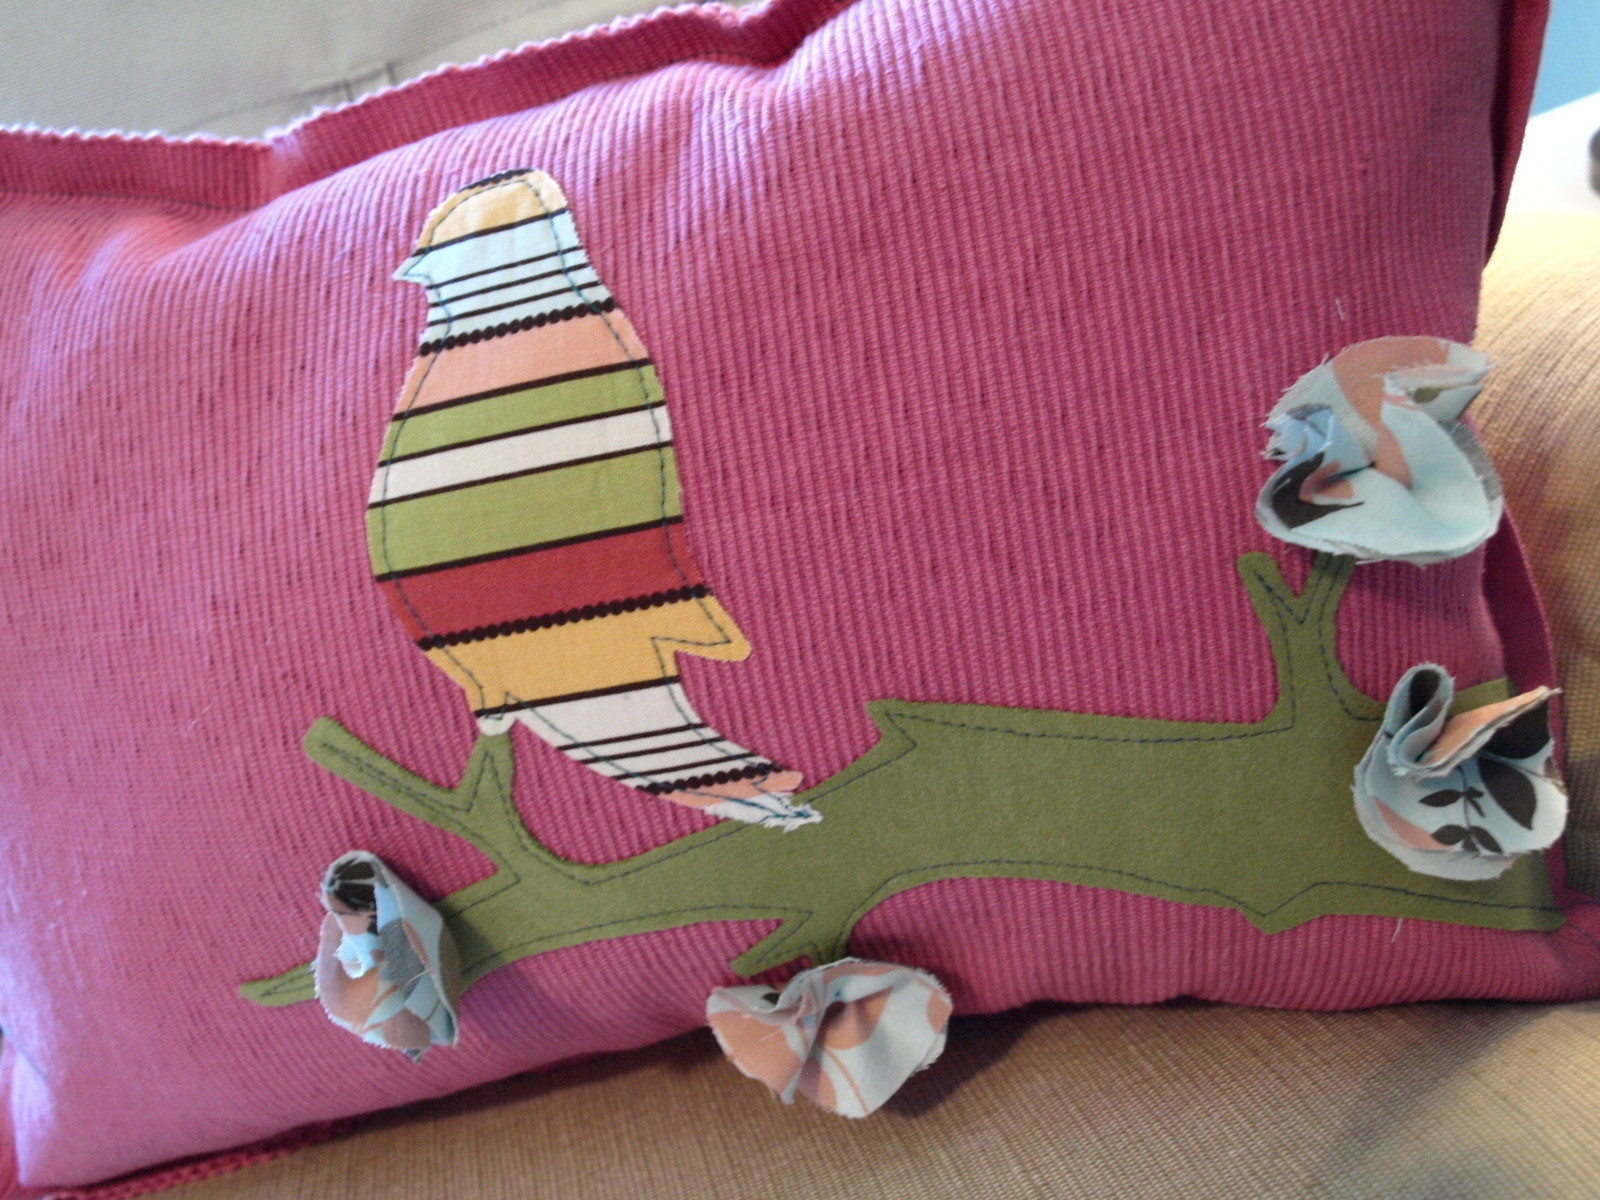
Super fun and easy way to spruce up your home for spring!
Hi everyone!! I know its been a while and I’m so excited to get some new tutorials up for spring! I have been feeling “bluesy” (blame it on the medication and the weekly injections I have to take for my high-risk pregnancy) and so I thought I’d spruce up my house (and myself) for spring to get my mood up and creativity flowing again. I made a trip to one of my favorite $Dollar Stores and found some great stuff that has inspired some new springtime projects. I could hardly wait to make this easy pillow and I’m SO loving the way it turned out! Hope you do too! I thought since my last tutorial was on applique that this would be a nice follow up now that you’ve had a chance to discover the world of transfer webbing! Heres the breakdown for this simple and inexpensive spring throw pillow:
-
 Sarah Sylvia S. favorited How To Make A Springtime Place Mat Pillow
25 Jul 03:10
Sarah Sylvia S. favorited How To Make A Springtime Place Mat Pillow
25 Jul 03:10
-
 Laura Ann. favorited How To Make A Springtime Place Mat Pillow
05 Sep 05:24
Laura Ann. favorited How To Make A Springtime Place Mat Pillow
05 Sep 05:24
-
 Uga P. favorited How To Make A Springtime Place Mat Pillow
01 Aug 10:25
Uga P. favorited How To Make A Springtime Place Mat Pillow
01 Aug 10:25
You Will Need
-
Step 1
Cost: $2-$8 depending on what you have on-hand.
Supplies:
2 cloth place-mats in the same color (or coordinating colors if you want a different color on the back). I got my pink place-mats at the $Dollar Store. They have tons to choose from usually and I LOVED the bright colors that are there right now! Perfect for spring!
Scrap fabric or quilting fat quarters in coordinating colors/designs. I used 3 fabrics for my pillow making the bird out of the busiest fabric.
Coordinating or contrasting thread.
Pillow batting or poly-fill. I took apart an old pillow I didn’t like anymore and used the batting.
Transfer webbing. This is the iron-on adhesive that allows you to stick your applique to your pillow before you stitch. I LOVE this stuff and use it ALL THE TIME. You can sometimes find it (or versions of it) at Walmart in rolls or you can buy it at the craft/fabric store by the yard for about $2 a yard. You barely use any of it for these little applique projects so even 1 yard will go a long way.
A dry iron.
A sewing machine with a simple straight stitch.
Scizzors and a needle and thread.
The bird and branch template from this tutorial (if you’re not feeling confident in freehanding it).
Ok! Thats it! Ready to go? -
 Step 2
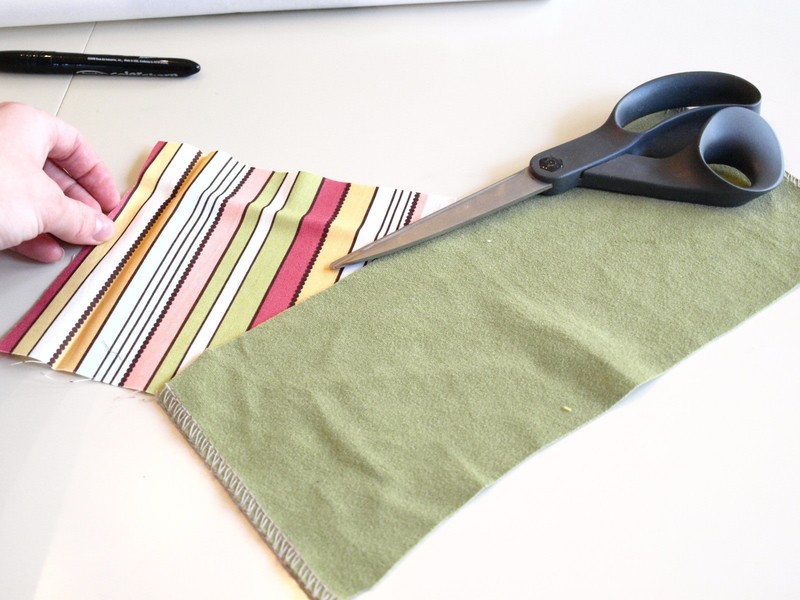
Choose your fabrics for the bird and the branch and cut out rectangles large enough to use as those elements.
-
 Step 3
Roll out some transfer webbing and lay your cut pieces down onto the nubby side of the trans web. Cut around the fabric making the trans web pieces as close to the same size as your fabric pieces as you can.
-
 Step 4
Keeping your nubby trans web sides inline with your fabric pieces, adhere the trans web to the fabric with a hot dry iron (or as instructed on trans web packaging).
-
 Step 5
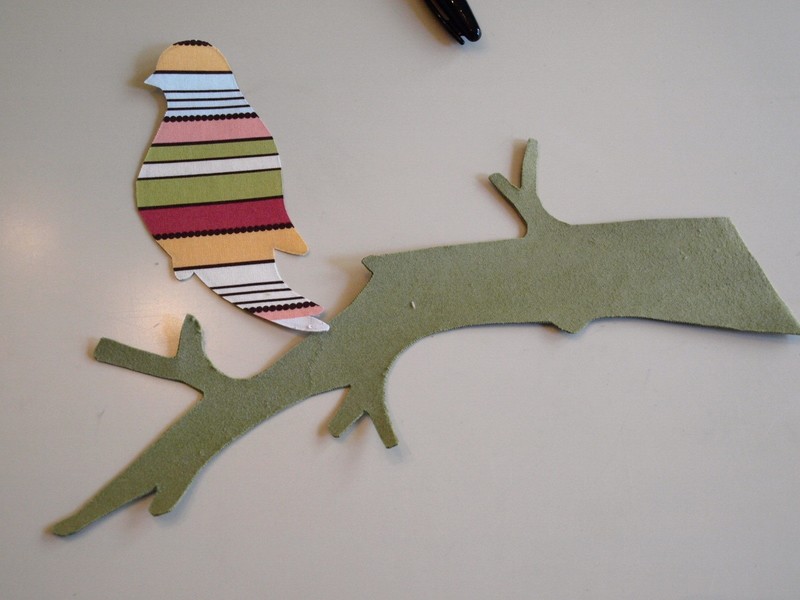
When both your branch fabric and your bird fabric pieces are cool, flip them over and trace your template image (or freehand draw an image) onto the paper side of your fabric with a marker. Its okay if you have to redraw again until you get the desired look you’d like in the appropriate size etc. It doesn’t have to be perfect! Nothing I make ever is! With your sharp scizzors, cut out your design elements.
-
 Step 6
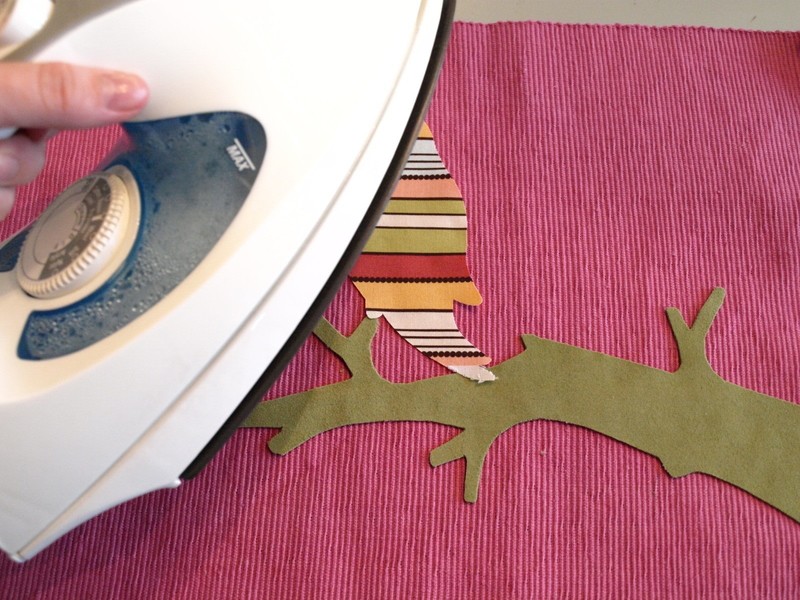
Carefully remove the trans web paper backing from your fabric pieces.
Grab one of your place-mats and arrange your bird and branch onto the front of it how you’d like it. With a hot iron (some trans web requires steam at this point), iron your applique to your place-mat. -
 Step 7
Once your place-mat and applique has cooled, take it over to your sewing machine and stitch the edges of the applique down. If you’d like you can actually skip this step since its not too likely that you’ll be washing this pillow too often and the trans web will adhere it fine temporarily. But, I like to stitch around all my appliques with contrasting thread just to secure it a bit more and give it some more character. And don’t worry about it looking a bit “messy”! It just adds to that character!
-
 Step 8
If you want, make little fabric ruffled flowers and sew them on to your branch by hand. (For more detailed instructions and to see more tutorials see my blog www.seecatecreate.wordpress.com).
-
 Step 9
Once your place-mat front is complete and all your flowers are securely sewn into place, take your other place-mat and line it up under the top one (wrong sides together if your place-mat has “wrong” sides). If you’d like you can pin your sides together for more stability while you sew. Head over to your sewing machine again and sew both top and bottom place-mats together with a topstitch and about a 1/4 allowance. BUT leave a section unstitched so that you can add your batting here in a minute. TIP: when going around the corners, reverse stitch a few times to secure the corners and keep them from pulling when you stuff the pillow.
Grab your pillow batting and begin stuffing your place-mat pillow paying special attention to the corners and stuffing it as full as you’d like. -
 Step 10
Topstitch your stuffing opening closed and YOU’RE DONE!! Now find a cute place to showcase your new cheery pillow!


CO + K User