About
Easy and quick way to obtain an awesome piece of lingerie!
Hope you find my tutorial useful :)
If you have any questions about making your garter belt, feel free to ask! Also, since English is not my native language, feel free to correct my mistakes.
Tags
-
 Genesis G. favorited How To Make A Garter Belt
05 Oct 06:49
Genesis G. favorited How To Make A Garter Belt
05 Oct 06:49
-
 George V. favorited How To Make A Garter Belt
03 Aug 01:48
George V. favorited How To Make A Garter Belt
03 Aug 01:48
-
 Key West Witch favorited How To Make A Garter Belt
26 Jun 08:06
Key West Witch favorited How To Make A Garter Belt
26 Jun 08:06
-
 Tashianna S. favorited How To Make A Garter Belt
11 Apr 12:27
Tashianna S. favorited How To Make A Garter Belt
11 Apr 12:27
-
 Arielle R. added How To Make A Garter Belt to diy garter belt
02 Feb 18:59
Arielle R. added How To Make A Garter Belt to diy garter belt
02 Feb 18:59
-
 Alma added How To Make A Garter Belt to Lingerie
10 Jun 15:36
Alma added How To Make A Garter Belt to Lingerie
10 Jun 15:36
-
Victoria L. favorited How To Make A Garter Belt
01 Jan 15:10
-
 Bloodyhiccup favorited How To Make A Garter Belt
11 Dec 02:23
Bloodyhiccup favorited How To Make A Garter Belt
11 Dec 02:23
-
 Emma H. favorited How To Make A Garter Belt
30 Oct 22:54
Emma H. favorited How To Make A Garter Belt
30 Oct 22:54
-
 Lina W. favorited How To Make A Garter Belt
03 Jun 03:18
Lina W. favorited How To Make A Garter Belt
03 Jun 03:18
-
Step 1
We shall start with creating a pattern for the garter belt.
I will show the construction of the pattern using as an example waist that measures 60 cm. If your waist is wider, you should draw an appropriately bigger pattern. You can also make your pattern longer if you want.
-
 Step 2
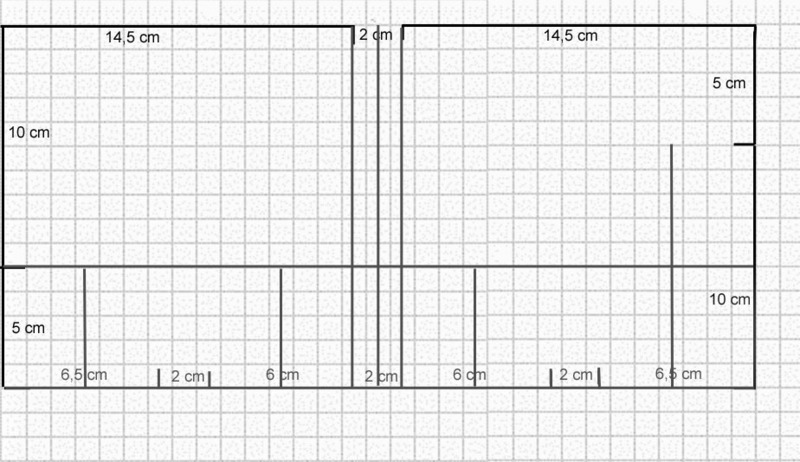
Draw a line measuring 1/4 of your waist circumference minus 0.5 cm (for me this line will be 14.5 cm), next, 2 cm space, and next, another line measuring 1/4 of waist circumference minus 0.5 cm.
Now your pattern's waist circumference is a bit smaller than your real waist circumeference. It is because you will be adding a fastening that will bring the missing centimeters back.
-
 Step 3
Draw center front line (left) - 10 cm + 5 cm auxiliary line.
Draw center back line - 5 cm + 10 cm auxiliary line.
Auxiliary lines will help you draw your pattern straight. You might want to define your main lines with a marker and draw auxiliary lines with a pencil. (see step 7) -
 Step 4
Draw auxiliary lines like in the illustration. Draw a horizontal line at the height of 10 cm and another horizontal line at the bottom.
Draw vertical lines starting at the edges of waist lines that you drew first. Another vertical line sets the center of 2 cm space. -
 Step 5
Determine the positions of garters.
The distances between the places where you will attach your garters should be fairly equal. In my pattern, the distance between the front garters is 6.5 cm; between the front and the side there is 6 cm; another 6 cm between the side and back; 6.5 cm between the back garters. -
 Step 6
Draw auxiliary lines in every center of distance between your future garters. You will be drawing arcs in the next step and this will make it easier.
-
 Step 7
I defined the pattern with green colour.
2 cm gap in the waist part was needed to give the garter a nice shape that will suit your curves.
The illustration shows how you should draw your arcs.
-
 Step 8
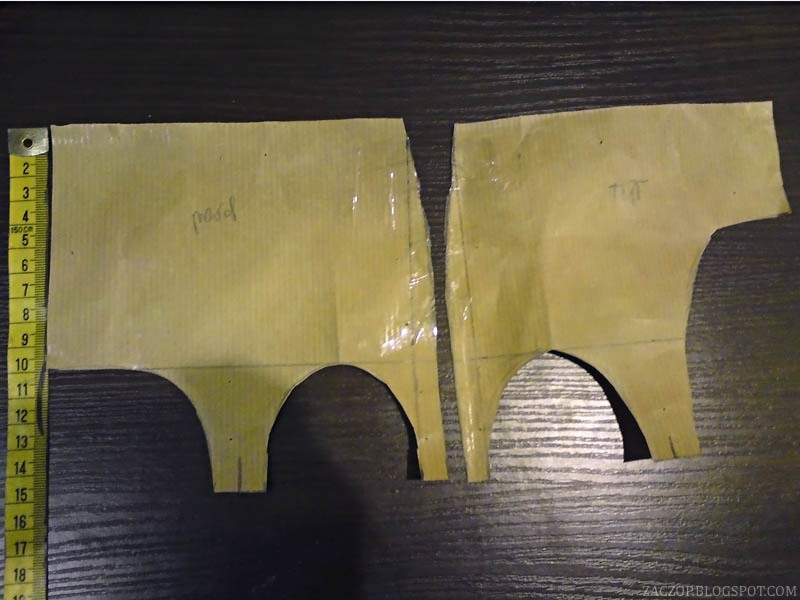
This is how my finished pattern looks.
-
 Step 9
Before you start sewing your right garter belt you should try your pattern out on a scrap fabric. Thanks to this you will find out if your pattern fits you and whether you should correct it.
-
 Step 10
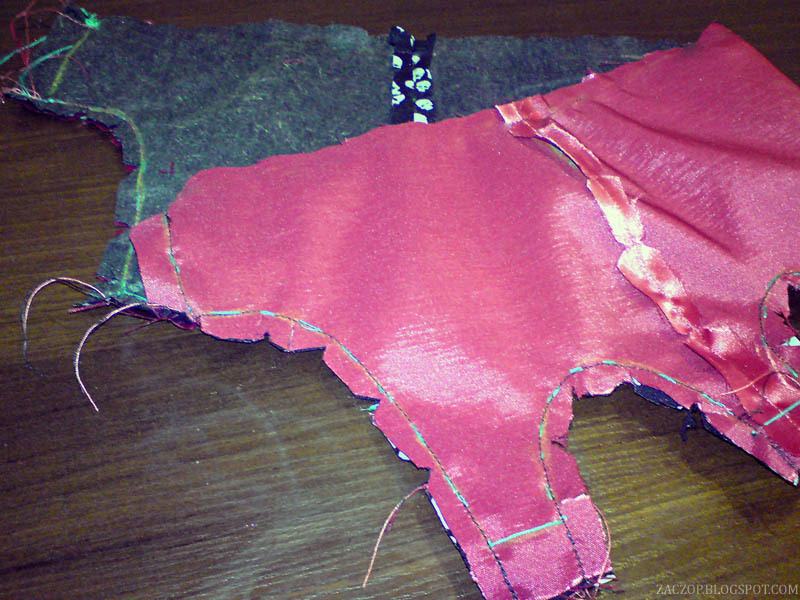
Cut your main fabric and lining. Remember to leave a suitable seam allowance! Cut your front piece on fold. Back should consist of two pieces.
I strengthened my external fabric with fleece because I found it too stretchy. This step is completely optional and advised rather for weak fabrics.
-
 Step 11
Stitch or pin the sides, then sew them.
Notch seam allowances and press open. (You can see the notches in step 13) -
 Step 12
Sew both layers in the places marked green. Notch seam allowances.
-
 Step 13
Your notches should look similar to these.
-
 Step 14
Time to prepare the garters.
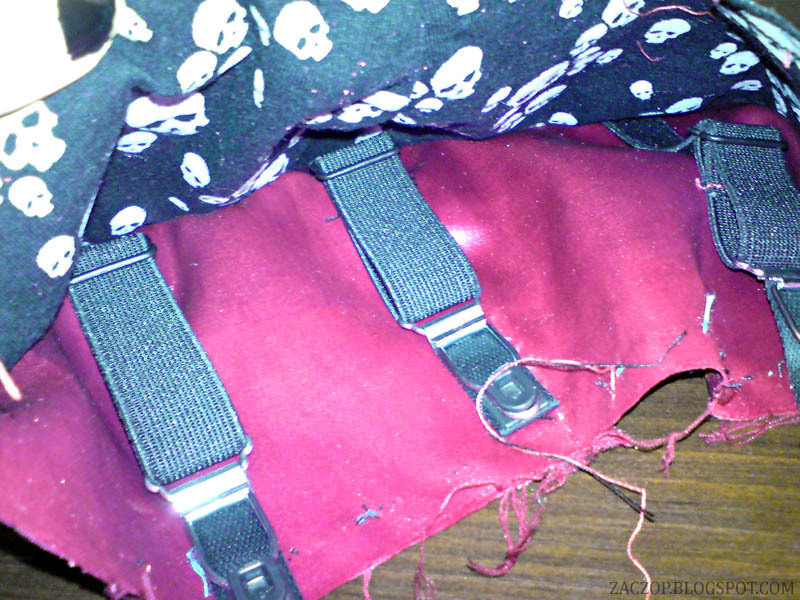
I cut 20 cm of elastic rubber for every front and side garter and 23 cm for rear garters. However, these garters will be relatively short, so you'd better cut yours a few inches longer.
The picture shows the quick and easy way to assemble your garters.
-
 Step 15
Attach the garters to your belt.
Slip the ends of the rubber bands to their right place. You can help yourself with a safety pin. Sew in places marked in the picture.
Leave one side of your future fastening not sewn because you will be turning the inside out through it. -
 Step 16
A pic taken while attaching the garters.
-
 Step 17
Turning my garter belt inside out.
-
 Step 18
Your garter is almost done! Iron it well.
-
 Step 19
Sew your fastening.
You can use a bra fastening, hook and eye tape, or whatever suits you. -
 Step 20
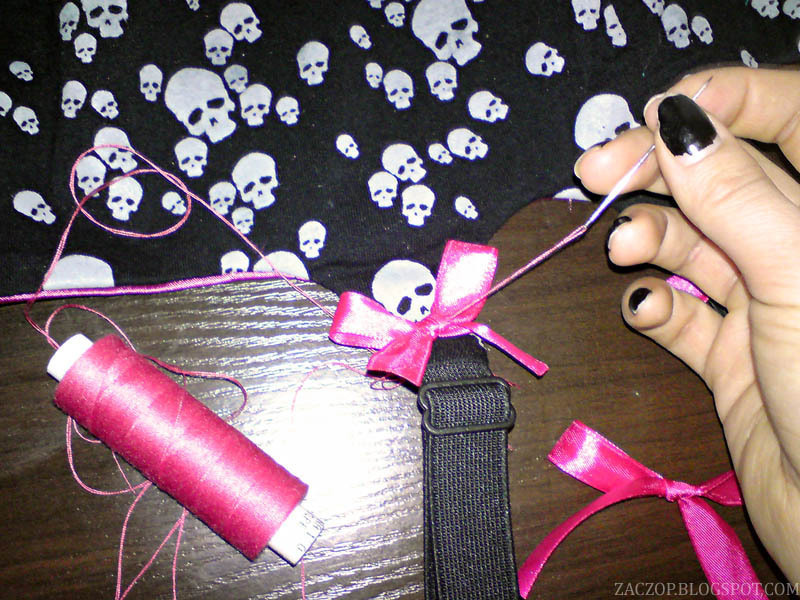
Now the only thing left to do is to decorate your piece of lingerie according to your taste...
-
 Step 21
...And to enjoy your new garter belt!


Comments