About
So easy and inexpensive! You are only limited by your imagination!
Use inexpensive burlap and acrylic craft paint to make a door hanging in any shape or color you want to.
-
 pamela.m.ravenel favorited How To Make A Burlap Door Hanging
20 Oct 01:56
pamela.m.ravenel favorited How To Make A Burlap Door Hanging
20 Oct 01:56
-
 Miss K. published her project How To Make A Burlap Door Hanging
22 Jul 15:17
Miss K. published her project How To Make A Burlap Door Hanging
22 Jul 15:17
-
 Step 1
The great thing about learning how to make a burlap door hanging is that you can decide what shape, color or size you want it to be. You can make them for different seasons or occasions. I am going to be sharing how to make a baby onesie that I made for a baby shower and gift but the techniques apply for any burlap door hanging. Well, you don't HAVE to hang it on a door but you get the idea.
-
 Step 2
Decide what shape you want your hanging to be. Sketch it out on a piece of of paper (I just used newspaper) the size that you want it to be. If you want both sides to be the same, you can fold the paper in half and cut both sides at one time. Cut out your pattern. If you need shape ideas you can look in the "search" box on the Pinterest website typing in "burlap door hanging" .
-
 Step 3
Use straight pins to hold your pattern on a double thickness of burlap fabric. Cut around the pattern. You need two pieces exactly the same for a front and a back if you want to stuff your hanging. I think the hangings look better stuffed, have more dimension and hold their shape better too. I used white burlap for this project since I was going to be painting it a light color. You can use the natural (tan/brown) burlap for any hanging but if you buy a color burlap near the color you want the hanging to be, you won't have to use as much paint.
-
 Step 4
Use hot glue to join the back and front pieces of your cut-out burlap. Put a protective surface under the burlap because the hot glue may seep out under the loose weave of the fabric. Only glue a few inches at a time so you have time to line up the back and front and make sure they are sticking together well before moving on. Be SURE to leave a couple of openings 3" or 4" long that are not glued if you are going to stuff the hanging. Press the pieces together with something other than your fingers or you will probably get burned by the hot glue. You could sew the pieces together instead of hot gluing.
-
 Step 5
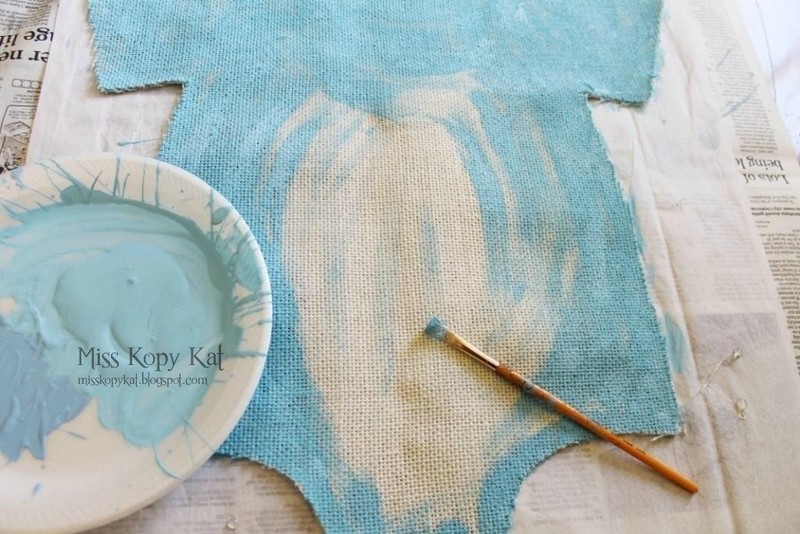
I like to paint the hanging before stuffing it because it is easily to paint a flat surface and also the paint helps keep the edges from fraying when you are stuffing. Inexpensive acrylic craft paint works great on the hangings. I like to add a little water to the paint as I go to make it easier to spread around. If you are going to have large circles or stripes on your hanging, you might want to paint them separately. You don't have to paint the back if it is not going to show but it does add to the (good) stiffness of the hanging. I did not include drying time in the time it takes to make this project. You will probably need two coats of paint for it to cover well. Allow several hours between coats for drying.
-
 Step 6
This project is almost entirely one color. You can see from other burlap hangings I have made (see photo in first step) that you can embellish them with stripes, circles, stars, etc. I wanted to add the baby's name to this project. I'll show you how I did that in case you would like to do it too. Since it is optional, I did not include this in the supplies list. On your computer make a template of the name in a font you like and print it out. Make sure it is the size you want to fit on the hanging. Use a pencil to darken the backside of the paper that the font is on. You can hold it up to the light to make sure you have it blackened correctly. Put the font on the burlap in the place you want the name to be. Trace around the edge of the font. It may be hard to see on the burlap. Use acrylic paint to fill in where you have traced.
-
 Step 7
It is really cute to outline your shape and add some details with a thin line of puffy paint. Since this is a baby item I used white but for bolder colors of hangings black looks good. To make the burlap shape hangable, poke a length of wire through both layers of the hanging at two points near the top. To keep the wire from coming off, make the end of the wire into a curly-q on both ends (after it is poked through). Leave an upside down "U" shape in the wire to be your actual hanger.
-
 Step 8
To be able to stuff the burlap shape, I left both of the arms open and a space along one side. I like to use plastic bags to stuff the hangings. They are lightweight, free and water resistant. If you think that printing on the bags might show through, cut the printing off before stuffing. Since stuffing the bags in the openings can cause fraying of the edge of the burlap, use a ruler to carefully push the bags in. That technique causes less fraying than using your hand.
-
 Step 9
Here is a side view of the hanging after stuffing. It doesn't have to a lot of stuffing to make it have some dimension. Push the bags in enough that they won't get in the way of the hot glue when you now glue those openings close. If there is some fraying on the edges that bothers you, you can trim the frayed threads off.
-
 Step 10
Here is the baby burlap door hanging onesie all ready to go to the baby shower. The hangings do well on an outside door if there is some type of covering. They would not do well long-term on something like a mailbox out in the direct weather.