How To Braid
Extract from Friendship Bracelets Beyond the Basics • By Not Appilcable • Published by GMC Publications

About
Friendship Bracelets Beyond the Basics
-
 Jeanette L. favorited How To Braid
05 Nov 17:48
Jeanette L. favorited How To Braid
05 Nov 17:48
-
Alex Z. added How To Braid to Интересное
12 May 17:08
-
 mmotse03 favorited How To Braid
16 Feb 06:58
mmotse03 favorited How To Braid
16 Feb 06:58
-
paigeydoll m. favorited How To Braid
25 Oct 13:58
-
 Freida H. favorited How To Braid
13 May 19:14
Freida H. favorited How To Braid
13 May 19:14
-
Alecia B. favorited How To Braid
03 Oct 07:05
-
Franky F. favorited How To Braid
10 Sep 11:22
-
 GMC Group published her project How To Braid
08 Sep 06:00
GMC Group published her project How To Braid
08 Sep 06:00
You Will Need
-
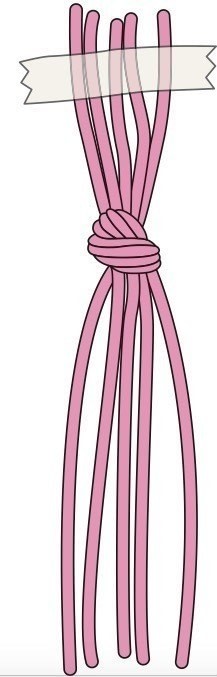
 Step 1
KNOTS
Overhand Knot (loose or folded ends)
Hold the strands together...
-
 Step 2
and tie a knot.
-
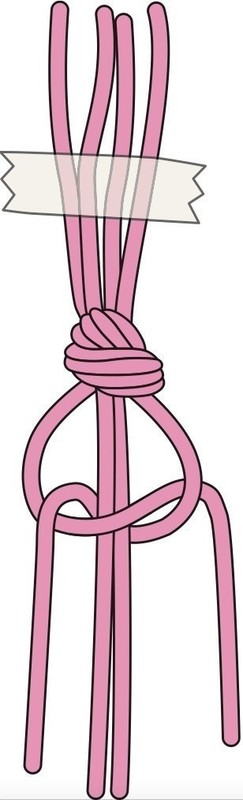
 Step 3
Lark’s Head Knot
Slip the loop through the metal ring.
Pull the ends through the loop and tighten. -
 Step 4
Square Knot
Use the outer strand(s) to tie the first half of a square knot. -
 Step 5
Use the outer strand(s) to tie the second half of a square knot.
-
 Step 6
Half-Square Knot
Tie the first half only of a square knot; repeat until you reach the desired length. As you tie, the knots will spiral. -
 Step 7
Left Knot
Begin with the strands on the left side. Wrap around the center strands and pull upward to tighten. -
 Step 8
To complete each left knot, always tie again, using the same strands.
-
 Step 9
Right Knot
Begin with the strands on the right
side. Wrap around the center strands and pull upward to tighten. -
 Step 10
To complete each right knot, always tie again, using the same strands.
-
 Step 11
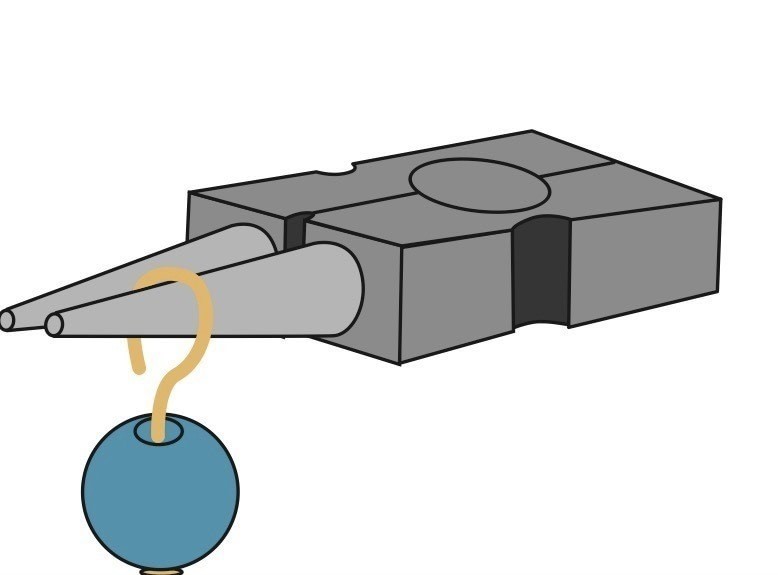
FINISHING
Using Jump Rings
Pick up a jump ring with a pair of chain-nose pliers. With a second pair of chain-nose pliers, gently hold the other side of the ring. Open the ring by pulling one pair of pliers toward you while pushing the other away.Close the ring by pushing and pulling the pliers in opposite directions, bringing the ring ends back together. Open and close chain links and loops on eye pins or head pins the same way.
-
 Step 12
Making a Bead Dangle, Connector or Loops on Wire
Bead Dangles are made on head pins and have a loop at one end. Connectors are made on eye pins and have loops on both ends. Loops on wire ends are made in the same manner as the loops on bead dangles and connectors.Slide the beads on a head pin or eye pin. Leaving about 1/2", cut off the excess wire. Using chain-nose pliers, bend the wire at a 90° angle.
-
 Step 13
Grasp the wire end with the round-nose pliers. Turn the pliers and bend the wire into a loop. Release the pliers. Straighten or twist the loop further if necessary.
-
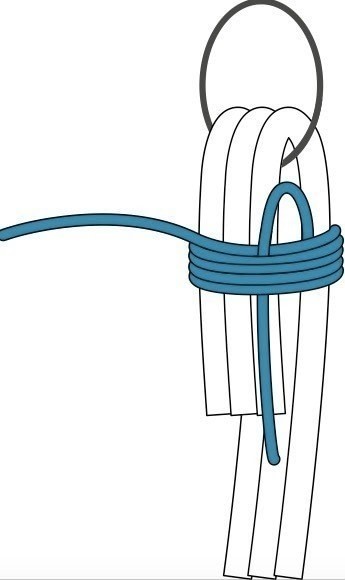
 Step 14
Finishing Ends
Holding the strands together and leaving 1" tails, fold the floss over a jump ring or clasp. -
 Step 15
Form a loop with one 12" length of floss. Wrap the length around the folded strands 4-5 times. Bring the end through the loop. Pull firmly on the opposite end of the cord until the loop disappears.
-
 Step 16
Place a drop of glue on the knot. When the glue is dry, trim the ends.