

About
Hoop earrings
Because sometimes you don't want to pay $20 for a pair of hoop earrings.....
Note: Hopefully this weekend I'll have pictures for some of this tutorial, but for now, if this makes sense, fabulous!
If you have any questions, just let me know.
-
 Key West Witch favorited Hoop Earrings
11 Sep 12:09
Key West Witch favorited Hoop Earrings
11 Sep 12:09
-
 Sandy B. added Hoop Earrings to jewelry Creations
30 Jun 22:17
Sandy B. added Hoop Earrings to jewelry Creations
30 Jun 22:17
-
Sandy B. favorited Hoop Earrings
30 Jun 22:16
-
 RareJewel favorited Hoop Earrings
29 Nov 07:30
RareJewel favorited Hoop Earrings
29 Nov 07:30
-
 Angel C. favorited Hoop Earrings
27 Oct 19:33
Angel C. favorited Hoop Earrings
27 Oct 19:33
-
 HerNameIsAlixx added Hoop Earrings to DIY The Look - Imelda May
18 Aug 10:56
HerNameIsAlixx added Hoop Earrings to DIY The Look - Imelda May
18 Aug 10:56
-
 Crafterella added Hoop Earrings to Beyonce
06 Dec 00:08
Crafterella added Hoop Earrings to Beyonce
06 Dec 00:08
-
Aïcha P. added Hoop Earrings to Bijoux
19 Apr 19:51
-
edie g. favorited Hoop Earrings
21 Oct 20:51
-
 saphirahgoddis favorited Hoop Earrings
13 Oct 02:47
saphirahgoddis favorited Hoop Earrings
13 Oct 02:47
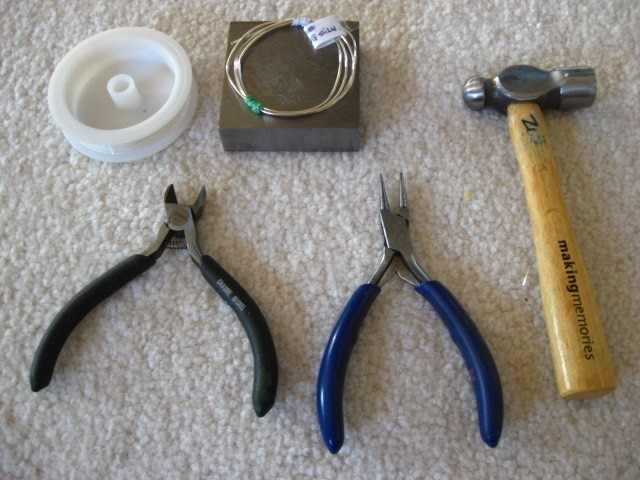
You Will Need
-
 Step 1
First get your 18 guage wire, (brass, silver, copper...gold filled) and find a can or something that is the same diameter that you want your earrings to be. I used a roll of beading wire that was a perfect diameter that I wanted.
You could use a bottle or can....anything that you can wrap the wire around.
-
 Step 2
taking the wire, and a polishing cloth, start pulling on the wire with your cloth to straighten the wire (and polish) and wrap around the can once until the ends meet.
-
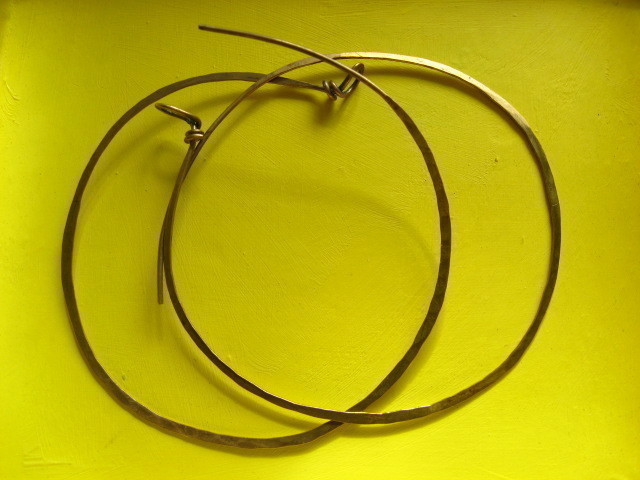
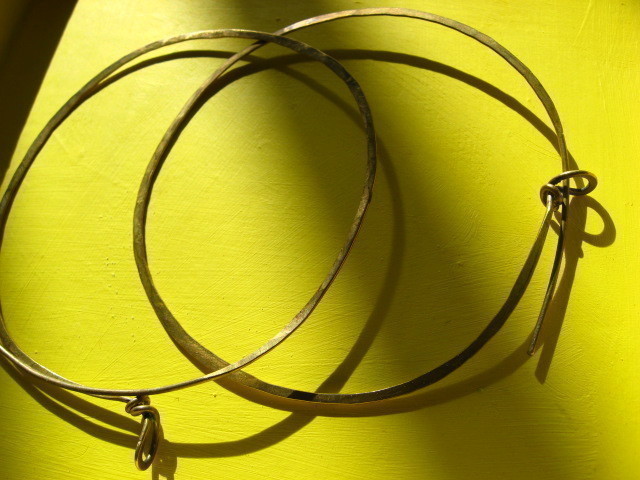
 Step 3
Still holding the wire firmly around the can, pull the can out, but still holding the wire together.
Hold your hoop down onto a chase, or something hard that you don't mind beating up. Because at this point you'll be taking your hammer and beating the wire flat. This keeps the shape of the circle. Start at the bottom of the circle (opposite of where you're holding the wire together) And work your way around- but DON'T HAMMER TO THE ENDS! On the end that IS cut, leave about half an inch or more unhammered. -
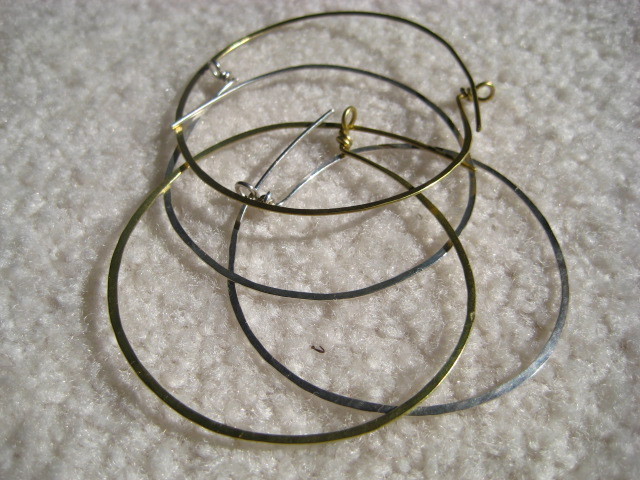
 Step 4
Now for the loop. Take your round nose pliers and bend the wire (that's probably still attatched to the roll it came off of) up to a 90 degree angle.
Now I wired wrapped my loop but you can just make a simple loop.
So still holding the pliers at that point where you've made a 90 degree angle, bend it again to a 90 degree angle, Perpendicular to the direction that the other end is pointing to.
Make sure that you're end is not bent at the same direction that the hoop is. This is because if you make your hoop in the same direction then you have nowhere for that other end to go through. So you have to make sure that your loop will face the other end of the wire so it can go through it.
Make your loop.
Now holding the loop you've made, (tightly) wrap around the wire that's not made into a cirlce. Wrap until you can't go any further and cut your end off. Finally you're free of the rest of the wire package. If you want to cut before, make sure you give yourself a generous amount of execess, so you can make the loop.I know this is a lot, but if you have any questions, you can ask)
-
 Step 5
Basically, your final wire wrapped loop should look like this. And your other end should be long enough to go through and stay through it.
And I sanded (with sanding paper) that one end so that it won't pierce your ear...just so it doesn't hurt to go in.
Now do this again...'cause we all know we have 2 ears.