


About
A decent-looking "silk-screened" T-shirt in just a few hours!
I needed an Obama shirt to wear around town. But the ones I ordered hadn't arrived yet. Freezer Paper and silk-screen ink to the rescue!
(How-To to come shortly. Unless nobody cares.)
Tags
-
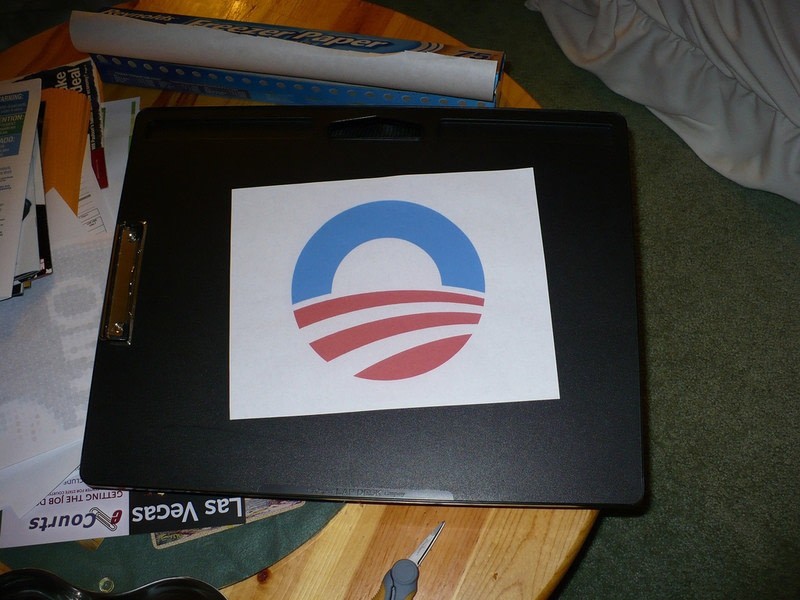
 Step 1
Start by printing out the logo at the size you want.
In retrospect, I should have made it bigger. Maybe used a full sheet of paper for each half, top and bottom.
-
 Step 2
Trace the red and blue areas onto two separate sheets of Freezer Paper.
(Not waxed paper! Not parchment paper! It has to be Freezer Paper!)
Make sure the side coated with plastic is facing down. The plastic coating will later let you iron the stencil onto the shirt, where it will stick quite firmly, while still being removable.
-
 Step 3
Stick something inside the shirt, like a piece of poster-board or cardboard, to prevent the ink bleeding through to the back side of the shirt.
Quickly iron the shirt to remove any wrinkles. If you have cats, like any good Democratic household does, be sure to pick off the inevitable car hairs.
Position the first stencil on the shirt. Try to get it centered. I goofed up and was a little off. Take a few steps back to help you judge.
-
 Step 4
Iron the stencil firmly to the shirt. Remember that the Freezer Paper needs to be plastic-coated side down.
If your design has pointy areas, be careful to not catch the points on the edge of the iron.
You can already see that I'm off-center. Pity I couldn't tell while doing it.
-
 Step 5
Apply some ink to the stencil, at one end of the cut-out. Pay attention to the direction that you're going to smooth it out.
-
 Step 6
I found that chunks of poster-board worked great as a squeegee. I think a real squeegee would catch on the paper. I also tried index cards, but they weren't stiff enough.
Spread the ink, trying to keep it even.
Then leave it the hell alone to dry.
-
 Step 7
Once it's really good and dry, you can peel away the stencil.
-
 Step 8
Before ironing down the second stencil, I placed some plain old printer paper over the dried blue ink. I was worried that the Freezer Paper might stick to the ink and pull it away.
Since you fix the ink by ironing it through a piece of paper anyway, I figured this would be fine.
-
 Step 9
Now iron the second stencil in place.
It's tricky to get it just right because the extra sheet of paper over the blue hides it.
I actually positioned the stencil first, tacking it in place with the iron. Then I slid the guard paper in place. Then ironed the whole stencil.
-
 Step 10
Put some ink at one end, again keeping in mind how you'll spread it across.
-
 Step 11
Spread the ink across and leave it alone to dry.
I ran into some troubles here. The marker I used to trace the drawings bled into the ink a little. For the most part, it actually gives the edges of the colored areas some definition. But it did make a streak in the middle of one of the red areas. I tried to fix it, but to no avail.
-
 Step 12
Once it's dry, peel away the stencil.
-
 Step 13
Admire your handiwork. And weep a little because the damn thing is a little left of center.
Oh well. So am I.
-
 Step 14
Finally, fix the ink by following whatever directions come with the ink. For Speedball silk-screen ink, you stick a piece of paper over the design and iron it for 3-5 minutes. Then you turn the shirt inside-out and do the same on the backside of the design.
Once the ink is fixed, you should be able to wash it!
-
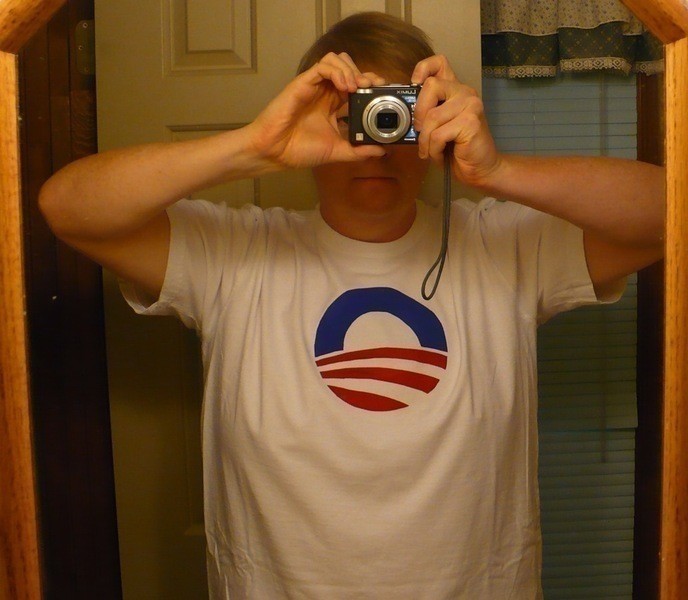
 Step 15
Wear it proudly, knowing that your side is going to win for a change.
"Change" Get it? Ha ha!


Although I hate obama. *shrug*