


About
Fast and easy!
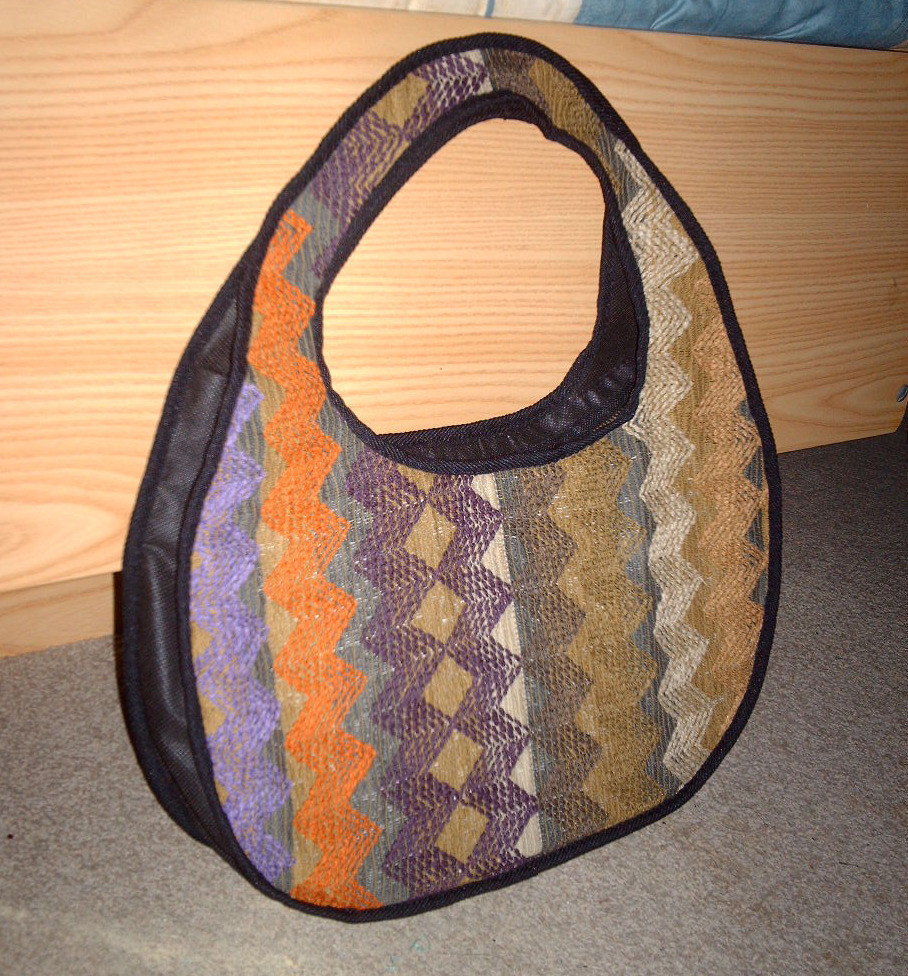
I had this zig zag heavy fabric from some old curtains and decided to make a simple yet cool and roomy bag and take pictures along the way :)
Enjoy!
-
 mmrydawn favorited Hobo Bag
24 Apr 16:11
mmrydawn favorited Hobo Bag
24 Apr 16:11
-
 Kelly K. favorited Hobo Bag
26 Sep 09:17
Kelly K. favorited Hobo Bag
26 Sep 09:17
-
 Anjie B. added Hobo Bag to Crafts I Loathe
26 Jul 16:26
Anjie B. added Hobo Bag to Crafts I Loathe
26 Jul 16:26
-
 Question_Savvy favorited Hobo Bag
04 Jun 03:16
Question_Savvy favorited Hobo Bag
04 Jun 03:16
-
Question_Savvy added Hobo Bag to Must do
04 Jun 03:16
-
 Faith S. favorited Hobo Bag
27 Apr 05:14
Faith S. favorited Hobo Bag
27 Apr 05:14
-
 floo_network favorited Hobo Bag
08 Apr 17:39
floo_network favorited Hobo Bag
08 Apr 17:39
-
 Kaiulani W. favorited Hobo Bag
14 Jan 23:56
Kaiulani W. favorited Hobo Bag
14 Jan 23:56
-
 Rebecca P. favorited Hobo Bag
21 Jun 00:47
Rebecca P. favorited Hobo Bag
21 Jun 00:47
-
 Caeli L. entered her project Hobo Bag to Craft-In Contest
01 Mar 19:46
Caeli L. entered her project Hobo Bag to Craft-In Contest
01 Mar 19:46
You Will Need
-
 Step 1
Draw yourself a template for the bag. Use a large paper sheet, fold it in half and draw the template on one of the halves of the paper. With the sheet still folded, cut along the lines and then unfold it.
There you go, you have your template.
-
 Step 2
Using your recently made template, cut two pieces of the fabric you chose for your bag (one for each side) and two pieces of lining fabric (I used a black non-woven fabric).
-
Step 3
Cut a long stripe of fabric(mine was 31", but the lenght depends on how big your bag is). It must be around 7" wide. Fold it lengthwise.
NOTE: this stripe will be visible, as it will be the bottom and sides of the bag, so keep this in mind when you chose the fabric.
-
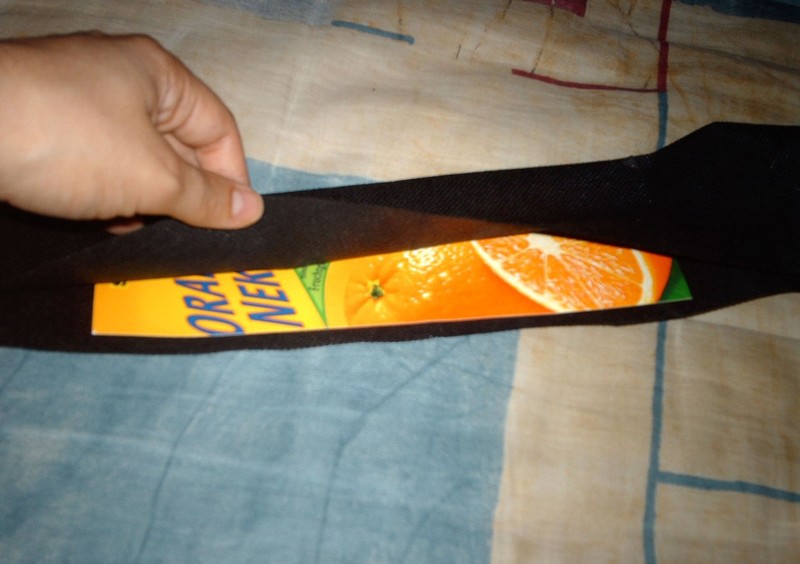
 Step 4
Now we need to reinforce the bottom of the bag. I used a juice carton, but you can use any other kind of cardboard.
Cut a rectangle around 9" long and 3" wide. Insert it in the fold you made in the long stripe (make sure it goes right in the middle of the stripe, lenghtwise). Sew the stripe on each side of the cardboard to keep it in place.
-
 Step 5
Now attach that long stripe to both lining pieces.
-
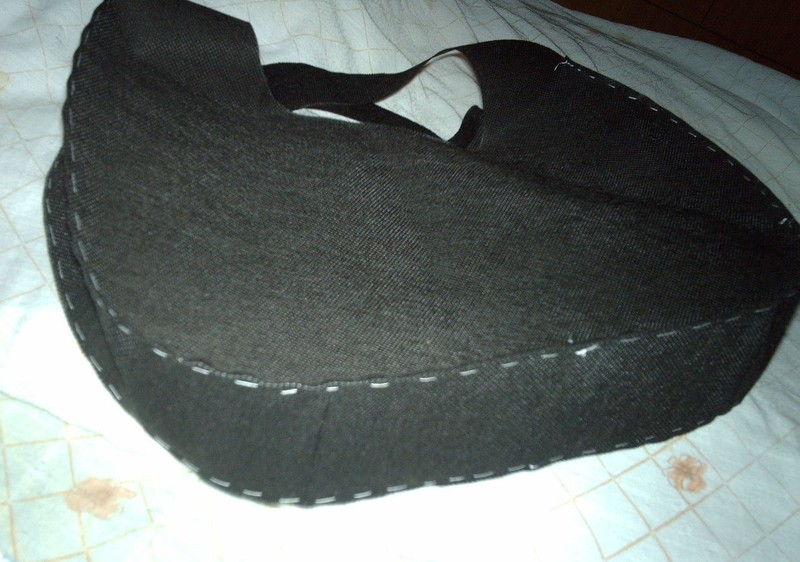
 Step 6
Check-point!
do you have something like this? If so, you're on the right way!
-
 Step 7
Grab your zipper and sew some of your binding tape on each side.
make sure the zipper is long enough to reach each ends of the bag.
-
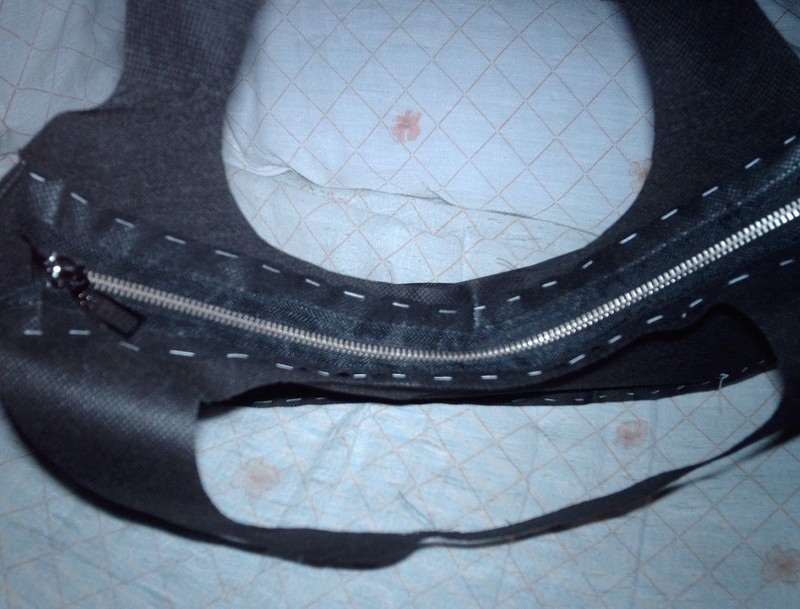
 Step 8
Sew the zipper to the lining.
-
 Step 9
Place the outside fabric so that it matches the lining and sew the edges together. Don't sew the armhole yet.
-
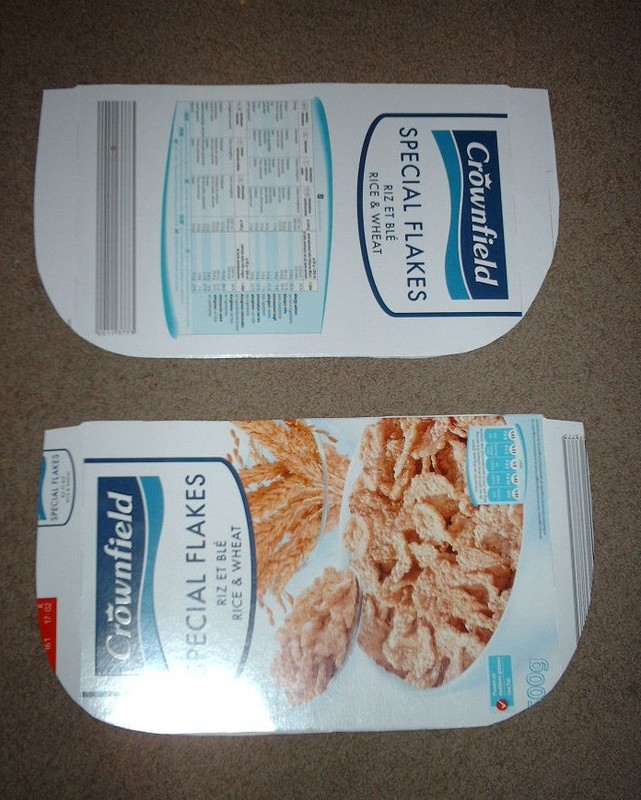
 Step 10
Use your template and cut two pieces from your cerel box as in the picture.
-
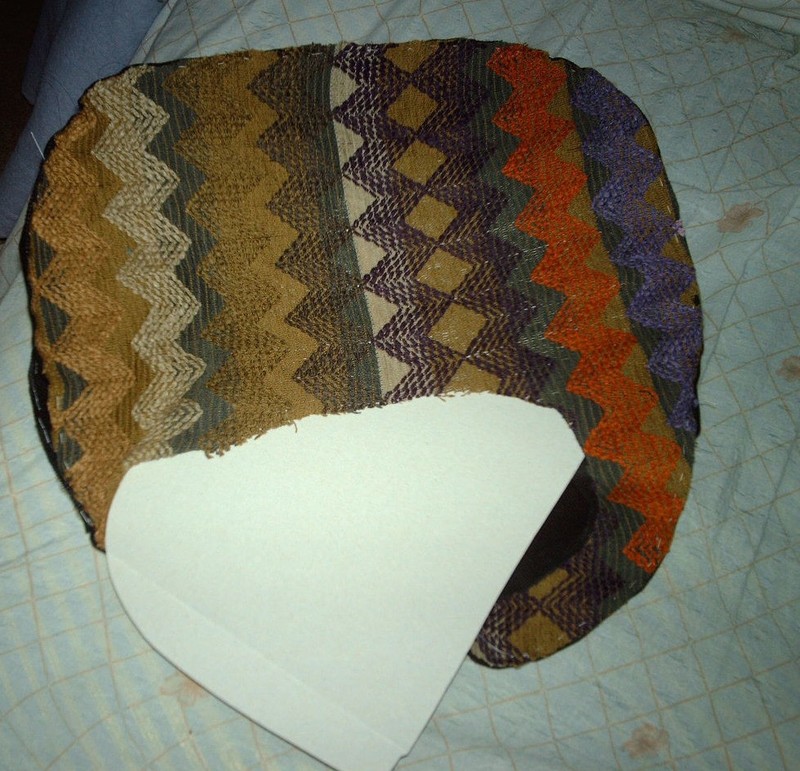
 Step 11
Insert the cereal box pieces between the outside fabric and the lining throug the armhole (as in pic). If it doesn't fit well, trim the edges it until it does.
-
 Step 12
Sew the armholes (outside fabric and lining together) on each side.
-
 Step 13
Sew your binding tape all around the edges of the bag and armholes.
-
 Step 14
TA-DAAAAA! You're done!


can't wait to make my own ^^
I sew a stripe of unfolded binding tape(but you can use any other fabric) on each side of the zipper to make it wider (so that the bag wouldn't be so tightly closed and to match the width of the side and bottom long stripe).
Then you have to sew it to the lining, right where you want the zipper to be, it should be right under the arm hole and the zipper should reach each ends of the bag(lengthwise). So you'll be attaching the zipper to the lining sewing that extra binding tape or fabric stripe you previously attached to the zipper to make it wider to the lining fabric.You can easily see on step 8 how I attached the zipper to the lining (click image to enlarge it), I basted it with white thread, so that it would be visible.
I really don't know how to be clearer on this as I always thought this was an easy step and that sewing a zipper is one of the basics of sewing