


About
I will not take credit for this. I just felt I must share this genuis idea with Cut Out & Keep fans.
I know some of you still have snow on the ground, but for us Floridians summer is already kicking into high gear. And summer means flip flops.
Yep, we southern girls have 'em for everything: casual wear, evening wear, 'flops with heels, 'flops with big poofy flowers glued on...you name it. They're cheap impulse buys, so it's easy to accumulate a whole mountain of flip-flops in a single season.
But say you don't like the "mountain" storage method. Say you need to get your mound o' 'flops off the floor and into a tidy system, but are limited on space. What then?
Well, how about this?
This was my no-cost solution last year: a left over curtain rod mounted on two shelf brackets, and lots of modified hangers. For the rod you could also use a wooden dowel, piece of PVC pipe, or any other strong bit of metal. To mount it we bent up the tips of two metal shelf brackets and secured the rod with small screws, but you could also use conventional closet rod hangers, which you can find in any hardware store.
Now, the fun part is the actual hangers. Here's how to make them:
Tags
Downloads
- flipflop_hanger_8.jpg 120 KB [ Download ]
-
 Bianca commented on Hanging Flip Flop Tutorial
27 Mar 02:54
Bianca commented on Hanging Flip Flop Tutorial
27 Mar 02:54
-
Bianca favorited Hanging Flip Flop Tutorial
27 Mar 02:54
-
 K2 favorited Hanging Flip Flop Tutorial
02 Nov 06:12
K2 favorited Hanging Flip Flop Tutorial
02 Nov 06:12
-
 Amber C. favorited Hanging Flip Flop Tutorial
07 Sep 06:50
Amber C. favorited Hanging Flip Flop Tutorial
07 Sep 06:50
-
 Kacie's Crafts favorited Hanging Flip Flop Tutorial
31 Aug 18:30
Kacie's Crafts favorited Hanging Flip Flop Tutorial
31 Aug 18:30
-
 shelby.collins.311 added Hanging Flip Flop Tutorial to randomly epic awesomeness
15 Jul 18:21
shelby.collins.311 added Hanging Flip Flop Tutorial to randomly epic awesomeness
15 Jul 18:21
-
 Shari B. added Hanging Flip Flop Tutorial to stuff to make my way
17 Jun 12:46
Shari B. added Hanging Flip Flop Tutorial to stuff to make my way
17 Jun 12:46
-
Shari B. favorited Hanging Flip Flop Tutorial
17 Jun 12:46
-
 craftgirl14 favorited Hanging Flip Flop Tutorial
04 Jun 20:23
craftgirl14 favorited Hanging Flip Flop Tutorial
04 Jun 20:23
-
 eFenuska added Hanging Flip Flop Tutorial to Home
09 May 18:35
eFenuska added Hanging Flip Flop Tutorial to Home
09 May 18:35
-
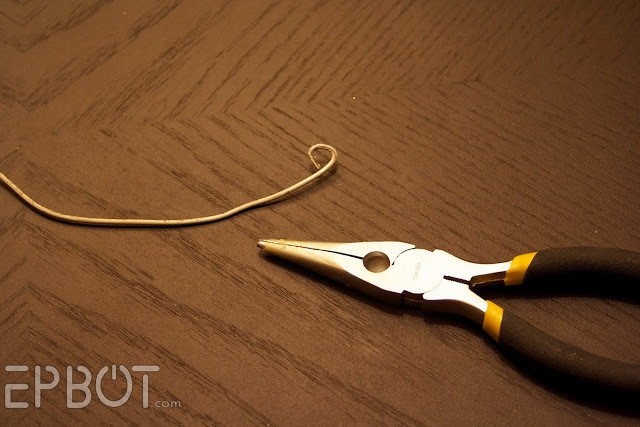
 Step 1
First, grab a handful of the flimsiest metal hangers you can find in your closet. (You want to be able to bend them with your hands, if possible.) You'll also need a pair of needle-nosed pliers.
-
 Step 2
Cut off the bottom section of the hanger like so.
*You may need to score the metal with the pliers and then snap it with your hands.*
-
 Step 3
Now take your pliers and roll up the two edges, like this.
*This gets the sharp edges safely out of the way, and also looks kind of cute.*
-
 Step 4
Now, using both your hands and your pliers, bend your hanger into this approximate shape.
*Kind of like a stick figure flexing his muscles. :)*
-
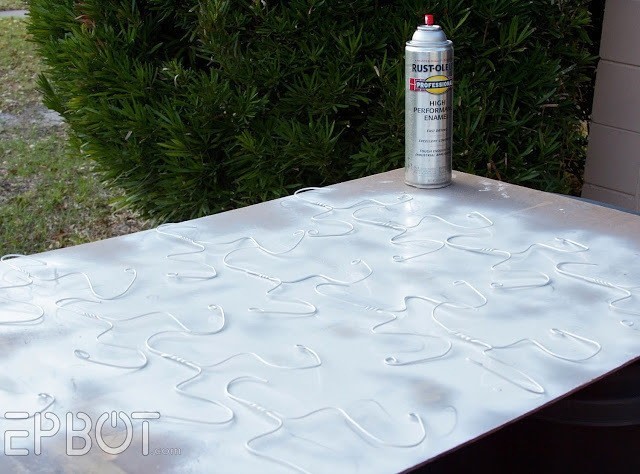
 Step 5
Now, to be honest, you could just stop here. I did, for over a year. The hangers are perfectly functional, if a bit chippy and drab.
I recently went back and decided to pretty them up, though. First I put a fresh coat of rust-proof spray paint on them.
-
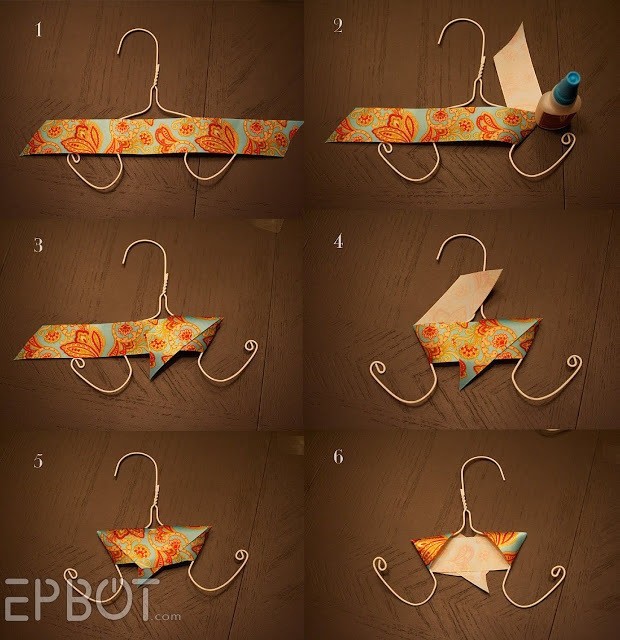
 Step 6
Making the jacket is optional.
-
 Step 7
Make sure your ribbon is snug, so it doesn't fall off the hanger. To secure it you can use fabric or super glue - or, if the glue stains the ribbon like mine did, glue dots also work really well.
Step 6 shows the backside of the hanger. I suggest flipping it over like this to trim off the excess ribbon. -
 Step 8
Again, you could stop there, but I thought a red button was the perfect cherry on top for mine
-
 Step 9
..... I do not want to take credit for this craft. I thought this was a great way to use up those old wire hangers.
Original Tutorial found: http://www.epbot.com/2011/04/hows-it-hangin-flop-tutorial.html


Comments

