
About
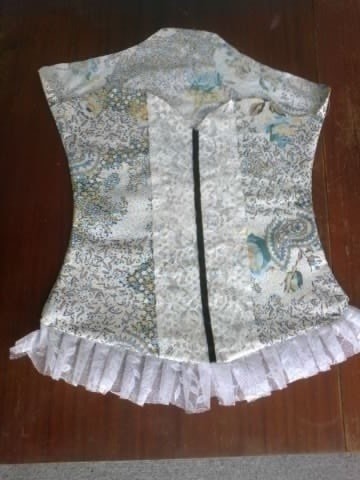
Burlesque-inspired hanging tidy for your unmentionables.
Store your bedroom and bathroom odds and ends in this pretty hanging bag.
These make super gifts, and also look great if you can get hold of children's hangers.
Tags
-
 Victoria L. favorited Hanging Corset Style Tidy Bag
01 Jan 09:17
Victoria L. favorited Hanging Corset Style Tidy Bag
01 Jan 09:17
-
 pandanomz added Hanging Corset Style Tidy Bag to my list
08 Sep 14:58
pandanomz added Hanging Corset Style Tidy Bag to my list
08 Sep 14:58
-
 gemma.holmes.334 favorited Hanging Corset Style Tidy Bag
22 May 20:14
gemma.holmes.334 favorited Hanging Corset Style Tidy Bag
22 May 20:14
-
 Jess W. favorited Hanging Corset Style Tidy Bag
19 Jan 01:14
Jess W. favorited Hanging Corset Style Tidy Bag
19 Jan 01:14
-
 Sarah W. favorited Hanging Corset Style Tidy Bag
25 Dec 23:24
Sarah W. favorited Hanging Corset Style Tidy Bag
25 Dec 23:24
-
 PsychoticWeirdo favorited Hanging Corset Style Tidy Bag
30 Oct 00:34
PsychoticWeirdo favorited Hanging Corset Style Tidy Bag
30 Oct 00:34
-
 choco s. favorited Hanging Corset Style Tidy Bag
25 Oct 07:03
choco s. favorited Hanging Corset Style Tidy Bag
25 Oct 07:03
-
 Penny F. commented on Hanging Corset Style Tidy Bag
16 Sep 15:10
Penny F. commented on Hanging Corset Style Tidy Bag
16 Sep 15:10
-
Penny F. added Hanging Corset Style Tidy Bag to organization!
16 Sep 15:09
-
Penny F. favorited Hanging Corset Style Tidy Bag
16 Sep 15:09
You Will Need
-
 Step 1
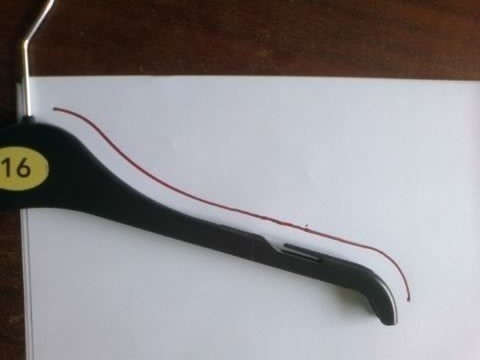
Draw around the hanger you want to use, remembering to leave a seam allowance. You are only going to make half a corset shape.
-
 Step 2
Simply use your judgement to draw a corset shape. A small waist is less useful for storage, but it's up to you.
-
 Step 3
Make a copy of your back pattern and use it to make the front pattern. Having something like a plate to draw round helps get a nice curve for the top of the corset front. Level the curve out at the side a bit.
-
 Step 4
Now you can cut out 1 front and 1 back from each of your outer and lining fabrics. This is the time to embellish the front with scraps of lace and trimmings. Have fun with this part.
-
 Step 5
Add your trimming - here I used a bit of net curtain, but voile, lace, thin satin all work very well and cost a lot less than bought lace edging. Gather it and pin it on or pleat it on as I did. Sewing it on now makes the next bit easier, but you could just pin it and go on to the next step.
-
 Step 6
Sew the front and back together, right sides facing. Take care not to catch the trimming into the side seams. When you turn it out, the edging is neatly attached.
Sew the lining together in the same way, but leave a gap at the side. It needs to be big enough to get your hanger through later. -
Step 7
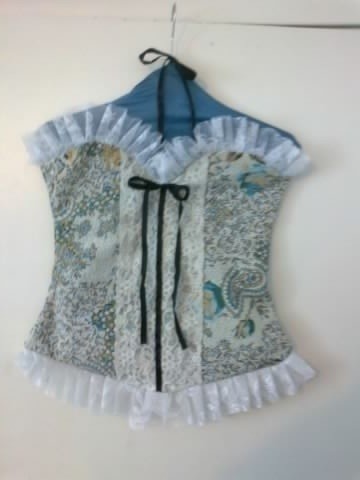
Now simply add trimming to the top front edge, just like at the bottom - best to stitch this on now.
Put one bag inside the other, be sure you have right sides together and pin. Starting at the top, sew down the first shoulder, across the front, and up the second shoulder. Remember to leave a little gap for the hanger hook. -
 Step 8
It is easy to turn right side out through the gap in the lining. Put your hanger in there, wriggle it up to the top and prod the hook through the hole you left. Hand stitch the gap in the lining, add a bow or two and you're done.