


About
You can make your own notebooks. It's easy!
One day, when I was in a stationary shop I looked at prices of notebooks. Those cheaper ones had ugly covers. I decided to make notebook on my own! :)
-
 Miss_Fit favorited Handmade Notebook
08 Jul 22:27
Miss_Fit favorited Handmade Notebook
08 Jul 22:27
-
 autumnrose.lee favorited Handmade Notebook
27 Jan 03:05
autumnrose.lee favorited Handmade Notebook
27 Jan 03:05
-
 Ec T. favorited Handmade Notebook
25 Jan 05:39
Ec T. favorited Handmade Notebook
25 Jan 05:39
-
 ShortHairedGirl favorited Handmade Notebook
01 Jan 03:02
ShortHairedGirl favorited Handmade Notebook
01 Jan 03:02
-
 Chudames favorited Handmade Notebook
19 Nov 19:56
Chudames favorited Handmade Notebook
19 Nov 19:56
-
 Calah L. added Handmade Notebook to GIFTS
22 Jan 22:57
Calah L. added Handmade Notebook to GIFTS
22 Jan 22:57
-
 Elle commented on Handmade Notebook
09 Jul 02:20
Elle commented on Handmade Notebook
09 Jul 02:20
-
 amalia.syamra commented on Handmade Notebook
12 May 12:47
amalia.syamra commented on Handmade Notebook
12 May 12:47
-
Patty S. favorited Handmade Notebook
29 Dec 06:02
- Geni Greenhill favorited Handmade Notebook 14 Aug 09:25
-
 Step 1
First step is to fold in half our paper sheets.
-
 Step 2
When you fold all your paper sheets, fold five shets into one block
-
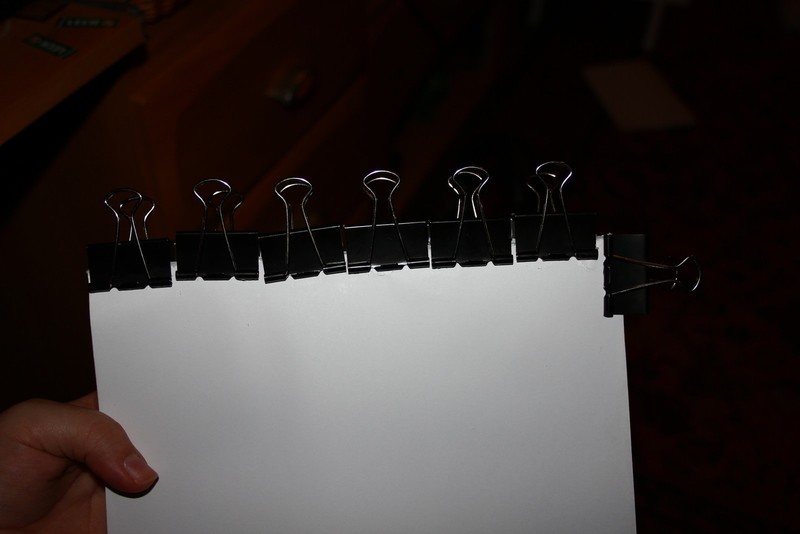
 Step 3
Clip them at top. When sheets don't move it's easier to sew them
-
 Step 4
Using the sewing machine, sew the sheets through the center. Try to do this as accurately as possible. If you miss the center a bit - nothing big will happen but it will be more difficult to glue our grouped sheets right.
USEFULL TIP: when your sewing machine doesn't have enough power, the needle may be jammed. It's important not to do it quick. Slow sewing is better. Then weaker sewing machines can handle going through paper.
-
 Step 5
This should be our effect after sewing. Don't mind the threads. When you add glue they'll strengthen our notebook.
-
 Step 6
Assemble our sewed sheets in one. Add Magic glue on egde where sheets were sewed. Put glue between sewed packs, put it on the spine and pin it with big paper clips. Be carefull not to move them!
-
 Step 7
Clip whole lenght of the spine, but be carefull! Paper clips should stay clean. If you get them dirty with glue, they may rip your paper sheets. Leave it for about 30-60 minutes to dry a litte.
-
 Step 8
When glue is a bit drier, put something heavy on your glued sheets and let them dry.It's usefull to put foil or something slippery on bottom and top when we sqeeze our sheets.
-
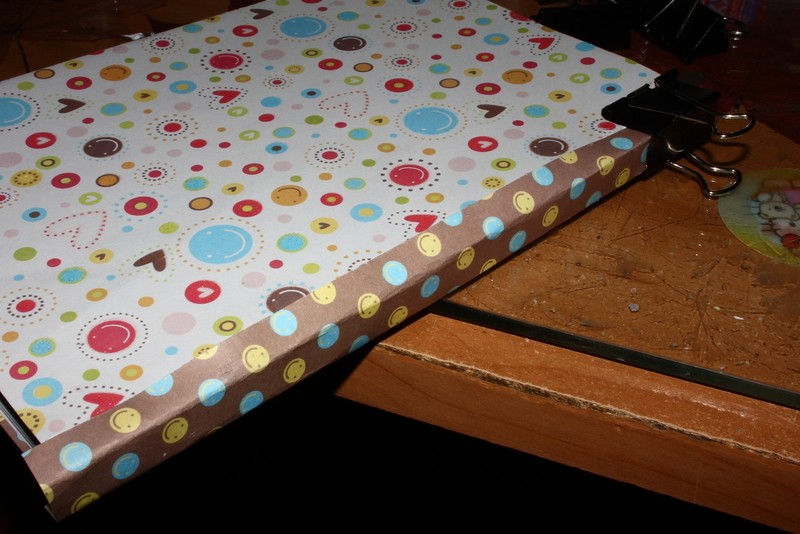
 Step 9
When glue is dry it's time to add our cover!
Crop our two sided scrapbooking paper to size of sheets and glue it to our sheets. -
 Step 10
When it dries a bit, cut a strip of paper, which you can glue to our spine.
Clip it again with the paper clips. -
 Step 11
Wait for glue to dry.
-
 Step 12
You can tap it with clear duct tape.
-
 Step 13
You can check if your notebook spreads out in a good way. And if everything is alright...
-
 Step 14
...voilà!! We have our handmade notebook :D


A dziękuję
Też miło mi spotkać tu kogoś z kraju ^^
My pleasure
CO + K User