


About
a cute substitute for the traditional pincushion
These hand-painted teacup pincushions will add a little cute to your sewing supplies. I found a set of four plain white teacups at Goodwill for two dollars. Hand painting them is a fun idea because the brushstrokes add a nice touch, and you can easily personalize them in any way. Of course you can make a pincushion with a teacup without painting it, but isn't this more fun?
-
 Mnemosyn favorited Hand Painted Teacup Pincushions
28 Apr 05:14
Mnemosyn favorited Hand Painted Teacup Pincushions
28 Apr 05:14
-
 Alecia B. favorited Hand Painted Teacup Pincushions
01 Jul 09:37
Alecia B. favorited Hand Painted Teacup Pincushions
01 Jul 09:37
-
 Emma H. favorited Hand Painted Teacup Pincushions
26 Jan 01:46
Emma H. favorited Hand Painted Teacup Pincushions
26 Jan 01:46
-
 Alex B. favorited Hand Painted Teacup Pincushions
25 Dec 22:41
Alex B. favorited Hand Painted Teacup Pincushions
25 Dec 22:41
-
 julie.mckenzie.7503 favorited Hand Painted Teacup Pincushions
24 Apr 22:23
julie.mckenzie.7503 favorited Hand Painted Teacup Pincushions
24 Apr 22:23
-
 lala favorited Hand Painted Teacup Pincushions
20 Feb 08:28
lala favorited Hand Painted Teacup Pincushions
20 Feb 08:28
-
Jennifer C. added Hand Painted Teacup Pincushions to crafts
10 Feb 16:58
-
 valerie.clement2 favorited Hand Painted Teacup Pincushions
25 Jan 21:54
valerie.clement2 favorited Hand Painted Teacup Pincushions
25 Jan 21:54
-
 Serena C. added Hand Painted Teacup Pincushions to Summer Money
12 Jan 05:45
Serena C. added Hand Painted Teacup Pincushions to Summer Money
12 Jan 05:45
-
 Alex Poser added Hand Painted Teacup Pincushions to Techniques and Tools
10 Jan 21:47
Alex Poser added Hand Painted Teacup Pincushions to Techniques and Tools
10 Jan 21:47
You Will Need
-
 Step 1
Gather your supplies. You need a teacup, glass paint (I used Martha Stewart multi-surface satin paint), paint brush, fabric, stuffing, embroidery floss, needle, something circular to trace (I used a pyrex container), hot glue gun + sticks, and scissors.
*a note on circle size: I was unsure of how big to make the fabric circle at first so I just had to expirement; a bigger circle makes a puffier pincushion like the cloud cup*
-
 Step 2
Paint your teacup and let dry. I'm bad at painting free hand so I sketched my design first with pencil, then painted over it. Any pencil marks left showing will wipe off.
-
 Step 3
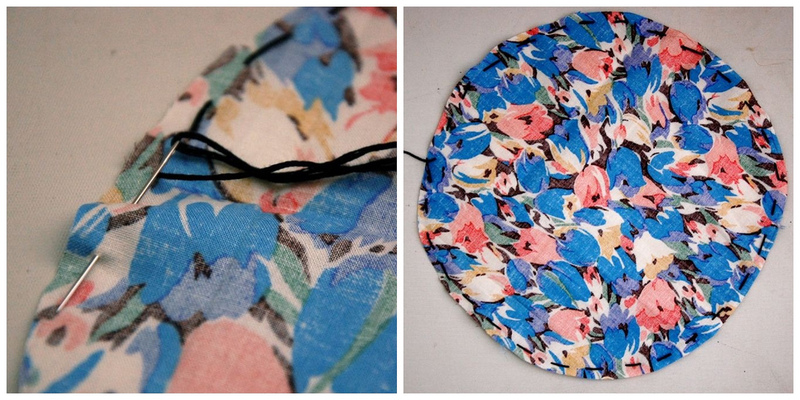
Trace your circle onto fabric and cut out.
-
 Step 4
With the needle and embroidery floss, stitch around the edge of the circle with stitches about a centimeter long. When you're done the stitches won't show at all.
-
 Step 5
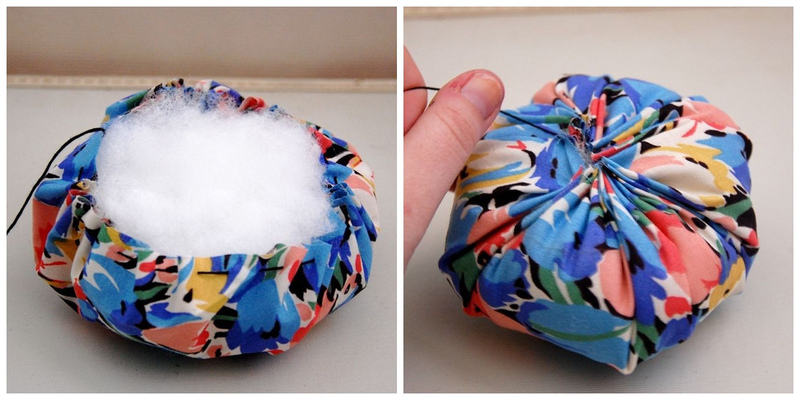
Pull the embroidery floss and cinch up the circle so it's like a bowl. Fill with stuffing until round and firm. Finish cinching the circle closed and tie off the floss so it stays tight.
-
 Step 6
Apply hot glue around the whole inside of the tea cup, about half an inch down from the top. Push cushion down into the cup and hold until glue dries.
-
 Step 7
Let glue dry completely and start using!


Comments

