


About
Cute portal cube box for something :)
I was home for christmas and had access to my little sisters hama beads. We made some awesome things and I started a portal box. I made 6 sides all the same and when all ironed and ready to be made into a box.
I didnt think of it properly and I had to cut off some of the beads to make it like puzzle pieces to fit together with the superglue - otherwise I just wouldn't of ironed those beads together (I just used a knife and sliced them out to correct my mistake).
I Kept the lid unattached so I can use it as a little box for something :)
Tags
-
 Last C. commented on Hama Bead Portal Box
26 Mar 19:22
Last C. commented on Hama Bead Portal Box
26 Mar 19:22
-
Last C. favorited Hama Bead Portal Box
26 Mar 19:08
-
 Katie Q. favorited Hama Bead Portal Box
04 Dec 04:36
Katie Q. favorited Hama Bead Portal Box
04 Dec 04:36
-
 Tierra T. favorited Hama Bead Portal Box
26 Oct 16:53
Tierra T. favorited Hama Bead Portal Box
26 Oct 16:53
-
chelsea g. favorited Hama Bead Portal Box
24 Aug 23:37
-
Ashley H. favorited Hama Bead Portal Box
18 Aug 20:55
-
 Ellen R. favorited Hama Bead Portal Box
06 Aug 17:47
Ellen R. favorited Hama Bead Portal Box
06 Aug 17:47
-
 Minna favorited Hama Bead Portal Box
13 Oct 11:04
Minna favorited Hama Bead Portal Box
13 Oct 11:04
-
 Linda S. favorited Hama Bead Portal Box
22 Aug 08:16
Linda S. favorited Hama Bead Portal Box
22 Aug 08:16
-
 English Ginger entered her project Hama Bead Portal Box to Petits Pixels
21 Jul 13:27
English Ginger entered her project Hama Bead Portal Box to Petits Pixels
21 Jul 13:27
You Will Need
-
Step 1
First pick ur colours, pattern and design. I did 6 squares all the same size and pattern of 13 by 13 size. I would check out the photo at step 4 of the 'How-do'.
(I made the mistake of making all the squares full, and in the end at step 5 you can see I removed some of the beads so I could fit the box together like a puzzle as well as with superglue)
-
Step 2
Next do the usual of ironing the hama beads so you have six squares (minus the little parts to make it slot together).
At this stage you should have less beads than I did because I made them whole squares but yours should be with beads not included at the side.
(I really hope this makes sense!)
-
Step 3
They all slot together with the parts on the side but I used superglue to help keep it together.
I glued all the side parts first then glued the bottom piece in place.
The lid I haven't glued as I plan to use it for something... not sure yet though!
-
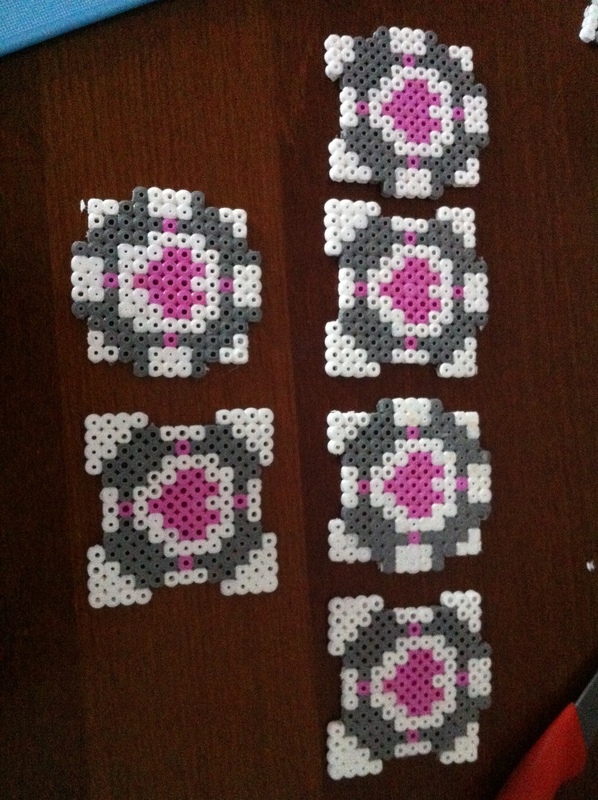
 Step 4
Here are all my pieces that fit perfectly together. You can see what beads I had to take off in the next photo (which is the beads that you wont need to include before you iron it).
The four in a row are the side parts. I made it so my pattern is up the right way up and they all slot together.
The bottom part is the top left square and the lid is the bottom left.
-
 Step 5
This photo shows where I messed up and had to use a knife and cutting board to remove the parts to make the pieces slot together.
Because I kept the pattern the same, when they slotted together the pattern stayed the same on each side which is perfect for what I wanted!
-
Step 6
I hope I've explained it well!

Versions


Comments


