


About
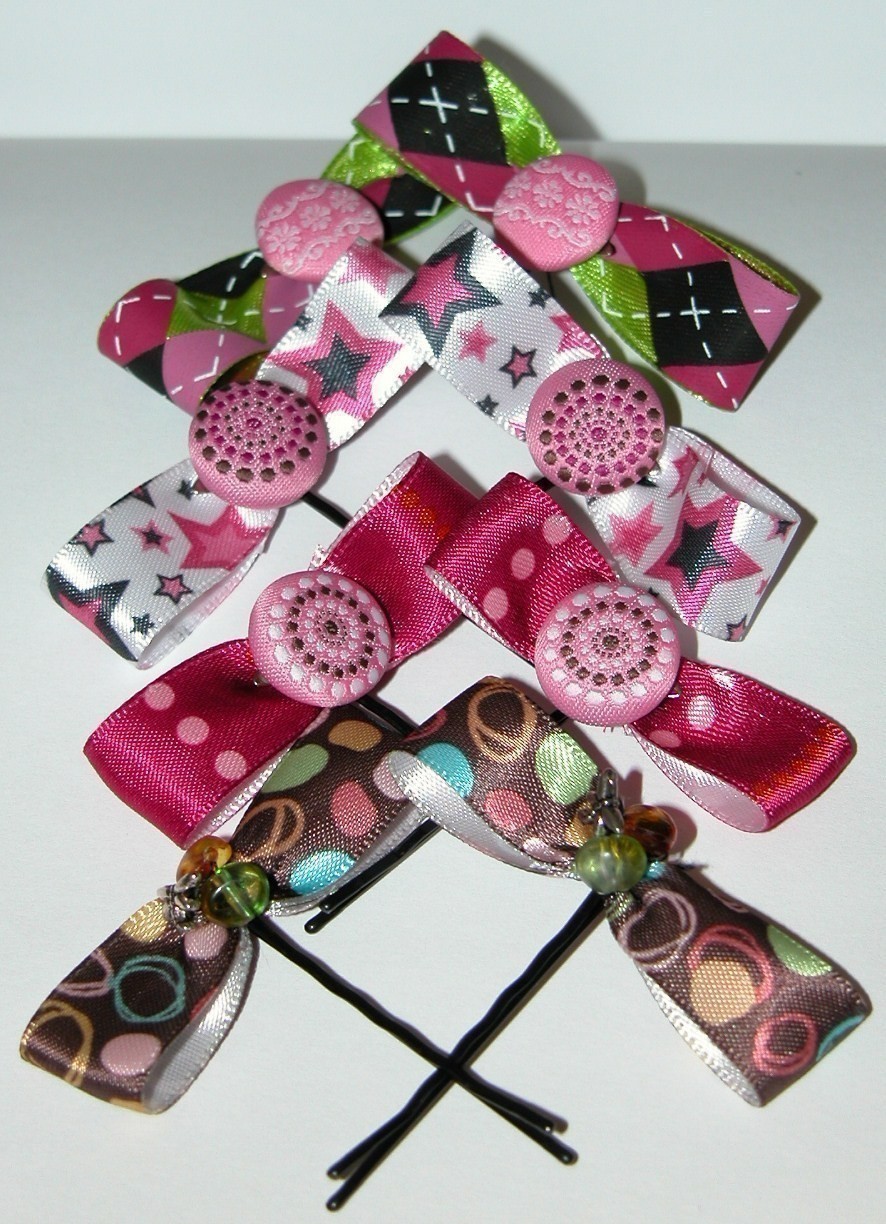
Hair Bows
Hair accessories for a Craftster swap.
For the top three I used brads I found in the scrap booking section.
Tags
-
 mar *ૢ✧ ཻུ۪۪⸙͎ ೫ favorited Hair Bows
25 Oct 14:09
mar *ૢ✧ ཻུ۪۪⸙͎ ೫ favorited Hair Bows
25 Oct 14:09
-
 Key West Witch favorited Hair Bows
06 May 14:49
Key West Witch favorited Hair Bows
06 May 14:49
-
 Kay T. favorited Hair Bows
22 Nov 11:59
Kay T. favorited Hair Bows
22 Nov 11:59
-
 marilyn.steckly favorited Hair Bows
21 Apr 04:09
marilyn.steckly favorited Hair Bows
21 Apr 04:09
-
 leslie.hardin1 favorited Hair Bows
26 Jun 03:18
leslie.hardin1 favorited Hair Bows
26 Jun 03:18
You Will Need
-
 Step 1
Cut four to five inches of ribbon.
I made this set for my roomie's daughter, she chose different beads in the end. (;
-
 Step 2
Fold ribbon into an oval, overlapping a little in the back, then slide into the center of the bobby pin.
-
 Step 3
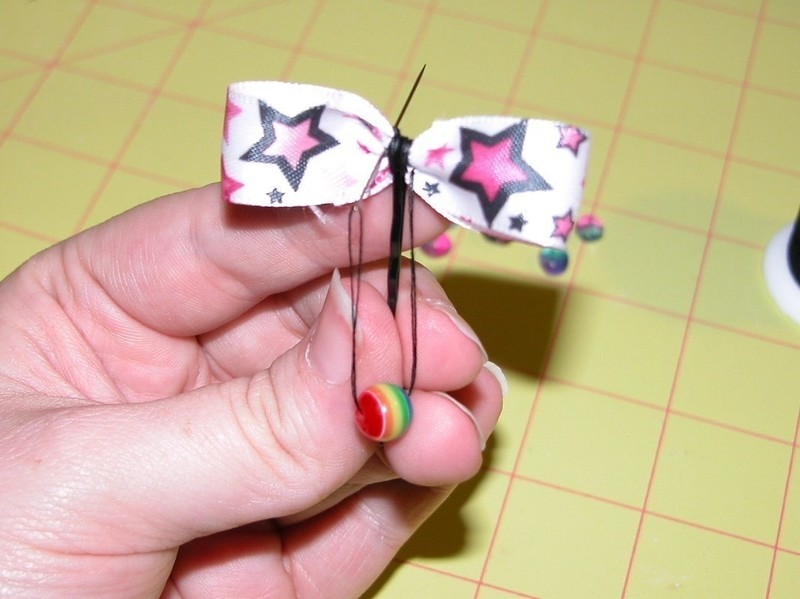
Push the ribbon up in the center and push the threaded needle through the bottom back of the ribbon close to the bobby pin.
-
 Step 4
Wrap the thread around the ribbon and the bobby pin. Before you tie off and cut the thread add your beads or embelishments if they can be secured with the thread as well.
I wrapped the thread around the ribbon and top of the bobby pin and only needed to poke the needle through the ribbon twice (once to star and second to make the bead sit the dirction I wanted. I tied the thread onto itself at the end. I hope the photo illustrates what I mean about securing/wrapping.
-
 Step 5
Finished.


awesome! ^^)
Awesome Project ^_^
Awesome Project ^_^
Thanks guys!
i like the rainbow button!!