


About
Intestines for all occasions!
So this year for my boy's Halloween costume I needed some good looking, durable guts that wouldn't make his stomach uncomfortably cold all night - so I made these.
Tags
-
 Nancy! added Guts: A How To to horreur/halloween
30 Apr 13:47
Nancy! added Guts: A How To to horreur/halloween
30 Apr 13:47
-
 Jess W. commented on Guts: A How To
08 Mar 03:19
Jess W. commented on Guts: A How To
08 Mar 03:19
-
Jess W. favorited Guts: A How To
08 Mar 03:19
-
 Margie A. favorited Guts: A How To
01 Feb 14:57
Margie A. favorited Guts: A How To
01 Feb 14:57
-
 Miss Scissors entered their project Guts: A How To to Zombie Felties Contest
06 Nov 03:03
Miss Scissors entered their project Guts: A How To to Zombie Felties Contest
06 Nov 03:03
-
Step 1
Cut off the valves of the tire inner tubes so that they tubes are cut in half.
-
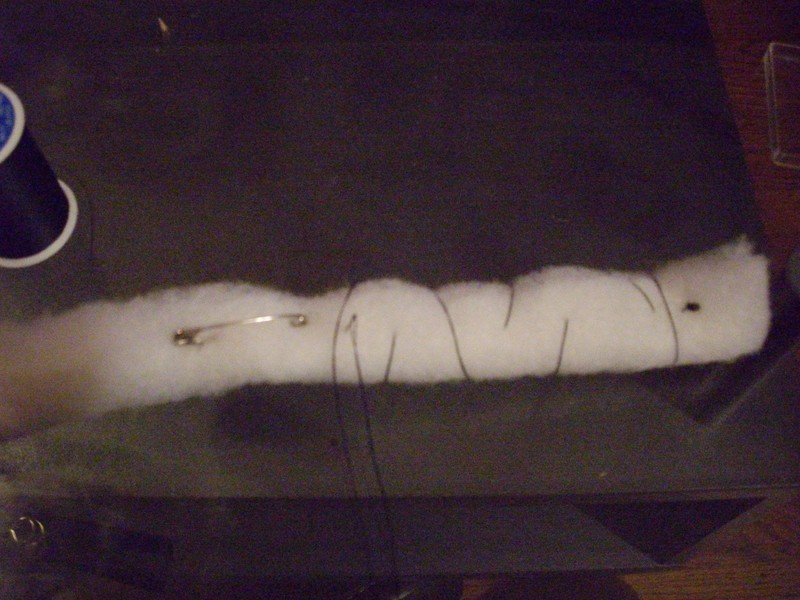
 Step 2
Cut a couple lengths of batting all the same width so you have uniform strips. Roll the first strip lengthwise and secure with safety pins. Next roughly secure the roll with stitching - doesn't have to be pretty, just has to keep the batting in it's rolled state.
Since the tube will probably be longer than the length of the rolled batting, connect two or three rolls together. -
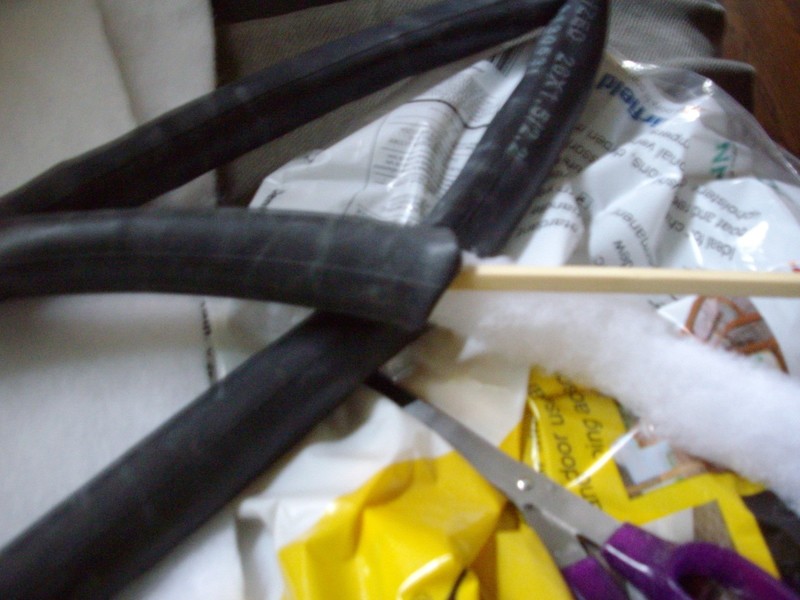
 Step 3
Cut a length of thread that is almost three times the length of the tube. Thread needle and knot. At one end of the batting roll, stitch and wrap the thread so it is securely attached to the end of the roll. Put the needle into the tube and feed it through until the needle comes out the other end of the tube. Stuff as much of the batting roll into the tube as possible(I used a chopstick to force more into the tube, no need to be gentle), then grab the needle and thread coming out the opposite end of the tube and pull. You'll want to pull as steadily as possible and not yank. It's hard to start the batting sliding through the tube, but gets easier as you go along.
-
 Step 4
Now comes the fun part: Painting! I first painted the intestines (which is what I'll call them from now on) a grayish blue and let them dry.
-
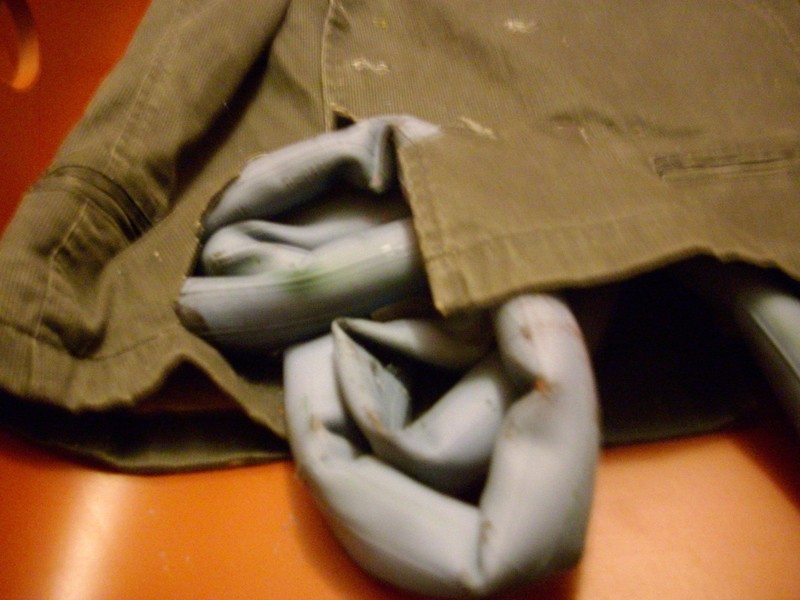
Step 5
Arrange the intestines how you want by using a piece of backing fabric and then superglue into place. I just used the vest that Igor will be wearing. Once everything is securely glued, stitch the guts to the fabric in a few places to make sure they stay put.
-
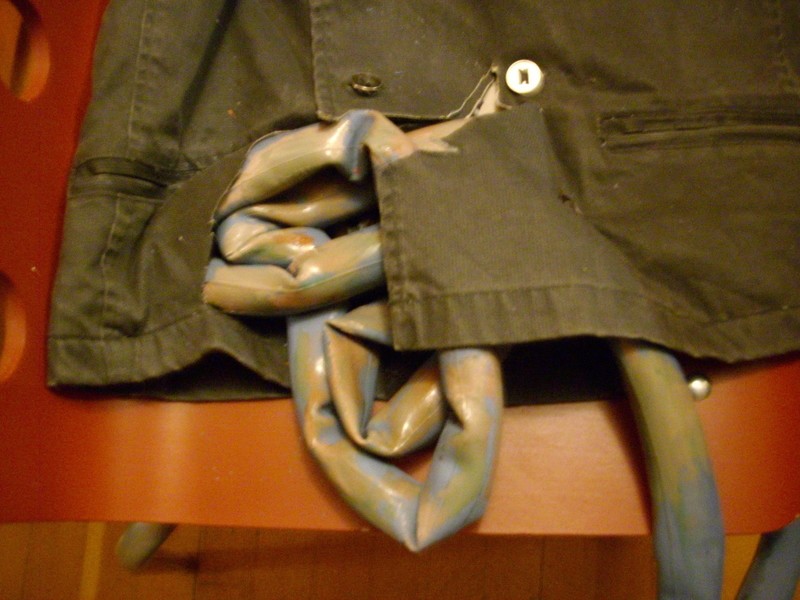
 Step 6
Next brush on some green and brown to give the intestines that special "I move the body's waste" look they should have. Also, if you used tempera paint and forgot to spray on a sealant before arranging the guts (like I did) this last painting can be used to touch up any bits of the intestines where paint has flaked off.
-
 Step 7
This step is really called "glue-blood" because that's what it's all about. I mixed about two-parts red paint with a little less than one-part brown paint, and one-part glue to make this mixture. By adding the glue I can let the blood dry and it still looks a bit shiny and slick like it's fresh. This is important because although my big bad wolf is tough, he hates having a cold, wet stomach. (I found this out on the first zombie walk we went on together and he complained that his guts were making his tummy cold - ha!). It also means you can have a pre-made, ready to use stash of guts that are easy to store and won't get moldy as when nylons and wet paper towels are used.
-
Step 8
Coat guts with the glue-blood and let dry (this can take up to 24-hours depending on how thick you pour the glue-blood). If you're using tempera and blood coat on the intestines dries with a bit of a chalky look, just go back in and re-coat the intestines with glue so they have a shinier finish.
-
 Step 9
Finally: Right before stepping out with your new guts, drip some fresh fake blood over them for that just eviscerated look. En voila: guts for all!!!


Comments


