


About
Rock the look! Hey Ho, Let's Go!
Made this for a costume party, it held my wallet, phone, a packet of gum and my bike keys. Me and my friends all dressed up as rock chicks... it was fun XD
The guitar measures 64cm lengthwise, the inner bag itself measures about 18 x 14 x 20 x 12 (clockwise and beginning with the left side of zipper)
- - - seam allowance NOT included in the pattern - - -
(cut an extra 1cm seam allowance)
Tags
Downloads
- GUITAR.jpg 58.4 KB [ Download ]
- Missing file
-
 Key West Witch favorited Guitar Bag
26 Jun 07:16
Key West Witch favorited Guitar Bag
26 Jun 07:16
-
 LaAlex favorited Guitar Bag
29 Jun 15:53
LaAlex favorited Guitar Bag
29 Jun 15:53
-
Key West Witch added Guitar Bag to Guitar Everything
19 Mar 05:48
-
 Kerri M. added Guitar Bag to Craft ideas
18 Jun 03:59
Kerri M. added Guitar Bag to Craft ideas
18 Jun 03:59
-
 Cindy L. added Guitar Bag to Music
08 Aug 21:26
Cindy L. added Guitar Bag to Music
08 Aug 21:26
-
Cindy L. favorited Guitar Bag
08 Aug 21:26
-
 Lesley D. favorited Guitar Bag
19 Mar 00:15
Lesley D. favorited Guitar Bag
19 Mar 00:15
-
 Lesley D. favorited Guitar Bag
21 Feb 18:19
Lesley D. favorited Guitar Bag
21 Feb 18:19
-
 Kim.Marie favorited Guitar Bag
13 Aug 03:35
Kim.Marie favorited Guitar Bag
13 Aug 03:35
-
 Kaotica favorited Guitar Bag
28 Jun 09:06
Kaotica favorited Guitar Bag
28 Jun 09:06
-
 Step 1
As seen on picture cut out all pattern pieces using the template you can download above... the one with the most KB because it seems I can't delete the other ARGH! >:(
No seam allowance needed for the felt pieces.
add an additional 5 cm to the strap (2,5 both left and right)
-
 Step 2
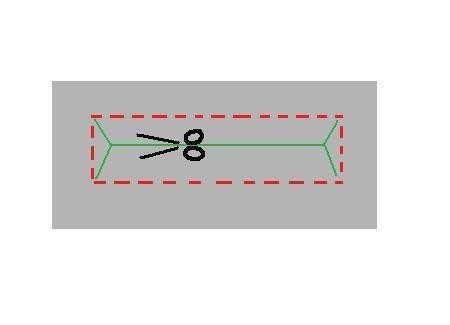
With right side facing lay the black rectangle (5x18cm) onto the backside of the guitar.
Mine is placed about 5 cm from the right side, 2 from the lowest part of the guitar curve and 5 from the neck.
<-- see picture (dotted red line)
Begin to sew at bottom right to bottom left 1,5cm to top left and then all the way around and end at bottom right. -
 Step 3
When sewn cut the middle part open all the way to the thread but be sure not to cut the thread.
Fold the entire rectangle to the other side through the part you have just cut. With wrong side facing pin down and iron.
Do the same with the inner lining.
-
 Step 4
Pin wrong side of inner and outer lining together and lay the zipper onto the opening in between both pattern pieces.
Sew all three layers together together with a small seam
-
Step 5
pin the other piece of the inner lining to the other inner piece which is now attached to the outer lining.
Fold the fabric of the outer lining away and if necessary pin down.
Sew the inner lining.
-
Step 6
To make the guitar a bit more puffy you could use flat stuffing for the body. Lay the pattern piece on top and cut adding 0,5cm seam allowance. Attach it to the front part and wrong side of the guitar body by hand with a few small stitches before sewing the pieces together.
STRAP:
Fold the ends over 2,5cm then fold the fabric in half and then in half again. Sew a small seam down all sides.GUITAR:
Lay right sides of outer lining together and fold the inner lining away. Place the strap on the mark and in between both front and back pieces of the outer lining, pin down if necessary.
Sew outer lining together leaving a large gap in the bottom for stuffing.MAKING UP:
Stuff the neck with foam or polyester stuffing and close the gap in the seam.Glue or sew on all felt parts and lastly sew on the buttons.


CO + K User