


About
Make your own gilded leaf necklace with painted silk leaves!
I have been making some new flower crowns for the shop lately with hand-painted metallic flowers and leaves. While I was experimenting with some new painting techniques, I was thinking about how some of the leaves had almost a gilded look, like they had been dipped in gold. I liked them so much that I wanted to come up with a way to wear them myself, (because while I love flower crowns, they’re just not an everyday sort of accessory, ya know?). So, I created this necklace, and I must say, I think it turned out pretty darn good, and I'm excited to share the tutorial with you!
-
 Key West Witch added Gilded Leaves Statement Necklace to Jewelry
30 Jun 01:53
Key West Witch added Gilded Leaves Statement Necklace to Jewelry
30 Jun 01:53
-
 Sarah Sylvia S. favorited Gilded Leaves Statement Necklace
19 Jul 04:46
Sarah Sylvia S. favorited Gilded Leaves Statement Necklace
19 Jul 04:46
-
 Babsi's Bean Burgers added Gilded Leaves Statement Necklace to JewellryToMake
19 May 22:52
Babsi's Bean Burgers added Gilded Leaves Statement Necklace to JewellryToMake
19 May 22:52
-
 su l. favorited Gilded Leaves Statement Necklace
05 Mar 12:27
su l. favorited Gilded Leaves Statement Necklace
05 Mar 12:27
-
 Jessica S. favorited Gilded Leaves Statement Necklace
22 Feb 06:21
Jessica S. favorited Gilded Leaves Statement Necklace
22 Feb 06:21
- kzk favorited Gilded Leaves Statement Necklace 28 Nov 17:49
-
 Adrienne S. favorited Gilded Leaves Statement Necklace
13 Oct 01:56
Adrienne S. favorited Gilded Leaves Statement Necklace
13 Oct 01:56
-
Diane R. favorited Gilded Leaves Statement Necklace
01 Oct 08:19
-
rene c. favorited Gilded Leaves Statement Necklace
04 Aug 23:30
-
 Alice N. added Gilded Leaves Statement Necklace to Accessories
09 Apr 11:14
Alice N. added Gilded Leaves Statement Necklace to Accessories
09 Apr 11:14
-
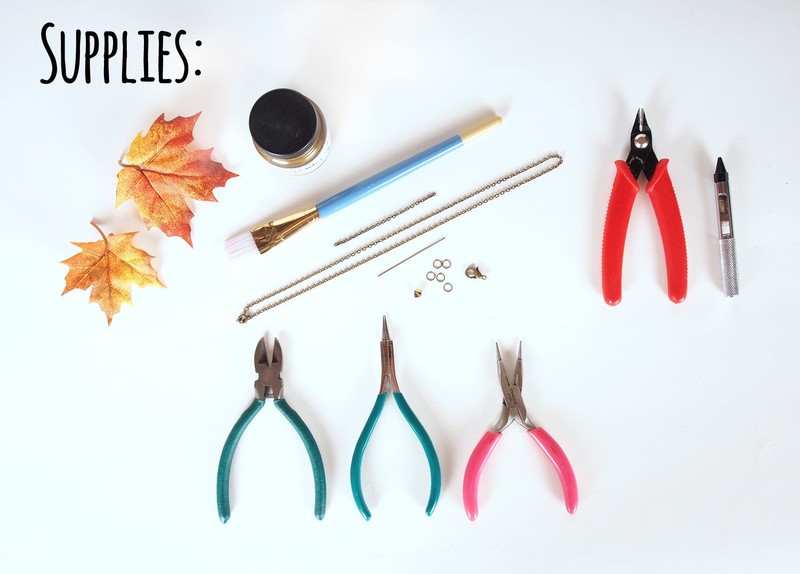
 Step 1
Supplies
-
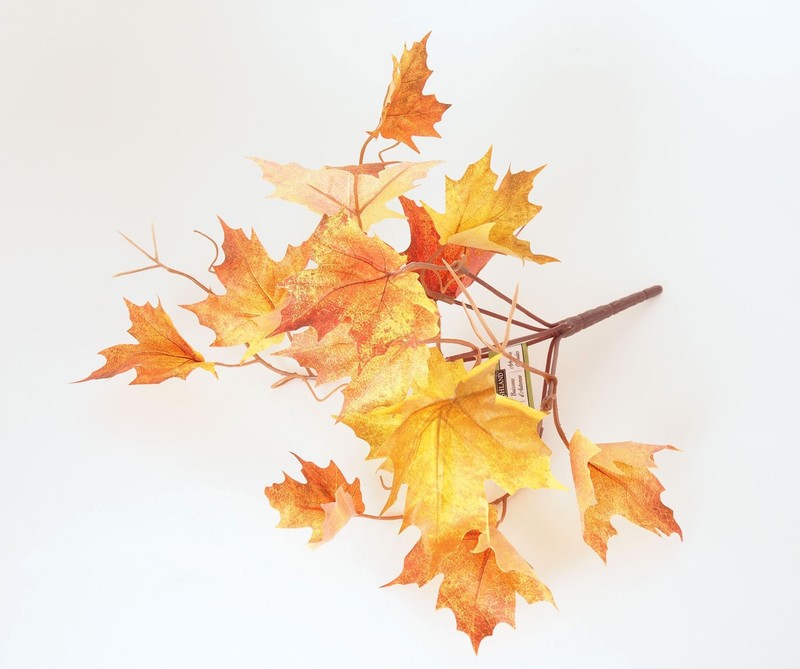
 Step 2
I bought several of these “Fall leaf bushes” at my local craft supply store a few months back when they were on clearance.
-
 Step 3
For this project, it doesn’t matter what color the leaves are since you’re just going to paint them anyway. What does matter is shape, so choose ones that have a nice shape and even veining. Also, the less wrinkled the better! The ones that have a smoother texture work better here because they tend not to soak up so much of the paint.
-
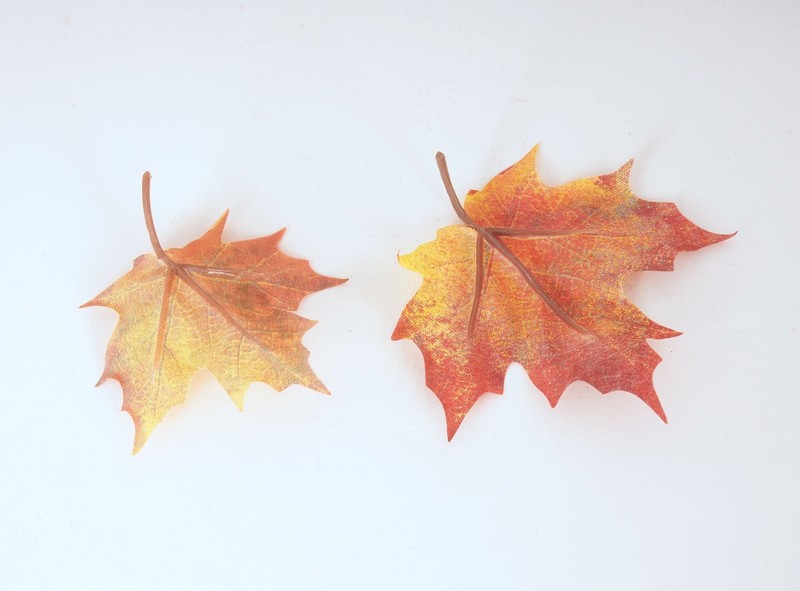
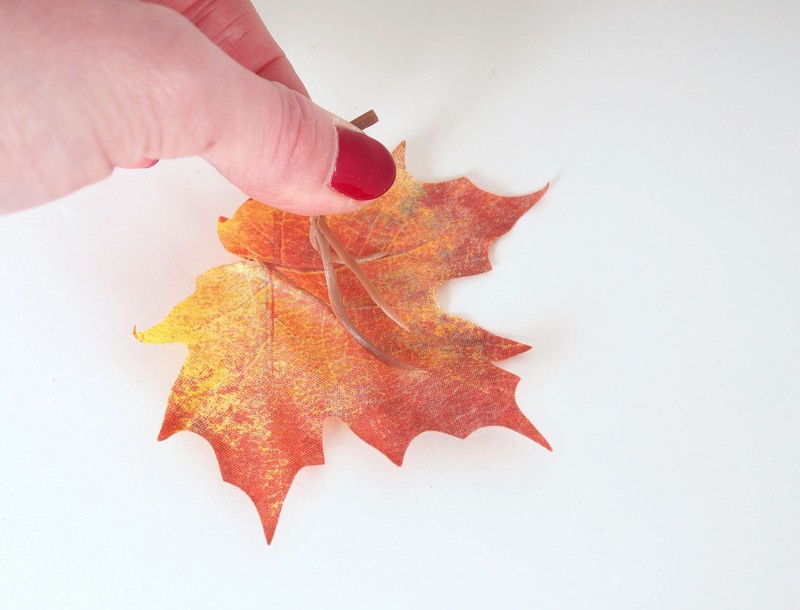
 Step 4
Remove the veins from the back of each leaf. They peel off pretty easily, just be careful not to tear the fabric.
-
 Step 5
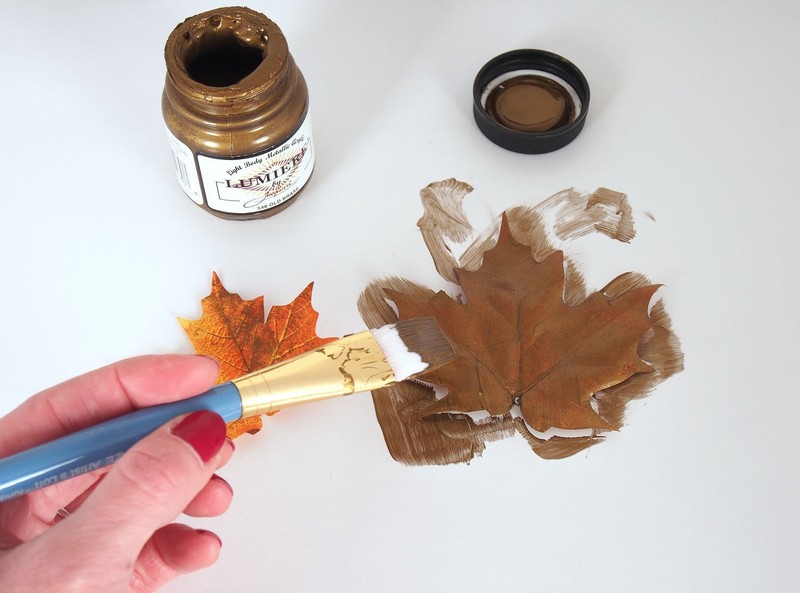
I used Lumiere Textile Paint by Jacquard in Old Brass. Paint the back of each leaf first, then flip them over and paint the fronts. After a minute or two, carefully lift the leaves (so that they don’t end up permanently stuck to the paper) and set them to the side to dry.
-
 Step 6
Let them dry for at least 4 hours (I left mine overnight). Check to see how thoroughly the first coat of paint covered fabric. They may need a second coat at this point.
-
 Step 7
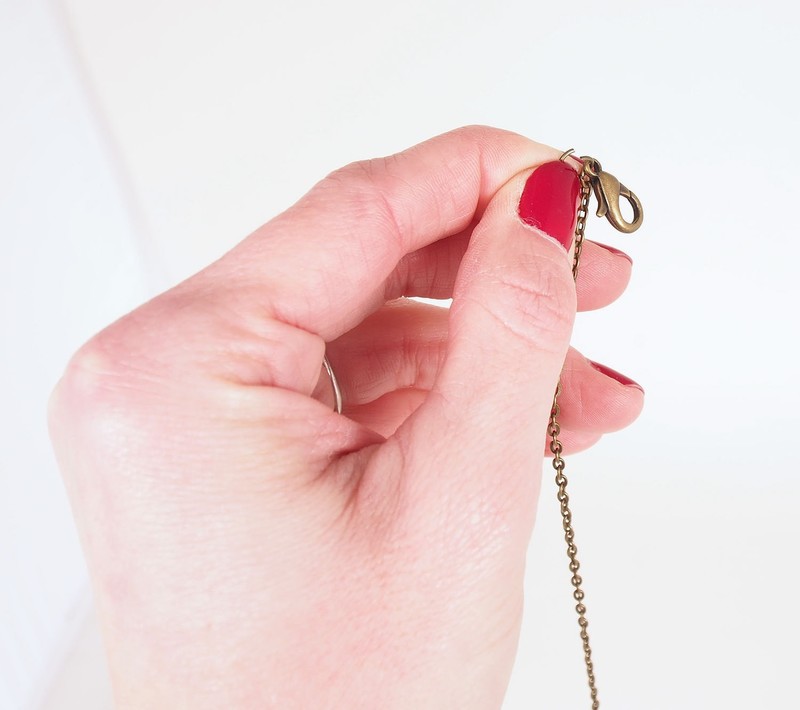
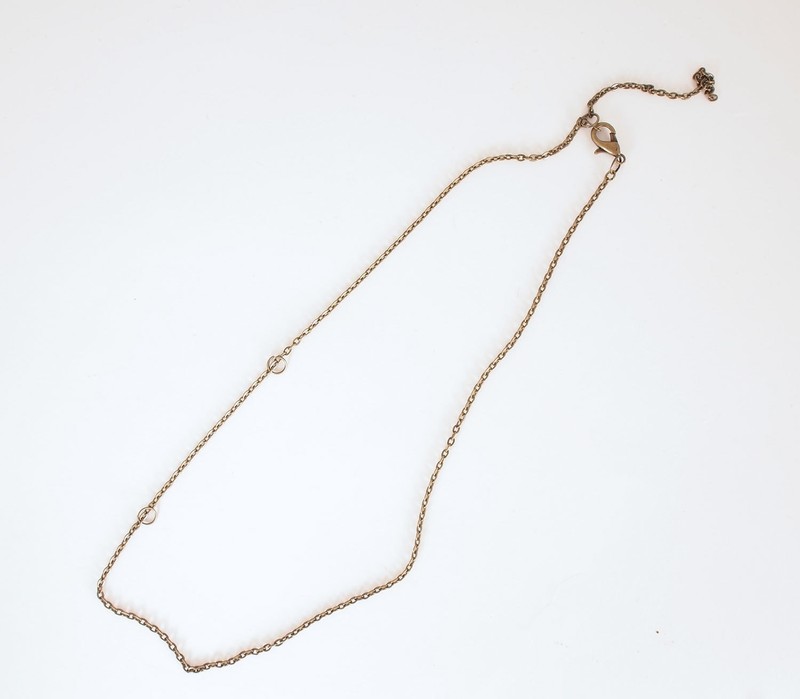
While you’re waiting for the leaves to dry, you can get started on the necklace itself. Rather than unfinished chain, I used an inexpensive “finished” necklace (available at most craft supply stores). The clasps on these can be pretty cheap and don’t always work very well, so I decided to replace it with a lobster clasp. This is optional of course, but it definitely makes a difference in the quality of the finished piece.
-
 Step 8
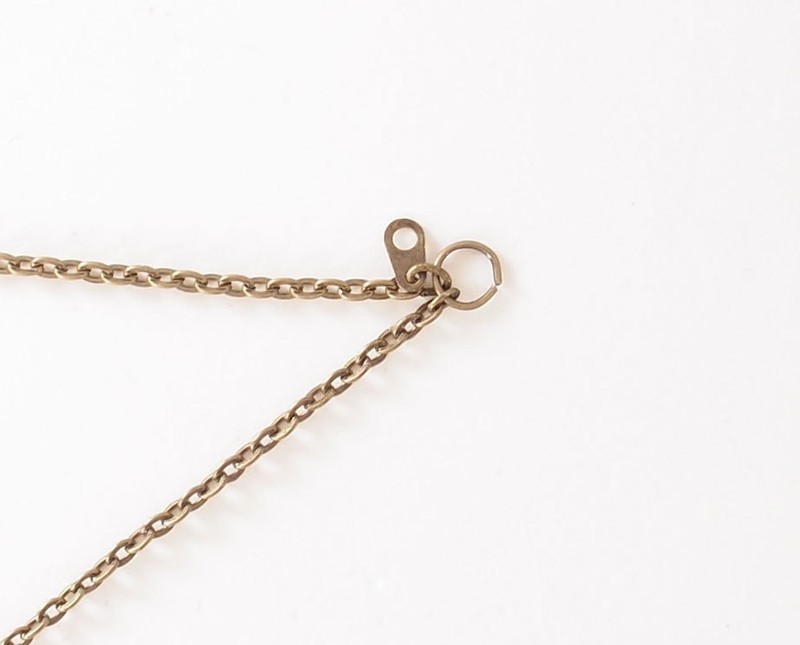
If you’re using a finished necklace like I did, and choose to replace the clasp, you will need to remove the original clasp and attach the new one with a split jump ring. Split rings have an opening at one side. You can usually open them with your fingers, but you can also use a pair of pliers if necessary.
-
 Step 9
Open one of the jump rings, slip it onto the last loop of chain in your necklace, and add the clasp.
-
 Step 10
Close the jump ring carefully, making sure the ends are as close together as possible so that it won’t come loose.
-
 Step 11
Repeat the process at the other end of your necklace, using a jump ring to attach the shorter piece of chain to the end of the necklace. This is the part that dangles down at the back of your neck.
-
 Step 12
The little closure tab shown above was the original necklace closure on the finished necklace that I was using. I left it on, but it’s not necessary. You could just as easily use the jump ring as the closure.
-
 Step 13
I added a bead to the end of the little extension piece that we just put on. You can add a bead if you want, or even another small leaf, but they aren’t strictly necessary.
-
 Step 14
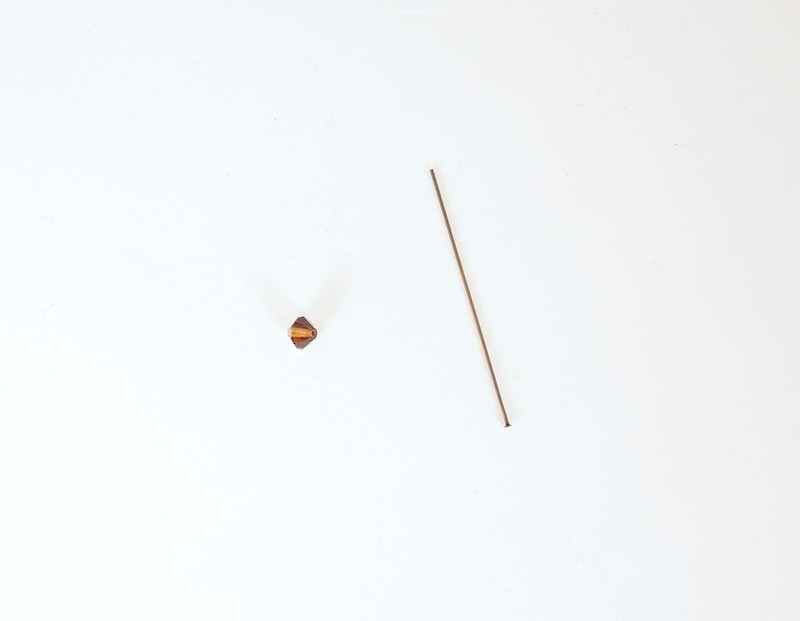
I used a 6 mm Swarovski bicone crystal in a dark bronze color. You will also need a headpin. It doesn’t need to be as long as the one shown here, I just used it because it’s what I had on hand.
-
 Step 15
Slip the bead onto the headpin. At this point, you will need to cut off the excess length of the headpin and form a loop using your round nose pliers. This can be a bit tricky if you haven’t done if before, so if you don’t want to tackle this part, don’t worry about it. This is just a little ‘finishing touch’ and your necklace will still be just as pretty without it!
-
 Step 16
I couldn’t manage to take photos while I was doing this part (it’s definitely a two-handed job)! For an excellent tutorial with lots of pictures, visit the tips page at Blue Moon Beads. You will have to scroll through most of the page before you find it. It’s the first set of instructions in the “Making Loops” section, titled “Creating a Simple Loop Using a Head Pin”.
-
 Step 17
Next, open up two of your jump rings. Lay your necklace out flat, and think about how you want to position your leaves. Use the jump rings to mark where the top of each leaf will be placed.
-
 Step 18
I ended up putting the necklace on and looking in a mirror to do this part. Don’t worry though, if you don’t like where the leaves fall, you can always reposition them by simply moving the jump rings.
-
 Step 19
I used an awl to punch holes in my leaves. You could also use the tip of a sharp craft knife to make a tiny opening, or even a pair of scissors. Just be careful to keep the holes small. Punch two holes in each leaf, making sure that they are positioned so that the leaves will hang they way you want them to. Keep the holes close to the edges of the leaves, but not too close or they will be more likely to come off (about 4 mm in from the edge is ideal).
* The hole shown here is one that I ended up making in the wrong spot, so now my leaf has an extra hole. Oops! (Try not to do that ;) )
-
 Step 20
Attach the leaves to your necklace using two jump rings for each.
-
 Step 21
And voilà ~ you have a gorgeous statement necklace that is completely one-of-a-kind!


Versions


Comments


