


About
A simple, easy to make gift bag using recycle materials.
This is based on an origami pattern which I have adapted. You can use any type of paper and also any size of paper.
The first one is tricky, but once you've made a few you get the hang of it.
See a video tutorial on my blog:
-
 Carrie Alice added Gift Bag Made From A Magazine Page to Crafty
28 Jul 11:04
Carrie Alice added Gift Bag Made From A Magazine Page to Crafty
28 Jul 11:04
-
 heidi.jarmaine favorited Gift Bag Made From A Magazine Page
17 Apr 02:23
heidi.jarmaine favorited Gift Bag Made From A Magazine Page
17 Apr 02:23
-
 Gonnis favorited Gift Bag Made From A Magazine Page
31 Dec 14:07
Gonnis favorited Gift Bag Made From A Magazine Page
31 Dec 14:07
-
 molly.vancleave favorited Gift Bag Made From A Magazine Page
10 Feb 18:29
molly.vancleave favorited Gift Bag Made From A Magazine Page
10 Feb 18:29
-
molly.vancleave added Gift Bag Made From A Magazine Page to magagone
10 Feb 18:24
-
 Jax L. favorited Gift Bag Made From A Magazine Page
22 Jul 16:16
Jax L. favorited Gift Bag Made From A Magazine Page
22 Jul 16:16
-
 Netra H. favorited Gift Bag Made From A Magazine Page
28 Feb 12:21
Netra H. favorited Gift Bag Made From A Magazine Page
28 Feb 12:21
-
Lynne S. favorited Gift Bag Made From A Magazine Page
29 Aug 10:09
-
 Anna S. favorited Gift Bag Made From A Magazine Page
24 Jun 14:33
Anna S. favorited Gift Bag Made From A Magazine Page
24 Jun 14:33
-
 Chachee.rayna added Gift Bag Made From A Magazine Page to Paper
17 Jun 05:27
Chachee.rayna added Gift Bag Made From A Magazine Page to Paper
17 Jun 05:27
You Will Need
-
 Step 1
Start with your piece of paper. I've used a page from a Chritmas catalogue, but you can use anything you like.
Don't worry about the ripped rough edge as this will get hidden, so there's no need wasting time trimming this off.
-
 Step 2
Take a metal ruler and place it along the long edge which isn't ripped.
-
 Step 3
Then lift the paper against the ruler and form a crease along it's edge. You'll be left with a flap like this.
-
 Step 4
Fold this edge down fully and then flip the paper over, so that the fold is on the other side facing down.
-
 Step 5
The next step is to take the right edge and fold it over to towards the left. Don't fold it all the way over, go for about two thirds of the way across. This fold determines the width of the bag.
-
 Step 6
Then take the right edge and fold this towards the right at the point where the right edge is from the previous fold. I hope that makes sense.
-
 Step 7
Next you need to slip the left fold underneath the flap at the top.
-
 Step 8
So what you're left with is this.
-
 Step 9
The next thing to do is to take the bottom edge - in this case the one with the rough ripped edge, and fold it up towards the top edge. Leave about 0.5cm from the top edge.
-
 Step 10
This is a side view showing you what I mean.
-
 Step 11
Next tuck the ripped rough edge under the top flap.
-
 Step 12
And push it all the way in until it's flat.
-
 Step 13
So you're left with this.
-
 Step 14
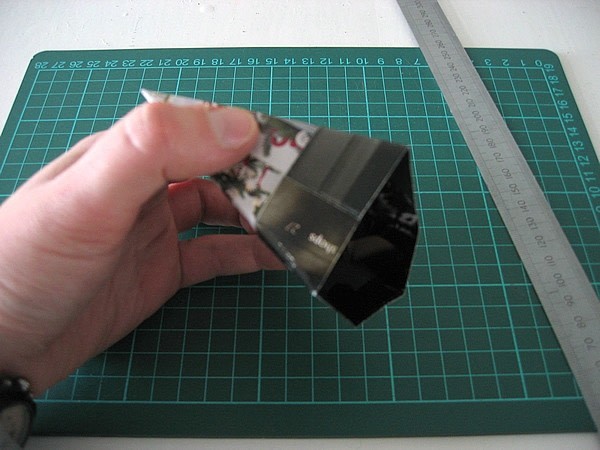
Next you need the metal ruler again. Line it up with the right hand edge and mark a notch with your thumbnail against the top edge.
Do this on the left edge as well.
-
 Step 15
You then need to line the ruler with the first notch and the bottom right corner. Fold up the corner and crease along the length of the ruler.
Do this on the left edge too.
-
 Step 16
You'll be left with this. It's a good idea at this stage to flip over the bag and do the previous step again to re-inforce the folds on the other side.
-
 Step 17
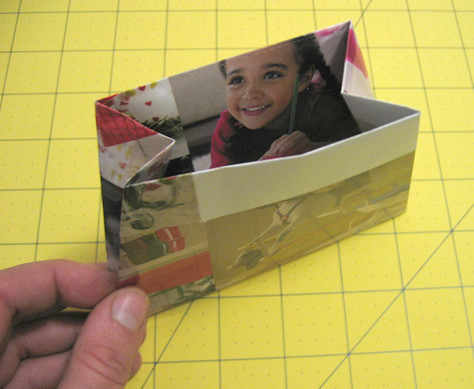
If you now open up the bag you get this kind of shape. You now need to push the edges into the centre.
Apologies for the blurry pic.
-
 Step 18
So push the central fold in to create a kind of concertina effect.
Apologies for the blurry pic.
-
 Step 19
Flatten this edge down and then do the same to the other side.
Apologies for the blurry pic.
-
 Step 20
And that's it, you're done. You can then punch holes into the front and back of the bag and add a handle, or simple stick the edges with a sticker to seal the contents within.


Comments


