

About
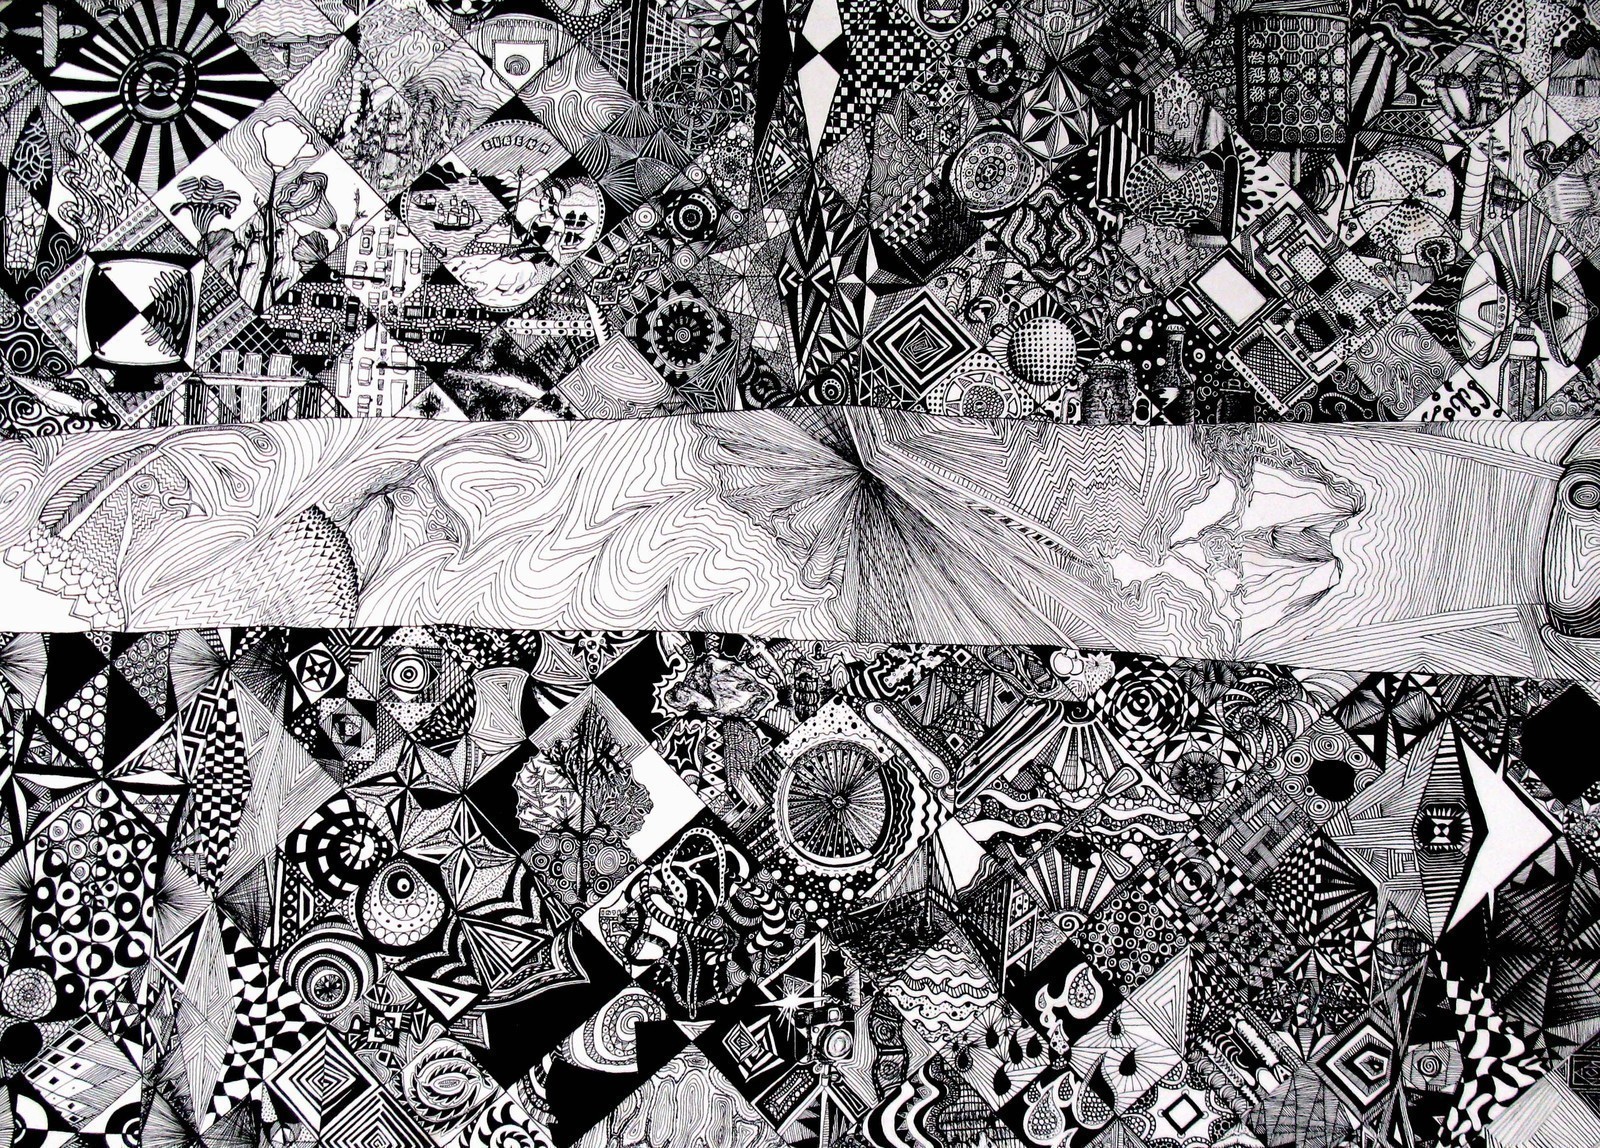
Detailed, intricate drawing of abstract northern California iconography
This is another Geometricism art tutorial, a step-by-step to creating an abstract representational drawing with deeply detailed geometric composition. Geometricist art is a term that I came up with to describe my particular artistic style, as I felt no single word could previously define my work. For those interested, here is the definition:
Geometricist (jee-uh-me-tri-sist) –adj. 1. An abstract style of artwork that is characterized by intense geometric shapes and linear designations; often incorporating not only reflections, translations, and near-symmetries/asymmetries but iconic and representational imagery as well.
Tags
-
 DawnRedwood favorited Geometricist Drawing Tutorial
19 May 14:57
DawnRedwood favorited Geometricist Drawing Tutorial
19 May 14:57
-
 Suzie favorited Geometricist Drawing Tutorial
07 Aug 06:59
Suzie favorited Geometricist Drawing Tutorial
07 Aug 06:59
-
 Katie B. added Geometricist Drawing Tutorial to Drawing
25 Jul 04:19
Katie B. added Geometricist Drawing Tutorial to Drawing
25 Jul 04:19
-
 Danielle C. favorited Geometricist Drawing Tutorial
23 Jan 20:43
Danielle C. favorited Geometricist Drawing Tutorial
23 Jan 20:43
-
 melinda.hotte added Geometricist Drawing Tutorial to going to make
01 Sep 21:20
melinda.hotte added Geometricist Drawing Tutorial to going to make
01 Sep 21:20
-
Kacie B. favorited Geometricist Drawing Tutorial
11 Apr 18:43
-
Vikki M. favorited Geometricist Drawing Tutorial
22 Oct 19:51
- Geni Greenhill favorited Geometricist Drawing Tutorial 05 Jun 19:17
-
 Corvii favorited Geometricist Drawing Tutorial
28 May 02:09
Corvii favorited Geometricist Drawing Tutorial
28 May 02:09
-
 silentband favorited Geometricist Drawing Tutorial
09 Dec 12:20
silentband favorited Geometricist Drawing Tutorial
09 Dec 12:20
-
 Step 1
Think of the subject you want to draw, or the general mood that you want the piece to convey. In this instance, I wanted to draw an abstract representation of northern California, where I live.
I decided that I would divide my paper into three major horizontal panels, the middle one being smaller than the other two. In the two larger stripes, I decided to use the ruler to make several repeating geometric shapes in the top and bottom panels. These shapes I decided to fill in with both abstract and iconic images. The center horizontal panel was left to draw in more iconic imagery free-hand.
-
 Step 2
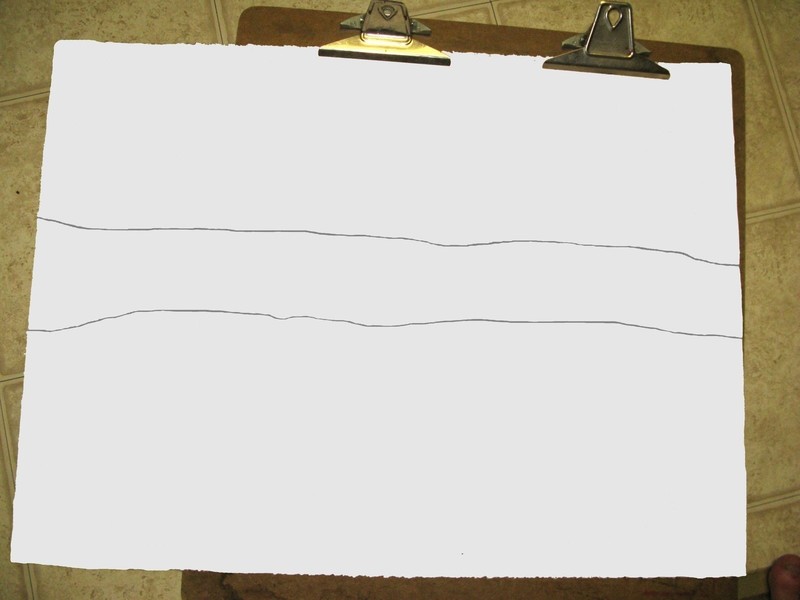
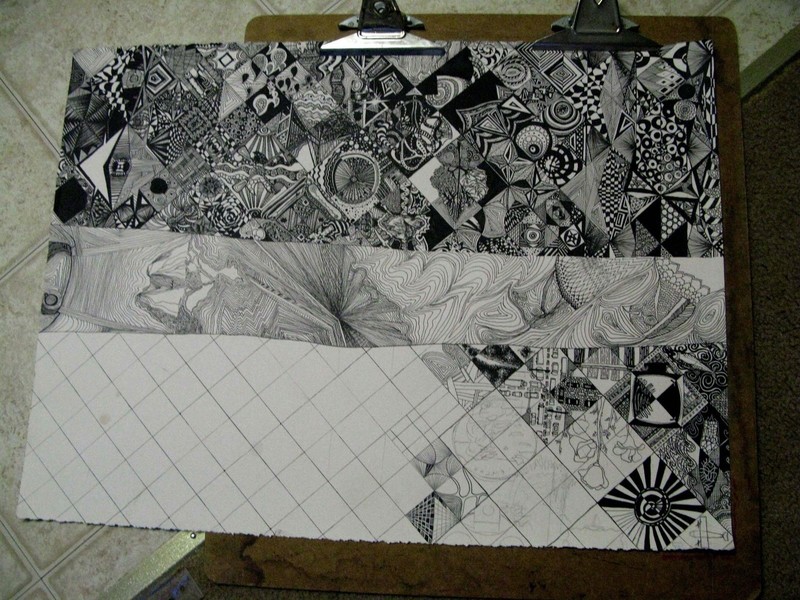
First off, I secured my paper in the clipboard. Next, with the pencil, I divided my paper into its three horizontal planes. Since I wanted a free-hand stripe through my drawing, without the ruler I drew (in pencil) two roughly parallel horizontal lines around 3 inches apart across the middle of the drawing.
-
 Step 3
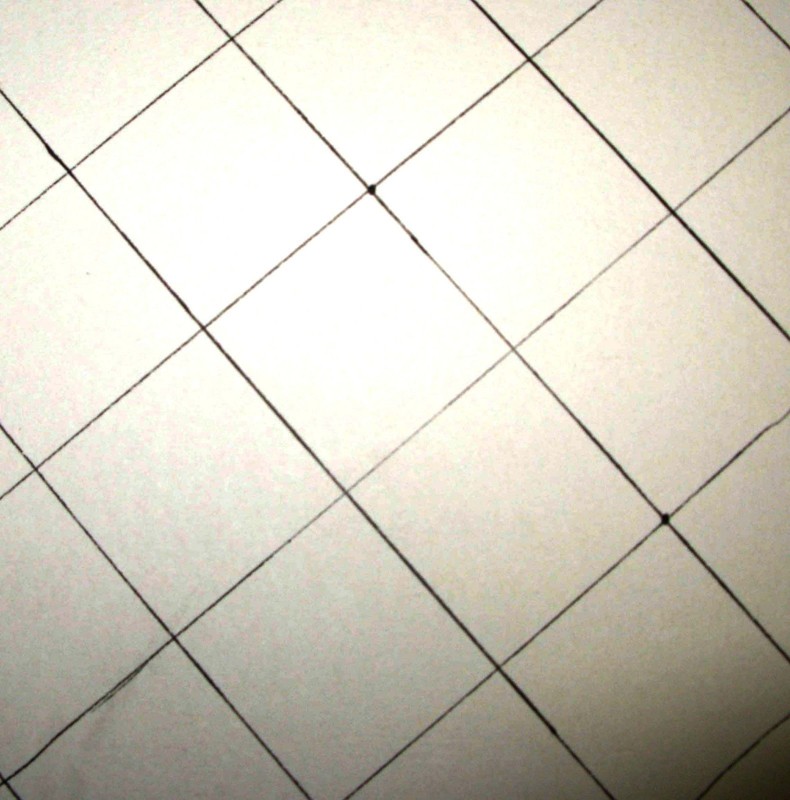
Using the ruler and pencil, block out geometric areas of the piece, above and below the smaller middle stripe. In this case, I chose a diamond pattern of 1.5 sq/in, and then created additional shapes by breaking up and combining contiguous diamonds.
“Northern California” has are four main shapes; 1.5 sq/in diamonds, 3 sq/in diamonds, rhombuses, and approximately 3.3 sq/in stars.
-
 Step 4
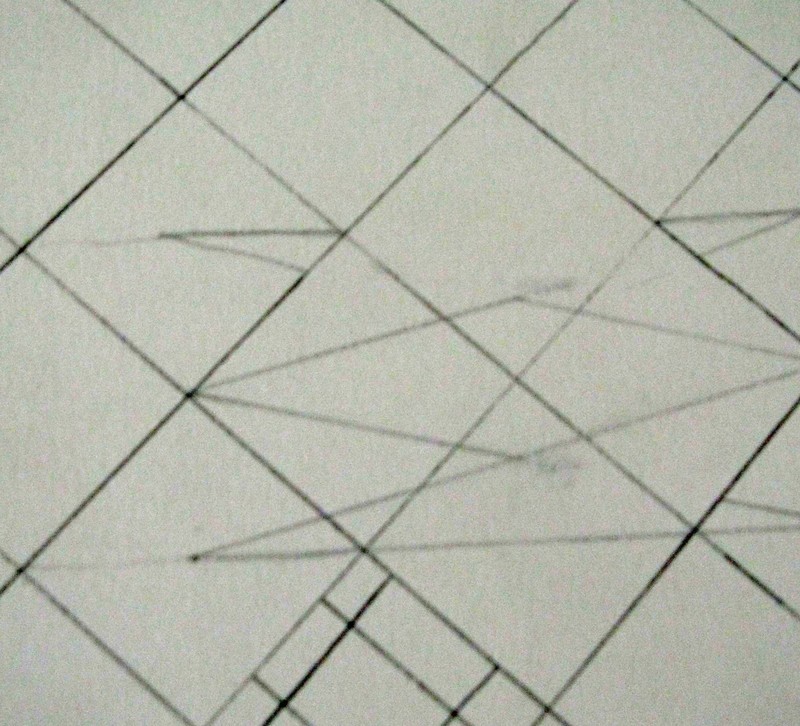
To form the stars and rhombuses, I started on the bottom panel. Drawing from the left edge of the paper in, I used the ruler to draw the stars and rhombuses from the shapes of several abutting small diamonds.
After a couple vertical columns of stars, I transitioned the tops of the stars into the small diamonds, which then abutted the large diamonds (made up of four small diamonds) in the center of the bottom panel. I then repeated this pattern from the right edge of the bottom panel in to the center. The result is a vertical line of symmetry on the bottom panel, with stars at each edge, moving inward to small diamonds which flank on each side the central large diamonds.
-
Step 5
Next, fill in the top panel with geometric pattern. I decided to invert the pattern that I drew on the bottom panel. Beginning again at the left edge, I drew columns of large diamonds. At the point on the bottom panel where the small diamonds meet the large diamonds, I made the large diamonds on the top panel become small diamonds, which then transition into stars and rhombuses in the center of the top panel. As with the bottom panel, I then worked my way inward from the right side of the top panel, drawing large diamonds, then small diamonds to flank the stars in the middle.
-
Step 6
If everything is to your liking, draw with the ruler and the pen over all of the existing pencil lines, creating permanent spaces to begin filling in with details.
-
 Step 7
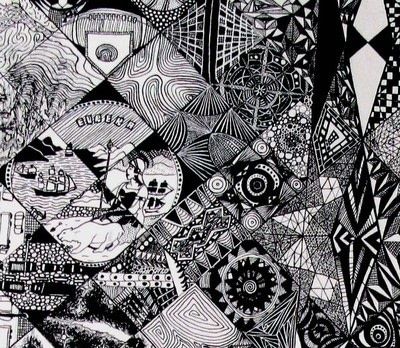
Continuing on, decide which shapes will be filled with iconic or representational imagery, and which will be abstract. In “Northern California,” the large diamonds all have representational and iconic graphics, while the stars, rhombuses and small diamonds are all filled in abstractly.
-
 Step 8
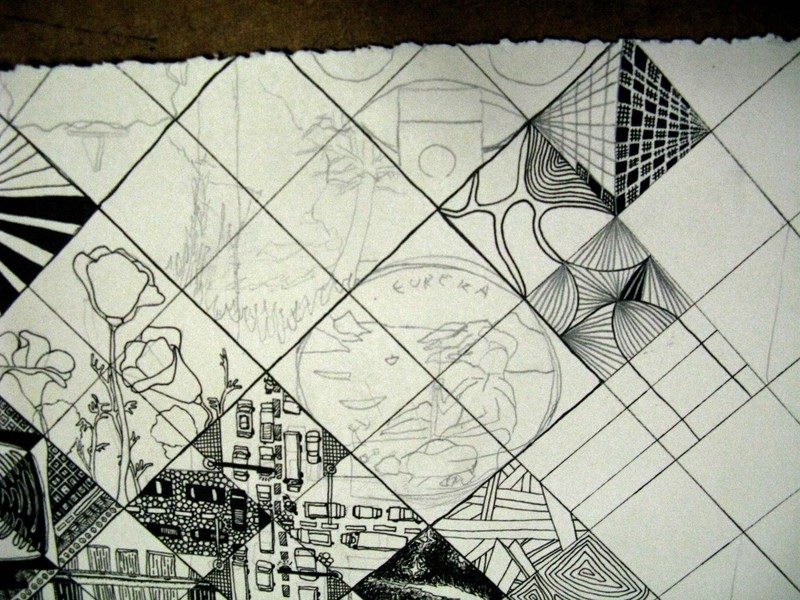
Next, starting at the edge of either the top or bottom stripe and working across, sketch in with pencil what you want each shape to look like. The subject matter that you choose to depict the feeling of your drawing is completely up to you.
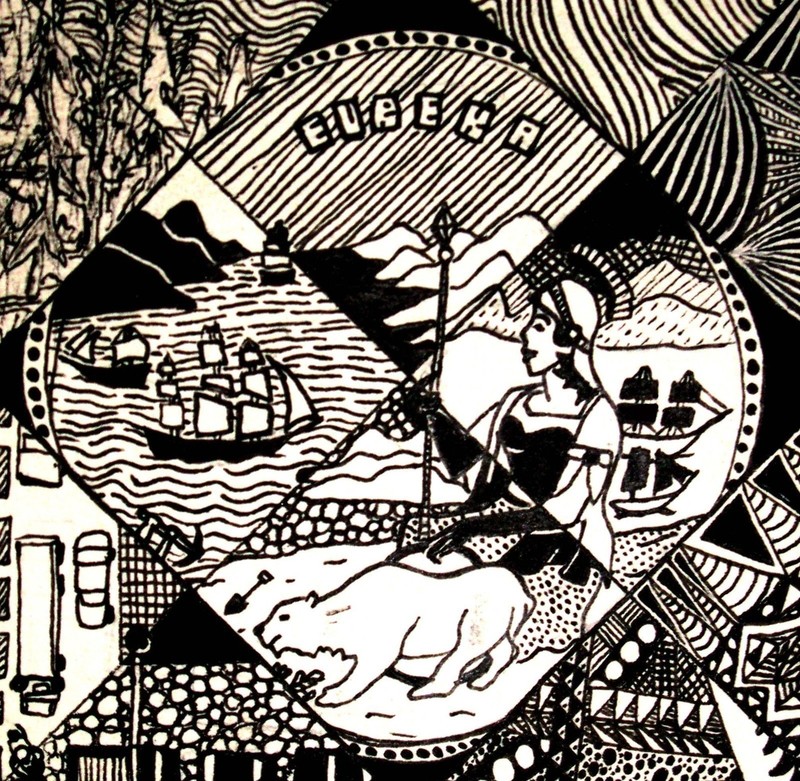
Since I am drawing my perspective of northern California, I chose mainly to fill in the large diamonds with easily recognizable icons and stereotypes of what life and nature are like in that part of the state. Different icons that I used in the large diamonds include the Golden Gate Bridge, traffic, California poppies, bicycles, rivers, computers, train tracks, and many other images.
-
 Step 9
When drawing your different iconography, it may be helpful to have print or online stock photography to serve as a reference point. Several different times I used my web browser to search for multiple stock photos of particular subjects that I was trying to portray.
By finding many images as a guide for each subject, I was able to form my own interpretation of the image I was trying to portray, rather than copy one existing photograph.
-
 Step 10
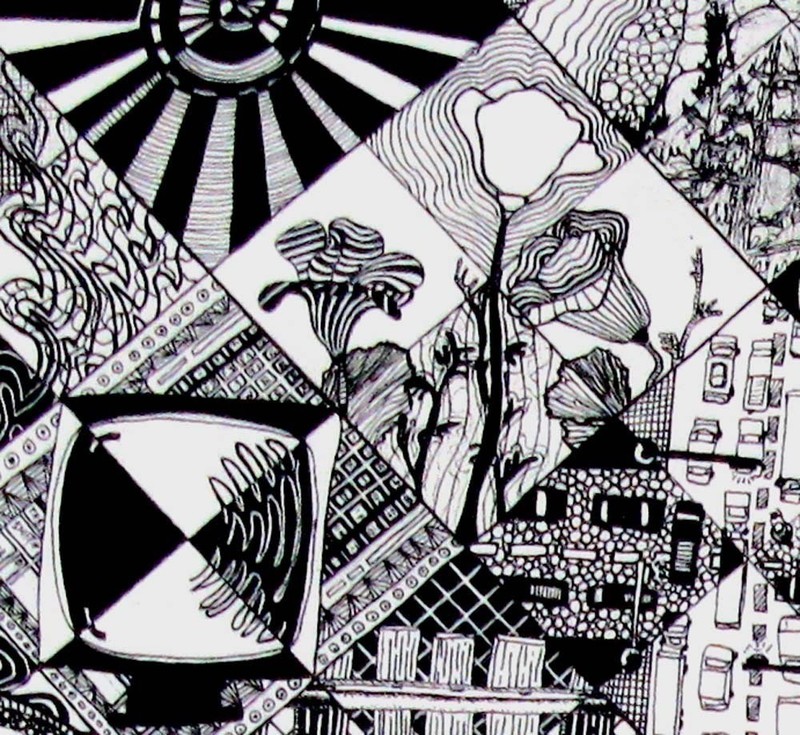
Decide how you will achieve cohesion in your drawing between the abstract and representational shapes. In my drawing, I chose to fill in the abstract shapes with lots of line patterns and black and white color contrast.
I then used these same and similar line and contrast patterns to depict shading and depth in the icons in the large diamonds. The result is that all of the shapes flow together and break up when viewed at a distance, creating layers of detail that expose new ways to see the drawing, depending upon the distance from which it is observed.
-
 Step 11
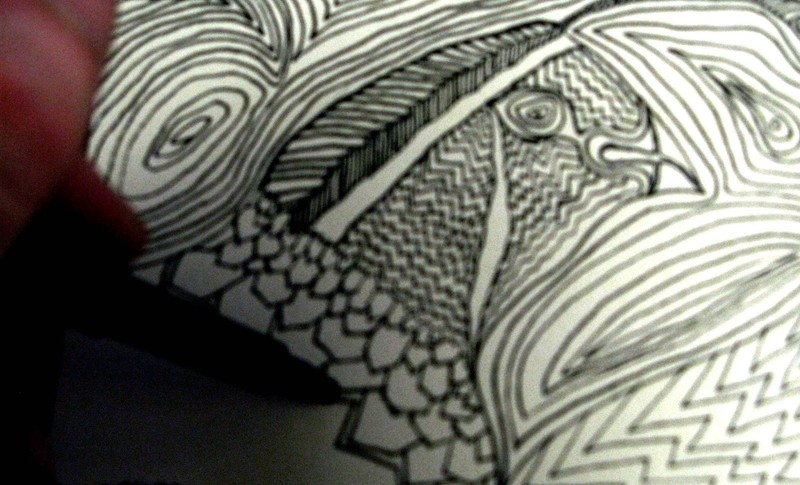
After the first horizontal panel is complete, begin filling in the smaller middle panel. Since it is going to be free-hand, do not use a ruler but simply begin filling in the panel with pencil. I drew, from right to left, a large eye staring at Mt. Shasta (tilted 90 degrees), which transitions into a cartographic view of northern California. The coast of the state transitions into waves, which become larger and ultimately morph into two quail, which are California’s state bird.
I drew all of this with long, thin lines very close together, but you can of course use whatever style that you want. Once you’re happy with everything, go over all of the pencil lines with ink. Erase any exposed pencil markings after the ink has dried for a few minutes.
-
 Step 12
After finishing the middle panel, draw the remaining panel with the same style as the first one, filling in large diamonds with iconic imagery and rhombuses, stars, and small diamonds with abstract imagery. As with the first panel, use the lines and patterns from the abstract shapes to shade the iconographic ones.
Once this panel is to satisfaction, cover all of the pencil lines with ink. Again, after a few minutes when the ink has dried, erase any exposed pencil marks. You have now finished your drawing! All that remains is to sign the back and put it in a frame, on a wall, or in a gallery!


Comments


